Showing posts with label homemade bags. Show all posts

Thursday, January 6, 2011

Three Small Things - apple sweater, dishcloth, square motif

>>> I first saw an apple sweater at Crochetspot and thought it was a fabulous idea. An apple is a great snack, but doesn't go very well in my handbag and always ends up getting bruised, but the sweater would protect it from that. More images of apple sweaters on google show different styles. I turned one of my baby beanies into an apple sweater by simply crochet a chain to go around the edge and sl st to join. This second one I made as an apple sweater from the start. It's my own pattern, it's like a baby beanie but with a chain threaded through the lip and sl st to join a ring. I used a 5mm hook and some more of the pink and blue mohair I had used for the hot water bottle cover. It now lives in our fruit bowl, waiting to be used!

<<< This aqua coloured flower dishcloth is a pattern I made up, turning over after every row to work in a ridge. The 5th round is some 5 treble flower petals. I ran out of cotton just at the end, so the last petal is 5 ch to form a handy hanging hook. For this one I used a 4mm hook and the last of the aqua cotton my mum gave me.

>>> I saw a lacey crochet square motif on a crochet blog, and I really liked it so I tried copying it. I didn't follow a pattern, I just tried to replicate the image. I used my 1.75mm hook and some fine lilac cotton mum gave me. When I was finished this tiny square I wet it and blocked it as it wasn't quite flat. I'm not sure where this square will live, perhaps it can be a dolly's blanket.

Tuesday, January 4, 2011

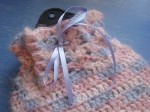
Pink and Blue Hot Water Bottle Cover

A hot water bottle is just what I needed for these aches and pains, the rice hot packs don't hold their heat for as long. But then I needed to make a cover for the water bottle, didn't I?

I still have an inflammed liver from the pre-eclampsia, or more specifically the H.E.L.L.P. syndrome which is very rare, so my liver aches but the doctors said that means it's getting better. For this cover I used a 5mm hook and a blend of 70% mohair and 30% PAC (whatever that is). I got this yarn from Lincraft when they had 50% off wool, this one was labelled  "Mohair Linate Classic" so I got 5 balls of it at a reasonable price. The washing instructions are cool wash, dry flat in shade, do not hang or tumble dry, cool iron. This is a very simple pattern I made up to fit the bottle and I completed it over a day.

My Hot Water Bottle Cover Pattern
using 5mm hook and thick yarn
1. ch as many as needed to width of bottle, ch 2, treble (US dc) in 3rd ch from hook, treble in ea ch to end, treble into bottom of ea ch to end, sl st to join
2. ch 2, treble into each treble around, sl st to join
3. repeat round 2 until you reach shoulder height of the bottle
4. ch 2, treble into same, {sk 4 treble, (2 treble, 1 ch, 2 treble) into next treble} to end, 2 treble into same space as 1st treble, ch 1, sl st into 1st ch 2
5. ch 2, trbl into same, {(2 treble, 1 ch, 2 treble) into next ch 1 space} to end, 2 treble into 1st ch space, ch 1, sl st
6. repeat round 5 to top of water bottle (about 5 rounds in total for neck)
7. thread ribbon through middle round of neck stitch, insert hot water bottle, tie bow in ribbon

Saturday, November 27, 2010

Three Small Things - soap saver, dishcloth, square motif

<<< I don't really understand why I woke one morning thinking I needed to make a soap saver for the laundry soap, but I did! I don't usually use these things, but the soap I have in the laundry at the moment was a gift and really needed one as it was making a mess. I didn't follow a pattern as it's a pretty basic shape, but I did look at crochetspot and google for some inspiration, and used my thick cotton and a 4mm hook. I got the idea of continuing the first round all the way round the bottom of the first row from the free pattern at crochetspot, there are also pictures and patterns of other soap savers there. I've tested it out, so far so good. The plan is, when you get the little shards of soap left over at the end you keep them in the bag so you don't waste them. Very thrifty, I like it!

>>> I have been working on a spiral dishcloth using the same aqua cotton as my first cotton dishcloth, but I'm not happy with it so it's currently in my pile of unfinished projects. I bought some 'amalfi' yarn from Lincraft for $4, which is 100% cotton. I think the choice of colours look 'dishclothy', if there is such a thing, so chose the aqua greenish one. This time I made a bigger version of the basketweave dishcloth, as David asked for a bigger one. This used most of the 50g ball, there isn't enough left to make another one this size. Consolation is that this cloth can be washed and reused for quite a while, so I can get my money and effort's worth out of it. This didn't take long to do, I used a new bamboo 3.5mm I thought to try for fun. I found working with the bamboo hook that it stuck a little, and is not as smooth as using a metal one. The final product measures 22cm x 18cm.

<<< I tried this square motif, I'm thinking of using it to make some baby play cubes. This coaster pattern is at crochetspot.

Wednesday, October 27, 2010

Pretty Pink and Purple Bag

Here is a small handbag that I made on an impulse a few days ago and am particularly pleased with how it turned out.

I really liked the look of a motif featured in Jan Eaton's book, crochet basics, but couldn't find the pattern anywhere within the actual book! So I guessed from the pictures what it was, and reproduced this motif. I liked it so much I made another, using some light yarn from my scraps bag in two pretty colours. They seemed to tell me they wanted to be made into a bag! I don't know why, I didn't ask them. I'm not so crazy to ask questions of crochet motifs, but there you have it. A cute and pretty little bag with a draw-string lip. I don't know if I'll ever use it, I wonder if anyone would like it as a gift?

My guess at the pattern motif
1. contrast colour (opt.), ch 5, sl st to form ring, ch 2, 15 trbl (US dc) into ring, sl st to join, (16 trbl)
2. main colour (opt.), ch 2, (trbl in next trbl, ch 1) in ea trbl, sl st to join (16 trbl, 16 ch sp)
3. ch 2, 2 trbl in same ch sp, 3 trbl in ea ch sp, sl st to join, (48 trbl)
4. contrast colour (opt.), (dc (US sc) in space between 2 sets of 3 trbl, ch 3) 3 times, (dc in next space, ch 5) in next space to form corner, repeat 3 times to end to form 4 corners, sl st into starting dc
5. ch 2, 2 trbl in same ch sp, 3 trbl ea in next 2 ch sp, (5 trbl, ch 1, 5 trbl) in corner ch sp,  repeat 3 times to end with 4 corners, sl st into starting ch, (67 trbl)
6. main colour (opt.), ch 2, trbl in ea trbl, (2 trbl in corner ch 1 sp), repeat around to end with 4 corners,

My pretty bag pattern
1. make 2 square motifs of same size
2. trbl in ea trbl of one motif on 3 sides only
3. sl st 3 sides of two motifs together
4. ch desired length for handle (90 ch), sl st to start of row 3
5. ch 2 sl st to same trbl, trb in ea ch of handle to start of row 4, sl st
6. ch 2, trbl in ea trbl across top lip of bag with 2 trbl in start of handle on ea side, sl st
7. ch 2, trbl in ea trbl around lip of bag, sl st, fasten off
8. contrast colour (opt.), ch length longer than lip of bag, thread in and out through trbls at top of bag lip, sl st to form ring, fasten off

Wednesday, September 1, 2010

Simple Blue Pouch

This was very easy to whip up, it took me just over an hour using some nice blue wool from my left overs bag.

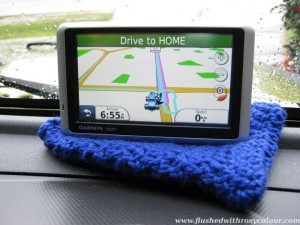
An internet friend asked me if I could make a pouch for his GPS which measures 125mm x 76mm x 16mm. Usually I don't sell what I make, preferring to make gifts for family, but I figured that this wouldn't be too hard so gave it a go.

My pattern for a simple pouch
1. ch 18, treble (US dc) in 3rd ch from hook, tr in ea chain to end, ch 2, turn (16 trebles)
2. treble in each treble, ch 2, turn
3-25. continue row 2 until piece measures 25cm long (about 25 rows)
26. fold at 12th row, making a base of one row, 3 dc (US sc) in ea space down the sides joining two sides together, last space has 1 dc then 2 dc in base row, dc in bottom of ea treble of row 12 to form bottom ridge, dc up the other side like the first side, ch 36 (long enough to be twice the width to form draw string).
27. cut the yarn and thread through first row of trebles, sl st in 1st ch to form draw string, fasten off
LoL! well that's my pattern as I understand it, I don't know if anyone else will!

I wrapped it up in some recycled tissue paper with a tiny homemade tag and posted it off to Western Australia! It fit inside a prepaid envelop which only cost $1.40 which I thought wasn't too bad at all.

Today these fotos came back from my friend in W.A. I'm very pleased to see the GPS actually fits inside. Really, why wouldn't it? Oh, I don't know, I thought I might have made it too small!!

I'm glad something I made so simply is a useful thing!

<3 <3 <3

P.S. Thanks to Louis for the fotos featuring the GPS! <3

Thursday, June 3, 2010

A Set of Small Purses

This set began with a shell pouch I made for my mum to say thank you for teaching me how to crochet. Now the set has grown to include more purses! This is my post for this week's Transformation Thursday which is hosted by The Shabby Chic Cottage. I transformed a ball of  lovely and soft multi-coloured wool into these purses.

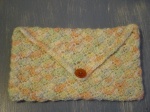
I made the tiny purse without a pattern. I again used the shell pattern for one side then plain for the other so the shape would not turn out wonky. I then made a lid for the purse. I was inspired by the lid on the quick clutch at Crochet Spot but I did not follow the pattern. If I did I probably would not have had to pull it apart two times before I got it right on the third try! I also made up my own tiny button, although I might replace it with a proper button if this doesn't work out. This tiny purse took one morning to do.

I completed the tissues cover over two days without using a pattern. I had been planning to make one with a slit down the middle but then I saw the tissues I had bought for this opened a different way. I made this tissue purse using the shell stitch on the front only and plain treble crochet on the back and sides so it would keep it's shape. I had trouble deciding if I would make a lid for it, but settled on leaving it open because the shell stitch made a nice wavy edge.

I gave these and the matching tiny dancing teddy bears to my mum yesterday when she came to visit. She said she likes the set, and promptly put her pens in the larger pouch to stop them from rolling around in her bag! The tiny teddies fit neatly inside the tiny purse, they were so cute!

Be sure to check out the other things linked in with Transformation Thursday, there is always HEAPS of handy home-crafting ideas which I love to check out!
<3 <3 <3

My Highlights from this weeks' party

Thursday, May 27, 2010

Simple Brown Handbag

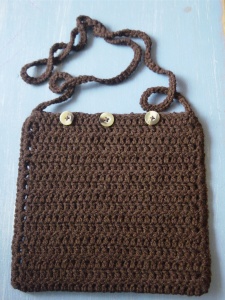
I've quickly made up another chocolate-coloured handbag in case my sister doesn't like the other brown bag I made for her. This is my post for Transformation Thursday at The Shabby Chic Cottage. The materials transformed for this was about 50g of yarn and three buttons. Using a 3.5mm crochet hook it didn't take long at all, maybe one afternoon.

I was speaking to Jen last week and she mentioned she needed a little handbag just big enough to hold a couple of things so I've made another bag a little bigger than the last with a longer handle. This bag has a handle long enough that when on the shoulder the bag will hang down by the waist. I used a simple stitch, instead of the shell stitch I used in the first brown bag which made it a little wonky, so this was quicker to make.

By the way, I found out at the craft group I went to last week that the stitch I've been calling 'double crochet' is American for the UK stitch called 'treble crochet', which is the stitch I used mostly here. I'm thinking I will need to learn both crochet languages so I know the two names for each stitch. There are so many free patterns on the internet that are in American crochet, but my mother and the local craft group use British crochet, so it's best I know both!

Here's to hoping my sister likes at least one of these bags!

So MANY Fantastic Ideas at this weeks party, some day I'd really like to try these ones...

Monday, May 10, 2010

Cute, Small Brown Handbag

I'm really quite proud of how this turned out in the end, if I do say so myself!

At first I was worried how wonky it was, marrying up the edges evenly was a challenge. But because it was off-centre I was able to place the button enough to the side to appear intentional, and  I think the result is rather cute. I had several cute buttons to choose from as usual, all would match nicely, but I settled on the pearly tan coloured one.

When I told my sister Jenny that I could crochet simple handbags, she said she'd like one in 'earthy brown colours', hence why I chose this wool and button. I really hope she likes it because I made it with love and care, although I know it's highly likely the first thing she'll say will be to point out an imperfection. But you know sisters can be like that, hey? I used the shell stitch described in my Shell Crochet Pouch post, I just made it larger and added a handle, which was rather easy and fun!

Sunday, May 9, 2010

Shell Crochet Pouch

I just made this modest crochet pouch because I thought the shell stitch was very pretty, and liked the multi-colours in this wool which shows off the stitch better than a mono-colour.  I have also started making a brown pouch for my sister because she asked me to make her one, and thought to make the stitch a little interesting so had a go at this shell stitch. Its kind of like this one here, but I did it off the top of my head at the time so it's different.

One row of this shell pattern takes two rows to complete. It goes something like this ...
start with a chain with length equal to pouch width
row 1 - (ch 2, 2 dc in 1st ch sp, sk 2 ch sp, sl st) to end, turn
row 2 - ch 2, 2 dc in 1st ch sp (sl st in top of shell in row 1, 3 dc in sl st in row 1) to end

I wonder if my mum would like this as a gift? She has so many lovely things, its very hard to find nice gifts for her. But mum was my very first crochet teacher. Thanks to her early lessons, I was I able to pick up a few pointers from youtube videos when I started hooking again in recent years. Hopefully she likes my simple gift as a thankyou for all the handicrafts that she taught me. I had several pretty buttons to choose from, and settled on the burnt orange one with a lovely shell-like shine to it.

I hope I get a chance to see mum soon so I can give it to her to say thanks!

Tuesday, March 2, 2010

Scented Rice Pack, Ribbon Gift Bag and Flowering Rosella

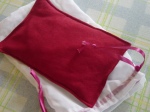
Today, I made up an organza bag to go with the hot rice pack I made last week. Well, I don't think it's proper organza, just a nice white sheer fabric I've had hanging around for ages. I finished it off with some of the new pretty deep pink ribbon I got from Lincraft the other week. My old machine did catch on the fine fabric, so I'll probably have to get around to that service soon.

To make the scented rice pack, I used a cup of rice (I got 10kg when on special), and added a tablespoon of dried lavendar petals, some dried homegrown marjoram, basil flowers, and lemon myrtle along with a drop of rose fragrance oil. I used more of the soft red cotton material, although I know red is not the best colour for a relaxing eye pack, but it is nice and soft. And it smells simply divine, if I do say so myself! It would be handy as a relaxing eye pack, or you can heat up it up in the microwave for a minute on high to use as a soothing hot pack. Alternatively, you can put it in the freezer to use as a cool pack. These rice packs are very handy to have around!

Flowering at the moment is our new rosella plant which is really taking off in this humid weather. We can't believe we picked this one up in the bargain bin at our local nursery for only $1! Its got a heap of fruit on it now, and also some optimistic white meally bugs. I sorted those bugs out, so hopefully we will have some fruit to try and make rosella jam in a month or so.

Saturday, January 23, 2010

Recycled Jeans Bag

This is my first attempt at recycling an old pair of jeans into a bag. I remember a couple of friends from school used to make bags or skirts by cutting off the legs of old jeans. But when I was a teenager I never had the luxury of having an old pair of jeans to cut up, so have been wanting to try this now I can!

For skirts they would sew a large square of material to the bottom after the legs were removed, and kept using the top of the jeans, leaving the buttons as they are. I can't remember if they would line their bags, but I gave it a go here. I haven't lined anything before and I could have done it better, that's for sure! I didn't match the width of the lining with the width of the jean waist so had to gather some lining to make it fit. The hardest part was sewing the lining to the jeans and then threading the cord through the lip I made in the lining. If I was going to do this again, I'd make the lining fit before sewing it, and I'd make the lip for the cord wider.

Perhaps this bag would be better if I made a handle out of the legs and sewed it up the sides ...

Wednesday, January 20, 2010

Crochet Mobile Cover

These things could look really daggy, but this one is a lot nicer than my very old, falling apart horrid black thing I used to keep my fone in!

The colour of wool to use is important, this one is beautifully soft and pretty with shiny fibres through it. I didn't follow a pattern, just the sight of my old mobile cover was enough to inspire me. This was really simple to do as I made it up as I went along and finished in less than an hour and a half. If I made another one, I'm sure I would be a lot quicker!

1. Crochet a chain as wide as the mobile fone.
2. Add rows of double crochet until you have a length that is twice that of the fone, sometimes add extra stitches as you go to make the  tapared shape.
3. Fold the piece lengthways in half and slip stitch down the side.
4. Contine a row of slip stitch along the bottom for decoration and shape.
5. Slip stitch back up the other side.
6. Chain as long as the opening is round plus some for extra tie.
7. Cut the wool, leaving a little for the final stitch.
8. Hand weave the chain in and out of the double crochets in the top row.
9. When the chain comes full circle, use the little bit of wool to slip stitch into the beginning of the chain and tie tightly.

Its Time To Go .... Old Mobile Cover!!

Tuesday, January 19, 2010

What comes out must fit back in?

After my brother and his family visited, I left my airbed folded up ready for the war of push and shove that would inevitably ensue. How is it these things never, Ever fit back into the box? Oh yes, I'm supposed to spend half an hour tightly folding it, inch by inch, squeezing every little goldfish bubble of air out of it as I go. Just so the thing will go neatly back into the box that it came in.

I decided to invest said 30 minutes into making a bag instead, one that was generously sized so this would no longer be an issue! I have metres upon metres, of cheap blue cotton material saved from my old life. These were purchased for a sea musical I directed for a primary school where I was the music teacher. For certain scenes of the show, we had a couple of kids hold the ends of these swathes of cloth, moving their arms up and down so they would make waves. Lol! I just have to laugh at the silliness of it, where did I get those ideas from? I didn't want to waste the material so saved it for a rainy day like today!

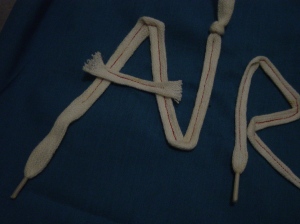
To make this very simple bag a bit more challenging, I planned to sew the letters for A-I-R-B-E-D on it. I had several options, but in the end went for white shoe laces (of which I have a copious amount and I don't know why) with contrasting red thread. Actually, the thread was red from working on another project but I thought it looked nice so kept it. Once the lettering was done, sewing up the bag was very straight forward.

1. Cut a piece of material twice the size of the object you want to go in the bag, plus a couple of inches extra to make it easier to go in, and for seams.
2. Using pins, plan where the shoelace writing will go, plastic ends of laces will be the ends of letters, so you don't have to hem edges.
3. Machine sew the shoelaces with a contrasting thread, let the cut ends of laces fray for added effect.
4. Machine sew what will be the lip of the bag, make it wide enough for a nappy safety pin to go through.
5. Turn the lettering to the inside and sew down the two sides (the 3rd side is folded).
6. Turn the bag right way around.
7. Attach a nappy safety pin (I find those easiest to handle) to the end of some brightly coloured cord, and thread it through the lip of the bag.
voilà

Saturday, January 16, 2010

Lavendar Afternoon

Last Easter, when we visited David's father and his fiance in Stanthorpe, we stopped by a lavendar farm and got our very own lavendar plant to grow. So far it seems to have adjusted to the climate change (it can get very cold in Stanthorpe). We gave it a good sized pot and put a lucky grow charm at the base. I'm trying to shape it by pruning lightly. I'm supposed to do this after it finishes flowering I know, that's why there aren't as many flowers on it as there otherwise might be.  After the flowers finish, I deadhead them and keep the dried flower. It prefer's a sunny spot and a good water, but doesn't like to sit soaking.

After the stresses of the morning, I knew I had to take my stress management into my own hands and decided to make a lavendar bag! I made this one in about 30 minutes and did it by hand, not machine, as I did it for relaxation more than anything. It's quite easy, this is how I did it.
Fold a scrap piece of pretty material in half with the back of the material on the outside, the front facing each other inside.
If a seam of the lip will fray, hem it first using blanket stitch and some matching coloured thread.
Using backstitch hand sew down the side of each of the two edges.
Turn the bag right way out.
Fold a scrap piece of thin white ribbon in half, put a knot in the end.
Sew the half way point of ribbon about an inch down from the top of the bag.
Put some tablespoons of dried lavendar inside and twist the ribbon around the bag to close it.

On one of our trips to Indoorpilly with David's mum and his sister Michelle, we stopped by the T2 Tea shop, which is full of relaxing teas.  While we were there, some tea cups and saucers fell from a high shelf, as if of their own accord. One tea cup remained intact, so I declared it a lucky tea cup and bought it! I also picked up a packet of dried lavendar from there. Lavendar tea is very good for stress management and soothing migraines. I didn't know you could drink lavendar tea like that, and through trial and error this is how I've come to prefer my lavendar tea.
Add 2 teaspoons of dried lavendar to a small tea pot with a removable mesh cup.
Fill with boiling water for no more than 2 minutes.
While waiting, jiggle the pot!
Test the colour every 30 seconds to make sure its not too strong.
Add 1 teaspon of sugar per teacup of tea before sipping.
Enjoy!

I remember a song my dad used to sing to me when I was little...
"Lavendar blue, dilly dilly, lavendar green.
When I am King, dilly dilly, you shall be Queen.
Who told you so, dilly dilly, who told you so.
Twas my own heart, dilly dilly, who told me so."
/awwww
Related Posts Plugin for WordPress, Blogger...