Showing posts with label mothers. Show all posts

Sunday, May 12, 2024

Today's Small Win - Mother's Day Cake

We decided we would make a cake for Mother's Day! I remembered I had some fresh raspberries in the fridge that I was going to use for porridge, so we started looking at photos of raspberry cakes and my son really liked the look of this one. We decided to give it a go! We ran out of sugar so only made one chocolate cake, this is the recipe we have used for many years, which is a Frugal Mud Cake. We make it dairy-free by using nuttelex. For the butter frosting, my husband used more nuttelex and icing sugar, he whipped it up in the mixer, one part margarine to two parts sugar, it worked really well. I wanted to remember how well the frosting went on. It didn't pick up any crumbs while I used a spatula to put it on. And then came for the taste test! It was very sweet and delicious! Happy Mother's Day!

A happy memory of Mother's Day 2024


Wednesday, January 11, 2012

How to have A Low Stress First Birthday Party

I did a little research before organising my son's first birthday party and I must say I'm really surprised at the level of pressure out there to perform when organising this event, when personally I find that very unnecessary!

Themes? Seriously? You don't need that. For goodness sake, talk about stressing yourself out when you don't need to! I just strung up a couple of balloons with some recycled ribbon! Prettily printed invitations sent in the snail mail? Come on! Just email your friends, easy! Thankyou bags? Maaaybbeeee, if you really want to, but doesn't that make it all a bit too formal? I'd rather have a relaxed affair where the mums and babies can have a good time. Well, I hope my friends had a good time at our party. We just had it at the pool area of my gated commuity, where there was plenty of space. I could have invited more people, several did say they wanted to come. But I was worried about the weather forecast which predicted rain, then we would have to all cram into my small house, which would have been ok, but not as nice. Luckily, it didn't rain. But I do think it's nicer to have smaller gatherings, then I can relax too, and get to chat to everybody. If I had everyone over on the same day, it would have been far too rushed and hectic, and I would have worried about neglecting some of my guests. It was far nicer, for example, to have my brother and family visit on the previous Sunday so we could hang out as a family without a bunch of people they didn't know.

One dilemma I did have was the question of gifts. If you read my blog, you might know I'm not really keen on our tradition of gift giving. But I don't want to be a kill joy either, nor do I want to offend my friends and family. So I did some research on this topic and discovered in some forums, that some people have quite a passionate opinion on this. I would have preferred to have said in the email 'please, don't bring gifts' but in my experience, that never works and some people always bring gifts anyway, no matter what you say. I found some people find it really sad and it takes the fun out of it for them. I also read that it was polite etiquette not to mention gifts at all, that to say 'no gifts please' implies that people should bring gifts, which some people think is rude!

My husband was home from work on holidays, so we decided we would put some nice nibblies on for the grown ups, and I decided not to mention gifts at all. That way, if people wanted to bring gifts, it was up to them if they wanted to, and at least we put on some food as a thankyou. I do think that if people bring gifts, they shouldn't have to bring food as well. It's not that hard to put on a bit of food. My husband baked some pesto and sweet chilli scrolls, marinated chicken wings and rosewater biscuits which were very popular. I made up a fruit platter and some dips with crackers. To further reduce stress, I tried to open gifts as guests arrived. This way there would not be a big parade of gifts everyone has to sit and watch, which I don't like. Unfortunately, I didn't quite manage it as three mums arrived at the same time when we were busy, so we opened their gifts after we did the cake ritual.

The fun thing is, I now have presents to make for 5 more babies as they all turn one soon, because Thomas was the eldest in our mothers group!

Saturday, October 8, 2011

Colourful Scrap Rug for a Toddler

This rug started off as a pile of scraps given to me by my mother last year, and is now the second rug like this I've done. I'm hoping it will be a useful rug for Thomas.

I really enjoy making these rugs. The material is not expensive, you can pick it up at op shops or find it in your own craft cupboard, and it's satisfying to turn balls of left over yarn into something that can actually be used. I enjoyed making the first one so much I called it a 'therapy rug'! There's no pattern to the colours, the only rule is whenever I change yarn it's a different colour to the last. It's therapeutic because there is no stress at all about the design, it just comes down to a decision at the moment it's time to pick a new colour.  And the idea of these rugs is to use up all of that left over yarn, that's why there are not finished rows, rather they run into each other like spirals until the yarn runs out. Then I choose a contrasting colour to continue. This way there are no little bits left over at all.  That's why this is much better than making a rug out of small granny squares sewn together. And I find sewing all those squares together at the end very tedious! For this rug, I used a 4.5mm hook, so not too small so it doesn't take too long.

The first thing to do is sort the balls of left over yarn according to size. The very smallest ball of yarn is the one you want to start with, next choose a contrasting colour that looks to be amongst the smallest of the balls left. I've even resorting to weighing the balls on a small kitchen scale! This way you get the spiral effect. I'm rather proud how this one turned out, the pattern is quite nice considering there was little planning in it. It's good to know I have something useful to do with all those annoying left over balls of yarn!

Sunday, May 8, 2011

My First Mother's Day 2011

Happy Mother's Day to all mums, now including me! David made me pancakes for breakfast with a scrummy berry sauce, and Thomas did his bit by being very cute!

All the beanies I've made so far are too small for Tom, yet it's starting to get cold and I think he needs to wear one. So I made this one this morning, using 100% Australian merino wool and a 4.5mm hook. I usually use the 4mm hook but the bigger hook made it slightly bigger, I also added an extra increasing round. So this hat is a bit on the big side, but he'll grow into it! Now he can keep warm in this cold weather, and I'm feeling like making him some more beanies now I know his size!

Friday, May 6, 2011

Handmade Easter Box

My mother made this clever cardboard box, she gave it to me for Easter filled with little chocolate eggs. The lid is part of the box, when you lift it reveals an opening in the middle. After the eggs were removed, I peeked inside and saw more pretty eggs printed inside!

Monday, October 25, 2010

How to have a simple wedding

David and I decided early last year that we would get married, after he romantically proposed during a holiday at a place called Secrets on the Lake in Montville. The how and when of it was all up in the air. The thought of organising a wedding was very daunting for both of us as we have become real hermits in recent years! But it was pretty obvious to us from the onset that whatever we did, it would have to be very simple and low stress!

By holding the ceremony in the cute and quaint backyard garden of a local celebrant, and only inviting parents to witness it, a relaxing lunch for 6 topped off the day and rain by no means dampened the mood.  The day was all about David and I celebrating our love and making our marriage official, skipping a lot of traditions but keeping the few that were meaningful for us. Below I outline the details of our little wedding for future reference, and how we organised it in about 6 weeks and for a cost of less than $1200 (if you don't count our rings!).


Our major purchase
The most expensive things we bought were the rings. We got those about 18 months ago when David's mum Beverly worked at Michael Hill so we could get a discount. We decided we could afford to splurge on these so got ones we both really liked, as these were the items that would last forever. We even got David a diamond engagement ring, as I feel it's very important that he get treated like a 'prince'. Getting married should not be all about the bride being 'princess for a day', imho. We got titanium and diamond engagement rings and plain titanium wedding bands to match, once made these can not be resized but we preferred it to white gold so we wouldn't have to get it coated every year. Soon after getting them we realised we had no idea when we would make our wedding official. It seemed a shame to not wear our wedding bands for an indeterminate amount of time, seeing as we were otherwise married and living as man and wife. So we put our rings on each other one night at home alone soon after buying them, and that was about 18 months ago. I usually wear my diamond ring when leaving the house, and David wears his on a neck chain, as he can't wear both at the same time on his left hand and it doesn't fit on his right hand.

What's in a name
Now I'm pregnant we realised life would be that little bit more convenient if we had that same family name in time for our baby's arrival. Of course, you don't have to be married to have a baby, and the wife certainly does not have to change her name - I didn't for my first wedding. But that was a lifetime ago and I really do feel like a different person now with different motivations. My sister has 4 children but did not marry their father for a long time. But recently she said it was just too inconvenient and too annoying for her to have a different name to her children, so they got married in a very simple family ceremony early last year. I took that as a cue and decided that I should do the same before our baby came.

The first thing to do
As winter drew to a close, the spring weather turned beautiful and inspired us to think what a great time to get married so started to make plans. We short-listed about a dozen local celebrants, which took us a while, but by the 7th September we were ready to start emailing them. But we had to check with David's mum when she would be back in town as she had told David but he'd forgotten. It takes a month and one day's notice to put in the form of intent to marry, as it turns out Bev had already arranged a trip with Michelle for the 1st of October so it wasn't meant to be. David and I went ahead and organised our wedding by emailing the celebrants, having little idea who we could ask to be our witnesses. We simply settled on the most local celebrant who replied to our email the quickest. It turned out Joy Jensen was a lovely lady, gorgeous with her manner of speaking and poise. She turned out to be the perfect celebrant for us.

The matter of witnesses
Every wedding needs two witnesses, if you elope you can often ask staff members to witness it. Joy offered to supply the witnesses, but by that time I'd already asked my mum. Our original thought was simply to invite the two mums only, that way hopefully the rest of the family wouldn't be too offended. For me, the matter of witnesses turned out to be the most unnecessarily stressful part of organising our wedding. We purposefully wanted something simple to avoid all that. We should have just had two witnesses that were not in the family at all, as I just felt too obligated to 'do the right thing' by every one else, especially the parents. But like all weddings, it pulled together beautifully in the end. We had a perfect wedding where both our father's came and signed the registry which was simply gorgeous. My mum and David's step-mum helped during the ceremony by holding our rings, which was really nice and special.

Our reception
For our celebration we went for lunch afterwards at one of our favourite places called Fleet Street in Indoorpilly. It was a bit of a drive away, but once we got there we knew it would be perfect. I worried the whole time how long everyone else had to drive that day, only coming for a day trip 2 or 3 hours away, then having the return trip. The other option was Yum Cha at the Landmark, which we love doing and would have been a lot of fun, but even if we made reservations it's such a popular place, we probably would have had to wait to be seated,  even on a weekday. So Fleet Street it was, and at one point we had the place to ourselves, so we could have a leisurely lunch and really enjoy the food. David and I insisted on paying for the lunch, for only the 6 of us it was considerably cheaper than a traditional reception. We even took photos of the deserts for a laugh to share on Facebook.

Including the rest of the family and friends
A month before the wedding we created a Facebook group called 'David and Teena's Virtual Wedding' and invited people from our friend's list. We kept the date a secret for as long as possible, simply telling everyone it was coming up. A week before I announced the date, and joked that our virtual gift registry had just one item on it, a toaster! We asked our friends and family to post 'virtual' gifts of toasters or whatever they wished on the page. We got a few pictures of funny and pretty looking toasters, as well as a punch set, which was fun. I was careful to point out that for a 'virtual' wedding, only 'virtual' gifts were appropriate, so I was very glad that almost everyone respected that. When we got home after lunch, David and I quickly chose about a hundred favourite shots to download immediately to Facebook to share with our friends and family. This was our way of having a virtual wedding, so we were able to invite and include everyone on our special day.
What's in a date
It turns out to be convenient later on if you choose dates carefully. David is not one likely to forget such a thing, but making the number easy to remember helps make life that little bit easier. We wanted to get married in October, or possibly early November. It being 2010, I knew the 10th of October would be especially lucky. The problem was it was a Sunday and it would be hard for me to get my hairdresser to help me on a Sunday. Then there was the option of the 20th of October, I was surprised I didn't realise earlier what a neat number it was (Twenty Ten Twenty Ten 20.10.2010). That was a Wednesday so I could get help with my hair, which I really wanted as my hair would have been a real flop if I tried to do it myself! I did have a problem with the hairdresser, as the first couple I wanted let me down, then the salon I had wanted screwed me around so much I went somewhere else. So it was the 5th hairdresser that did it on the day. I knew she would do a good job, but she has a problem of running chronically late, which she did do on my wedding day but it was no surprise so it wasn't a huge disaster. Just would've been nice if we started on time. Maria, a beautician at Amaroo Essential Therapies, helped me with my make-up, which was fun.

What to wear
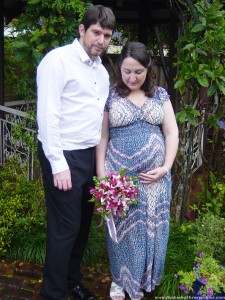
I did try on some ivory coloured wedding dresses at a maternity store, but they just weren't right. I also tried on some expensive dresses which just looked silly. In the end I found a really nice simple maxi print dress at Katies for a bargain price! The good thing is, I can wear it again and there is room for baby to grow. And blue is good luck!  I've been married before and have done the whole 'white wedding dress' thing, so I didn't feel like I had to. But David hadn't been married before, and I wanted to make an effort for him. I didn't want him to feel like he missed out so I tried to look as nice as I could manage. When our relationship started to get more serious years ago, we were joking about getting married one day and that we would wear blue. I really didn't think at the time that it would come true, I was very much of the mind of 'wait and see'. Now the four years is up and we are happily married and all has turned out well. We decided David should wear the white instead so found him a very smart white shirt from Myer.

Whether the weather's fine or not
We were thinking to have the ceremony in a park, but Joy offered us her backyard. I was doubtful at first but it turned out to be very simple and easy to just do it there. She has a very cute garden with a gazebo and it was perfect. Although the weather forecast was fine, we always had the option to stand under cover if it was raining. If we went to a public park it would not have been so good, especially if it was raining. The two days preceding our wedding were beautiful and fine, the forecast for our day was partly cloudy and otherwise fine. But when I left the beautician it was pouring down with rain! It was fortunate indeed that we had kept that 'in case it rains' in mind when deciding where to hold the ceremony. In the end, the rain caused us very little inconvenience at all because of that, and everyone kept telling me 'rain on a wedding day is good luck'. And I think it was ...

Taking the photographs
We thought to get professional photographers, mainly because I didn't do that for my first wedding and regretted it. But they wanted waaaaay too much money for something that would be all over in 30 minutes! And then you don't own their images, can you even put them on Facebook? We all own digital video cameras, so decided we should do it ourselves! With only the 6 of us and Joy there, how many photos were you going to need to take? The minimum photographer's package we saw was something like 4 hours which was laughable, we just didn't need that. In the end, we took our own photographs, everyone had a camera and away we snapped. After lunch we were able to download them to our computers and select the best 100 to share on Facebook with all our family and friends who missed out on being there. It turned out to be the best way for us.

Beautiful Flowers
I was pretty sure that if I was wearing a dress that didn't look like a wedding dress, I needed a bouquet. Just to help make it look a bit more like a special occasion. That turned out to be a bit of a drama, unfortunately, because when I went to the florist I had in mind with less than a week's notice she literally freaked! I swear I could see the whites of her eyes when I made such an outrageous request so I walked out of her shop. I rang my mum that night and she told me not to worry at all, that she would ask her florist friend, Wendy at Wendy's Flowers to help. The professional bouquet she prepared was perfect. David's father also brought a lovely bunch of home-grown roses and lavendar from his garden, and my high school friend secretly sent a bunch which arrived on my doorstep as a surprise! So in the end, there was plenty of flowers, even without worrying a stressed out florist who couldn't handle the pressure!

So with the purchase of wedding rings well out of the way 18 months before, the preparation of our official wedding took just 6 weeks. My initial guess was it came in under a grand, but after adding it all up, including several trips to the beautician, it was just under $1200. But it wasn't about the money so much as keeping it simple and low key. In the end, the day was about David and myself celebrating our love and making it official legally. We had a lovely day, skipping a lot of traditions but keeping the few ones that were meaningful to us.

Thursday, July 15, 2010

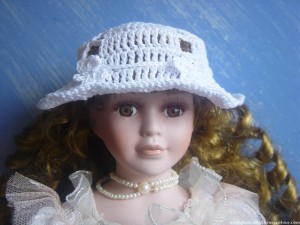
White Sunhat with Daisy Garland

The purpose of making this sun hat was to practice before trying to make one for a child, possibly my niece who has gone back to live in Darwin and has no use whatsoever for one of my winter beanies!

This is a very special doll my mother gave to my grandma. When nanna went to hospital I was given this doll for safe keeping. I think my mum wants this doll back one day but when I offer she says 'next time'. So I am taking good care of her by making her a pretty hat, so she doesn't feel left out because all the other toys are getting clothes made for them, too!

I have real trouble reading patterns as I often say, I need to understand in my mind beforehand how what I am making will work. This means I have a lot of trial and error while I try and make up my own patterns when I want to do something a little more complicated. I looked at images of cotton crochet sun hat on google but did not follow a pattern or any one image idea. I started with a five petal flower then continued with a flat round, then stopped increasing down the sides, making gaps in the five corners. With the brim I started increasing again at the corners, filling in the gaps with increasing stitches. I mostly used double trebles (American trebles) for this hat.
The hat was a little loose on the doll and I made it that way so it wouldn't ruin the doll's curls. But it wouldn't stay on! Looking at the completed hat I decided it needed some more five petal daisies to match the one in the centre. So I came up with the idea to make a little daisy garland to go round the hat to keep it tightly on the doll. The daisies in the garland are the same size as the daisy on the hat, but are made differently so the tips of the petals are not joined in a round. The daisies on the garland were (3 ch, sl st, 3 ch US treble into centre cluster, 3 ch, sl st into centre) repeat 5x, then each flower was joined with 15 ch. I had to do the final sl st of each flower on the opposite side to front so they would sit properly on the garland, all nicely facing the front.

I'm still not sure how I will make one to fit a child though. This used cheap 4ply mercer cotton from Lincraft and a 1.5m hook. It might be a bit fine for a child's hat, but I wouldn't want a summer hat to be much thicker either. Making a child's sunhat is just one more thing on my 'list of things to do'!

<3 <3

Tuesday, July 13, 2010

My 39th Birthday

Last Sunday was my 39th Birthday, and David baked a wonderful meal to share with my parents who came to visit.


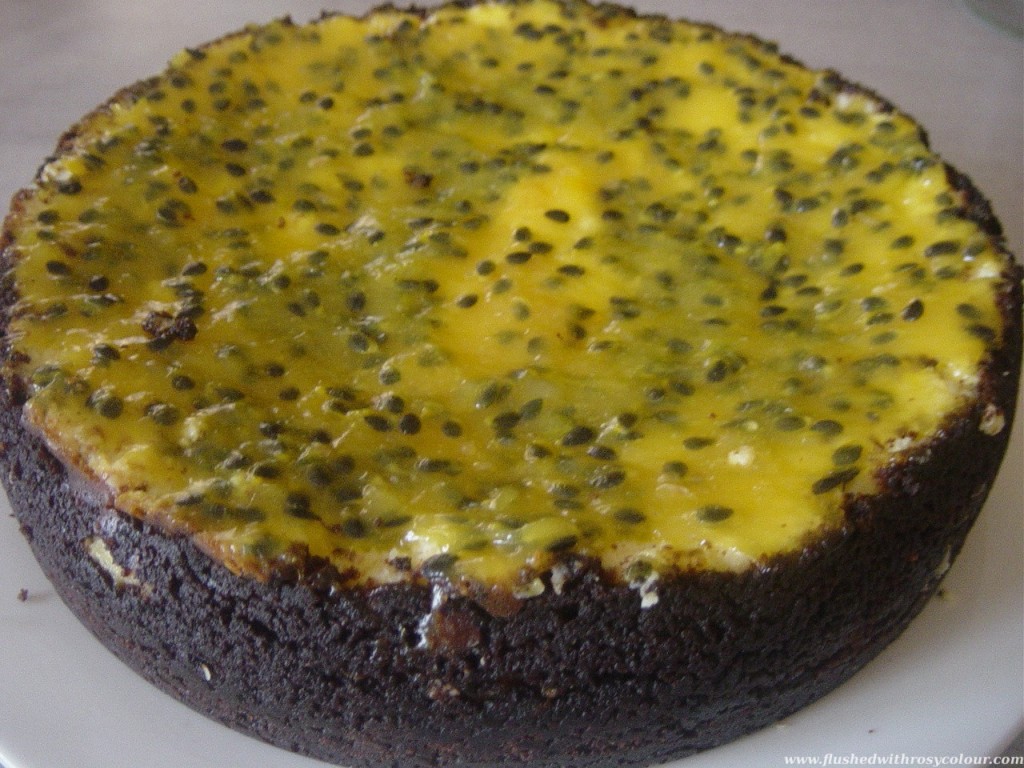
David made pumpkin soup, this time without the chilli, a roast chicken dinner and this amazing classic baked cheesecake with a passion fruit top! As always, his cooking was fabulously perfect and a wonderful birthday gift.

Mum and I talked a lot about crochet and she brought me a big bunch of wool. She also gave me a great transparent bag which will be perfect for crochet projects.
We had a lovely, relaxed day and watched Alice in Wonderland with Johnny Depp. I can't help but think that my next birthday will be very, very different!

<3 <3 <3

Sunday, July 11, 2010

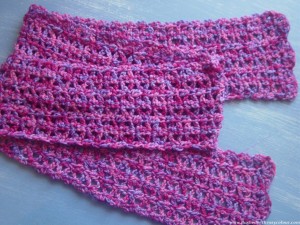
Long Berry Pink Scarf

I liked the stitch from the purple baby jacket so much that I used it for this scarf! This is my post for Pink Saturday hosted @ How Sweet The Sound.

I edged the ends with 3 x 5 treble (American double) clusters. I still have heaps of this colour left over and I figured this stitch would make a nice patterned scarf. I was wondering if Shelly would like it to go with her new hat, but I didn't get it finished in time. When she comes back here, she'll be on her way back to Darwin so hardly a reason for a scarf living there! maybe my mum would like this, as the hat she might like is also made from the Berry Pink mix.

Interesting that David's sister lives in Darwin, and so does mine, but David and I didn't meet in Darwin. But both of our RSVP photos were taken at Darwin beaches at the weddings of our siblings in mid 2006. Both brides at those weddings are school teachers, and both grooms are mechanics. Uncanny, isn't it? I think of David as my angel sent to me by the universe when it figured it was about time to send me a fair go! We were meant to meet, if not in Darwin, then somehow sometime! Now my life is complete. /awwwww

Be sure to check out other pretty pinks @ Pink Saturday.

Monday, July 5, 2010

Cream Ribbed Hat with Rose Brooch

I was very surprised when this beanie hat worked out so well, because I made up the pattern myself!

I learnt how to do ribbed stitches when I made my purple bolero shrug using a pattern from Lincraft. I had seen round ribbed crochet hats before but I'd never read a pattern when I made this hat. I sat down to watch tv with David with a new ball of Sullivans Softply in cream which cost $2.49. I flicked through an old stitches book my mum has leant me but couldn't find what I was looking for, but I did start thinking about the ribbing, and wondered if it would work. It easily worked out, it was a lot simpler than I thought!

Then I just had to make a big rose brooch to go with it didn't I? This is the 4th flower I've made using Rachel's pattern from Crochet Spot. But this time I remembered the pattern as I had done the Berry Pink one the day before. But I made this one different. There are 14 petals, and for the 1st 7 I did trebles (English db tr) instead of doubles (English trebles) to make the petals at the bottom bigger. The other 7 petals are double crochet (English trebles) as usual. It makes the rose more full at the bottom.

My easy ribbed beanie pattern, using 5mm hook and thickish wool
1. 1st round is a beginning 3 chain, sl st, then 12 trebles (American doubles) in the round, sl st
2. 2 ch counts as 1st treble, treble front around the post of the treble below, treble into each treble (as well as front treble around each post) = 24 trebles
3. 2 ch counts as 1st treble, treble into each treble, treble front around each 3rd post (the one thats raised from the previous round) = 36 trebles
4. 2 ch counts as 1st treble, treble into each treble, treble front around each 4th post, sl st = 48 trebles
5. 2 ch counts as 1st treble, treble into each treble, treble front around each 5th post, sl st = 60 trebles
6. 2 ch counts as 1st treble, treble into 5 trebles, skip one treble, treble front around each 6th post, sl st = 72 trebles
7+ repeat row 6 until desired length is reached

The wool I used feels soft to touch, but after wearing this hat for a short time the skin on my forehead started to itch. I'm assuming this is why people usually use nicer wool for beanies. I will live and learn! Still a fun hat to make, and I'm very glad my mother in law liked it enough so I could give it her last time she dropped by for a visit. She didn't think it was scratchy, so I hope she will get some use out of it.

<3 <3

Saturday, July 3, 2010

Pink Doilies my great-grandmother made

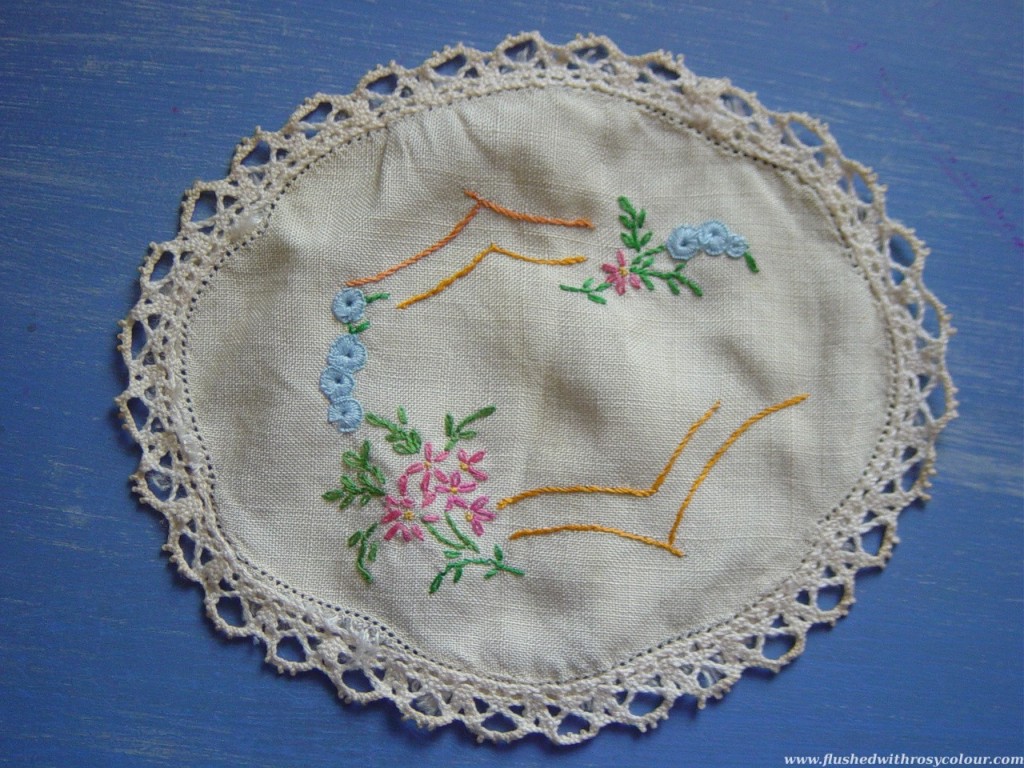
These are a pair of embroidered doilies my great-grandmother made which are edged with pink crochet. This is my post for this week's Pink Saturday hosted by Beverly @ How Sweet The Sound.


I remember these from my childhood. My great-grandmother was so very talented with this, there are many samples of her work in our family, these are the few I have in my possession. My great-grandmother (my mother's mother's mother Margaret) embroidered these, as well as the crochet edges. These two are starting to show signs of age, and I know they look like they are in need of an iron, but I dare not touch them!


Here is another doily, this one my grandmother Beverly embroidered. That is my mother's mother. The fine embroidery is so lovely, I hope one day to improve my skill with this, but I don't think I will get it this good.
I hope you enjoyed seeing these two samples of our very special family treasures made by my great-grandmother, and my grandmother.
<3 <3 <3


Be sure to check out other pretty pinks @ Pink Saturday!

Monday, June 7, 2010

David's Red and Blue Dragons

David just loves dragons! When I asked him why, he replied because they are strong and intelligent, and also because they are both beautiful and terrifying! Here I will showcase David's collection of Dragons. I couldn't decide if this collection is more red than blue, so I've decided it is equally both, which is why I've linked this post with two parties, Blue Monday and Ruby Tuesday. If you'd like to know more about Teena, be sure to check out his cooking blog.

This red dragon ornament was given to David by his sister. It lives beside my Chinese Tea Set which my mother gave me, and is decorated with blue Chinese dragons. Its considered good luck to face dragons toward doors to scare away any bad luck or negativity before it enters the house, as the red and blue dragons are doing here.

David's favourite t-shirt is worse for wear, it's his favourite colour blue with a dragon on the front! I wonder what the Chinese writing means?

The other weekend when we went to the Rocklea markets on Sunday and picked up some cute trinket boxes, we also grabbed this red dragon box. I don't know what's going to go inside it, but David just had to have it!

Besides the red dragon box sits his collection of dragon books - the Eragon trilogy. I haven't read it yet, maybe I will one day! We also own a copy of the Eragon DVD and are still eagerly awaiting the release of the sequel movies. This is a very special movie for us, it was the very first movie we saw together on our very first date on Boxing Day 2007! Awwww, isn't that romantic?!

Last Valentine's Day I made a gift using some cut out dragons. Should I tell you where these dragons came from? He had a couple of boxer shorts with dragons on them that were falling apart but he couldn't bring himself to throw them away, so I had to recycle the dragon print didn't I? LOL! I cut them up and made them into a bedside organiser! Hanging off the hooks are two dragon key rings he has been given, the one on the right I gave him a while ago now.

Another special dragon David owns is this red-winged dragon candle. I don't think we will ever burn it, its just too special!

I bought this dragon pendant in 2008 and he loved it, wearing it all the time until he woke up one morning with it bent out of shape! So now it is a little memento.

Finally, below is a picture of a delicately etched glass dragon. I bought this for David from a shop in Toombul when we lived on the Northside of Brisbane in 2007.

I hope you liked looking at pictures of David's red and blue dragons!

David has started his own cooking blog and is calling it "Teena's Home Cooking". If you like cooking, be sure to check it out!

<3

<3

<3

My selected highlights from this week's Blue Monday party

My selected highlights from this week's Ruby Tuesday party

Thursday, June 3, 2010

A Set of Small Purses

This set began with a shell pouch I made for my mum to say thank you for teaching me how to crochet. Now the set has grown to include more purses! This is my post for this week's Transformation Thursday which is hosted by The Shabby Chic Cottage. I transformed a ball of  lovely and soft multi-coloured wool into these purses.

I made the tiny purse without a pattern. I again used the shell pattern for one side then plain for the other so the shape would not turn out wonky. I then made a lid for the purse. I was inspired by the lid on the quick clutch at Crochet Spot but I did not follow the pattern. If I did I probably would not have had to pull it apart two times before I got it right on the third try! I also made up my own tiny button, although I might replace it with a proper button if this doesn't work out. This tiny purse took one morning to do.

I completed the tissues cover over two days without using a pattern. I had been planning to make one with a slit down the middle but then I saw the tissues I had bought for this opened a different way. I made this tissue purse using the shell stitch on the front only and plain treble crochet on the back and sides so it would keep it's shape. I had trouble deciding if I would make a lid for it, but settled on leaving it open because the shell stitch made a nice wavy edge.

I gave these and the matching tiny dancing teddy bears to my mum yesterday when she came to visit. She said she likes the set, and promptly put her pens in the larger pouch to stop them from rolling around in her bag! The tiny teddies fit neatly inside the tiny purse, they were so cute!

Be sure to check out the other things linked in with Transformation Thursday, there is always HEAPS of handy home-crafting ideas which I love to check out!
<3 <3 <3

My Highlights from this weeks' party

Sunday, May 30, 2010

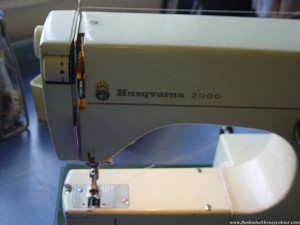
I Love my Husqvarna

Yes, it is true. I am having a hot and steamy secret love affair - with my sewing machine!

Of course, this does not mean I love David any less, how could I? "He da man!" (pretty much, pretty much). And there is no law written that a happily married woman must not love her trusted sewing machine dearly.

What an absolute treasure my old sewing machine is, and oh so lovely. A much-loved well-worn relic, it always works like a smooth charm whenever I feel brave enough to venture near it. I'm not sure why I don't use it more often, this wonderful refined beast intimidates me with its perfectness. It simply purrs as it glides the seams all my itself, all I have to do is turn it on! But so patiently it waits for me, never pesters me for attention. Just is always there for me when I need it.


And just like a good friend, if I'm making a mistake sewing something the wrong way around, it Knows it isn't the sewing machines fault. So it says nothing, and just keeps sewing, trusting I will see my own error sooner or later. My sewing machine ain't gonna tell me I'm wrong and remains silent. I've known people like that!

This machine came to me second hand by a friend of my mother who I believe didn't use it much, and I didn't realise straight away just how precious this thing truly is.  It's had two services so far, one in Darwin and one in Brisbane, I should try and find someone I trust here on the south side to do it, but I'm a bit nervous about that! We all know how I have 'trust issues'! How I would be lost without my Husqvarna, no other could possibly replace it.


Oh, I love my sewing machine!
/smiffle!

Tuesday, May 25, 2010

Red Hearts of Love

All these photos were taken last Sunday morning. When I saw them in my pictures folder together I realised they were all red so that gave me an idea for a post to join in with Ruby Tuesday hosted by Mary at Work of the Poet!

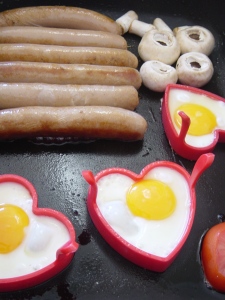
After a couple of hours of me checking the Pink Saturday blogs and he playing a computer game, we got peckish for some breakfast. We were in the mood for our favourite lovey dovey breakfast, sausages and tomato with love heart eggs and mushrooms!

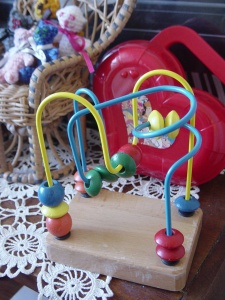
On Saturday, David took me to a Salvo's store (Salvation Army charity shop). We hadn't been there before and there were lots of bargain treasures to be found, some of which I decided I coudn't bring home. One thing I did grab was this very good toy for developing fine motor and hand-eye coordination in very young children. It's pretty solid, not flimsy, so I grabbed it for $3. In the background you can see a red love-heart bag. I can't remember where I got it from but I keep some Barbie things in it, it's so cute. Also in the background you can see my tiny teddies where they live now, sitting on one of the vintage doll's chairs to keep Barbie company. The doily you can see I believe was made by my great-grandmother, which I hope to try copying one day.

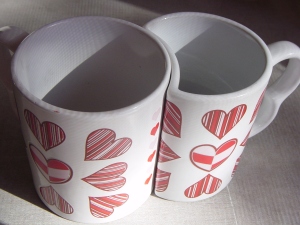
Another bargain treasure we found at the Salvo's store on Saturday were this pair of lovey dovey coffee mugs. We've decided to collect coffee mugs with love hearts on them, as well as other things with love hearts because we are sooo lovey dovey! /awwww... lol! These are probably not so great because the shape means that one is smaller than the other. I don't like the idea that to be in love one person must be smaller.

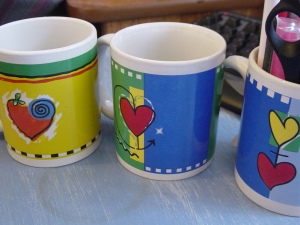
Our first love heart coffee mugs we bought were these very cheap ones we saw at the supermarket a couple of years ago. We got four, one broke and has been thrown away. That's a shame, I really must remember to keep broken crockery for my mosaic projects I hope to do one day. Two of the remaining three mugs have broken handles, so one is now used as my pens holder by my pc. That's why I'm afraid to use the 3rd mug for drinking as I have a terrible vision of someone spilling hot coffee over them when the silly handle breaks! But they are just too cute to throw away, they are too lovey dovey! When a coffee handle breaks, it can still be recycled into something useful.

I also took a photo of this very cute red chocolate tin. It cost me $5 full of chocolates from Coles online last Valentine's Day. I havent' decided what it will be used for yet, but I'm sure it will turn out to be nice. It's sitting on top of the table my great-grandfather made, which I will do a post about one day.

I didn't realise how many red love hearts I have about my house!
<3 <3 <3

Be sure to check out other Ruby Reds at Ruby Tuesday!

Highlights from this week's party

Saturday, May 15, 2010

Beautiful Pink Roses

These are two beautiful pink roses that David's mum Beverly brought from her house. She lives alone near Ballina in NSW, and grows her own fruit, veggies and flowers, including roses, all the while working as a nurse at a local nursing home. I think she said this species is "Tiffany". I particularly liked the fragrance, so I hope we could grow me some of our own! These smelt so beautiful and were so lovely to have in our home, I made the petals into a pot pourri.

Also, outside my front door are some very pretty pinks flowering at the moment. I'm not sure, but they might be a variety of native lilly pilly.

Yay for PINK!
Go to How Sweet the Sound for more details on Pink Saturday.

Recommended ...
Five Minutes Just for Me
Another local blog, this one is a mum who lives here in Brisbane, Australia

Two New Blogs for this week, highlights include a vintage pink telephone and a Pink Princess Suite!
Teacupstitches and A Cottage Muse

Sunday, May 9, 2010

Shell Crochet Pouch

I just made this modest crochet pouch because I thought the shell stitch was very pretty, and liked the multi-colours in this wool which shows off the stitch better than a mono-colour.  I have also started making a brown pouch for my sister because she asked me to make her one, and thought to make the stitch a little interesting so had a go at this shell stitch. Its kind of like this one here, but I did it off the top of my head at the time so it's different.

One row of this shell pattern takes two rows to complete. It goes something like this ...
start with a chain with length equal to pouch width
row 1 - (ch 2, 2 dc in 1st ch sp, sk 2 ch sp, sl st) to end, turn
row 2 - ch 2, 2 dc in 1st ch sp (sl st in top of shell in row 1, 3 dc in sl st in row 1) to end

I wonder if my mum would like this as a gift? She has so many lovely things, its very hard to find nice gifts for her. But mum was my very first crochet teacher. Thanks to her early lessons, I was I able to pick up a few pointers from youtube videos when I started hooking again in recent years. Hopefully she likes my simple gift as a thankyou for all the handicrafts that she taught me. I had several pretty buttons to choose from, and settled on the burnt orange one with a lovely shell-like shine to it.

I hope I get a chance to see mum soon so I can give it to her to say thanks!

Thursday, April 29, 2010

Lavendar-edged Facewashers

Oh no! I did say "Somebody Stop me!" Here is another pair of crochet-edged facewashers, this time I edged the white ones in lavendar coloured cotton. Because why? Because I am bored! Yay for frilliness!
lavendar-edged facewashers
I just copied this pattern by looking at an edged face washer David's mother did.

round 1. using 1.5mm hook (slp st, ch 1) slp st
round 2. using 2.5mm hook (sc ch 1 sk ch sp) slp st
round 3. using 2.5mm hook (sk 1 ch sp, 5 dc, sk 1 ch sp, sc), at each corner 8 dc in corner ch sp

Wednesday, February 17, 2010

Three Small Things - showerpuff, beaded hanger, doily

>>> I finished this pink shower puff yesterday. I used the crochet shower puff pattern from Crochetspot. It was really fun to make, the pretty pink cotton yarn I chose to try was really nice, but it took more than a whole roll. It certainly isn't the cheap option for shower puffs, as you can pick up the plastic ones for a dollar or two, and the yarn cost $3 each. It took a while to do as well, but it was a relaxing exercise. Apparently they last longer than the plastic ones, so I decided I needed to try it out in the shower. It feels like a face washer, and lathers up about as much. I'd rather the exfoliation of the plastic shower puff, so I think I'll pop this one in the guest bathroom because it is quite pretty.

<<< After I picked up David's suit yesterday from the drycleaners, I beaded the wire hanger with some old plastic beads I had stashed away. I don't have any other wire hangers, I threw them all away years ago, but wanted to try this out to see if it works. I got the idea for the beaded wire hanger from allfreecrafts. With it being summer, I'm wearing more singlets than usual and want to hang them up, but don't have enough of the kind of hangers where the straps won't slip off. I finished this hanger with some red ribbon and a cute little bow.

>>> On Monday, I bought a new dress that might do me as a wedding dress, if we actually get around to organising a wedding sometime in the next 12 months or so, which might not happen. I'm wondering if I'll be able to make myself a little cream coloured bolero to go with it, so I've started practicing and working out a draft pattern that has potental. I'm really liking the gathered petals, which is (tr 4 tog).  Part of this sample was inspired by a pattern my mum gave me, and I used some lovely lemon coloured cotton she also gave me. Thanks, mum!
Related Posts Plugin for WordPress, Blogger...