 |
| a pair of 'mango' flowers |
I'm not sure either of these flowers look right on my mango beanie, so I'm not sure what they'll get used for. I'm sure to think of something!
 |
| a pair of 'mango' flowers |
 Happy Mother's Day to all mums, now including me! David made me pancakes for breakfast with a scrummy berry sauce, and Thomas did his bit by being very cute!
 On the weekend, we got a visit from Nanna and Poppy (David's dad Brian and his wife Freya) and they came with many gifts, including this special handmade quilt for Thomas!
 Besides the quilt, Nanna and Poppy also brought a lot of fresh produce from Stanthorpe, including these tomatoes and zucchinis home grown in their very own garden. We've already eaten some in the few days since their visit, but I'm a bit worried that some might waste there is so much! They also gave us several jars of home-made pickles, again using fresh veggies from their garden. It must be so satisfying to eat from your own garden. I know it is and our own garden only has herbs and a lime tree!
 They also brought this lovely posey of roses from their garden, now my kitchen smells like roses again! It's a pity they live so far away, it's a long three hour drive one way. Hopefully we'll see nanna and poppy again before too long.
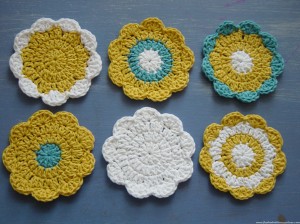 This is the last coaster set I'll do for now. I guess if anyone else wants one, I'll just get some more cotton and make more! But next time I buy cotton, I'll get some red, pink and purple so I can get different colour combinations. Below is a photo of the colours I used for this gift giving season.
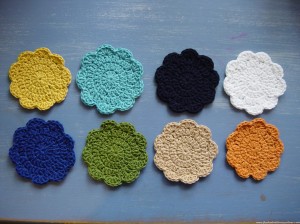 Then as the wet season approaches, the trees would become full of flowers and the smell was gorgeous. Most of them were the yellow and white variety, some had a light blush of pink. And very rarely, there was a deep red variety which didn't seem to grow as thick but had the rich fragrance of a rose and was very special. The blue in this set represents the clear blue skies of the Darwin dry season.
 These are the first two sets of my Seasonal Drinks coasters!
 Autumn also had to have some orange, with a little bit of golden and green. Again, I found inspiration on google images, this time for Autumn colours. As often found in collections of Autumn colours, these represent the turning of the leaves from green to golden, to then dull and fall upon the ground, loosing the bright colour as winter approaches ...
 I made the pattern up for these beanies, because I felt like making something cute and quick!
 These beanies are shorter than the other beanies I've made, as I skipped the last three rows that would have gotten turned up. Then, for a flourish, I added a row of simple picot to make it pretty. And I don't think these are too pretty for a boy, although I just couldn't help myself but to make a pink one! I guess I might meet someone with a girl who might like it, or I can donate it to the hospital. All the colours except the pink one are pure Australian merino wool which I bought from Lincraft. The pink wool is some really soft, silky yarn my mum gave me ages ago and we're not sure what the blend is as it doesn't have any labels. Each beanie takes about an hour or so to make, and I used 4mm or 4.5mm hooks.
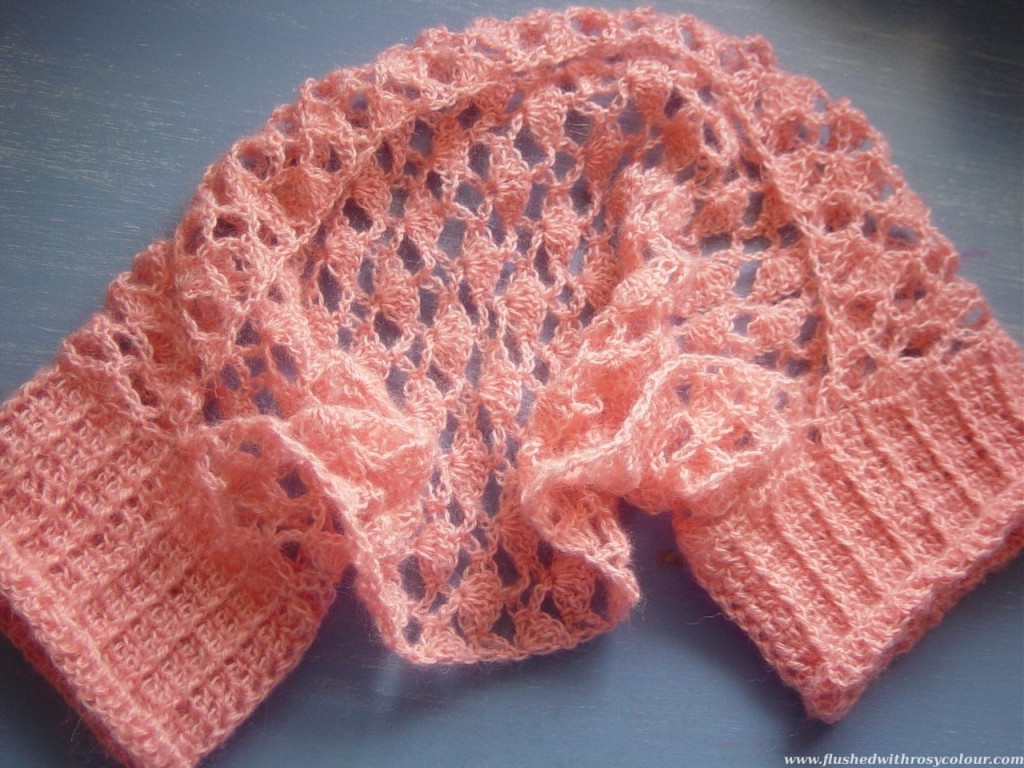 |
| a simple shrug made from imported Angora |
 |
| lace detail of my shrug |
 |
| folded shrug |
 This was going to be a drink coaster, but I wasn't quite happy with it and it's now a doily on David's bedside table! The pattern for this doily came from a book I got from a second hand store at Toowong for $11. This pattern is on page 56 and the book is called 'Beautiful Lace', published by Nihon Vogue in 1982. When I finished it, it was very wonky, so I gently ironed it and it came out ok. I do want to have another go at making cotton coasters, or I might end up making some out of plarn.
 But I was very keen to get some stronger shades of purple and some green to match so checked out Lincraft today as some of the nicer baby wool is on special. It's very naughty of me, but I got some expensive pure Australian wool machine washable baby yarn in bright shades of green, blue and orange. I was after some brighter colours in really nice baby wool so I can make a colourful and cheery jacket, hat and bootie set, I can't wait to start on that one!
 |
| pretty outfits for four Kelly dolls |
 |
| how I found these 4 dolls at the market for 50 cents each |
 |
| matching beach outfits for four Kelly dolls |
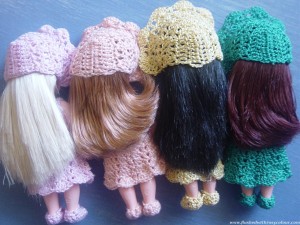 |
| after some hair care the bonnets fit perfectly |
 I started this apricot coloured beanie ages ago, and now it's finally finished!
 This set began with a shell pouch I made for my mum to say thank you for teaching me how to crochet. Now the set has grown to include more purses! This is my post for this week's Transformation Thursday which is hosted by The Shabby Chic Cottage. I transformed a ball of lovely and soft multi-coloured wool into these purses.
 I made the tiny purse without a pattern. I again used the shell pattern for one side then plain for the other so the shape would not turn out wonky. I then made a lid for the purse. I was inspired by the lid on the quick clutch at Crochet Spot but I did not follow the pattern. If I did I probably would not have had to pull it apart two times before I got it right on the third try! I also made up my own tiny button, although I might replace it with a proper button if this doesn't work out. This tiny purse took one morning to do.
 I completed the tissues cover over two days without using a pattern. I had been planning to make one with a slit down the middle but then I saw the tissues I had bought for this opened a different way. I made this tissue purse using the shell stitch on the front only and plain treble crochet on the back and sides so it would keep it's shape. I had trouble deciding if I would make a lid for it, but settled on leaving it open because the shell stitch made a nice wavy edge.
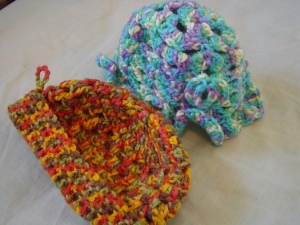 How did this happen? I do not know, but somehow I have managed to crochet, not one but two hats for babies, how absurd!
 I have completed just 3 beanies in my life before learning how to read crochet patterns, making them to fit the person who was to wear them. One of them is the blue beanie I made for David last winter, I also made a loose fitting white one for myself to wear on holiday to Tasmania in 2004, the 3rd I made BD (before David) so we don't talk about that. The only beanie pattern I have actually read and followed was on Rachel's Crochet Spot, but I didn't actually finish the beanie! Instead it ended up as a flower in my day of crochet trials.
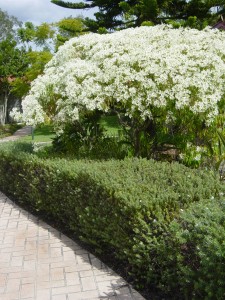
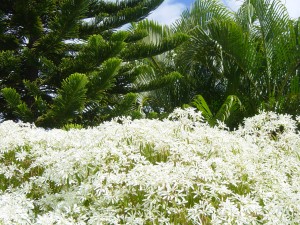
 Every Wednesday I plan to post on my blog about venturing outside, sometimes tagging along with Outdoor Wednesday. Today I'd like to include some pictures of a particularly spectacular snowflake bush which is currently flowering and welcomes you as you drive into our apartment's complex.
 My visit to Lincraft went ok, it wasn't too busy so I was free to potter around in peace, and there was no waiting at the counter, which is a bonus for me. I bought some brightly coloured wool which was on special, I plan to make some children's beanies with it. In the photo you can see my first attempt which is too big and has to be undone. I also bought some new cotton for edging face-washers! They didn't have any white, so I chose a nice lilac-grey. I bought 1.7m of stretch velvet which I plan to make a skirt with. I also paid a couple of dollars for some crochet patterns, knowing I can get crochet patterns off the internet for free, but I liked this particular collection and want to try making the bolero.
 I find going to the library a little overwhelming, which I know is silly! I went and picked up some brochures, one is a very helpful map of the local nature reserve which I hope David and I can go to soon before it gets too cold. I walked around the whole library then wondered what to do next so made myself sit down as I feel stupid walking around aimlessly! After I looked through the brochures I noticed some quilting magazines, so got up to look more closely to see if there were some crochet ones but they only had knitting. I then went and had a look at some more information displays but couldn't find anything about the craft group that's supposed to be there at the end of this month. I didn't feel up to asking anyone about it so I left. I hope to go back to the library again soon, it would be great if I could sit in on that craft group in a couple of weeks.
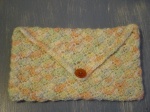 I just made this modest crochet pouch because I thought the shell stitch was very pretty, and liked the multi-colours in this wool which shows off the stitch better than a mono-colour. I have also started making a brown pouch for my sister because she asked me to make her one, and thought to make the stitch a little interesting so had a go at this shell stitch. Its kind of like this one here, but I did it off the top of my head at the time so it's different.
 I wonder if my mum would like this as a gift? She has so many lovely things, its very hard to find nice gifts for her. But mum was my very first crochet teacher. Thanks to her early lessons, I was I able to pick up a few pointers from youtube videos when I started hooking again in recent years. Hopefully she likes my simple gift as a thankyou for all the handicrafts that she taught me. I had several pretty buttons to choose from, and settled on the burnt orange one with a lovely shell-like shine to it.
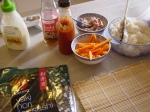 I love sushi and David has learned how to make it quite well! For lunch, we make 3 rolls with a simple filling of tuna and carrots. Because we have run out of wasabi, we used our very own home-made Awesome Sauce and some mayonnaise. We did try and make our own mayonnaise once, but that was epic fail so we'll have to try that again another day! I'm David's kitchen hand, preparing the carrots, tuna, other ingredients and equipment, he prepares the rice with the sushi vinegar as I'm much more likely to screw that bit up!
 So far, I've made 3 small rugs, as they take quite a while to do, but making them is excellent therapy!
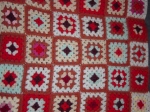
 The first rugs I made were a matching pair of lap rugs, which I made to pull over our legs in the winter. They're not too large to catch in the wheels of the computer chairs. I even got creative and gave them names to match their colour schemes. As David loves all things dragon, his is called "Dragons in the Woods", because it had a lot of brown in it. The red represents the fire breath. Mine is called "Roses in the Snow", because it's pink and white, and it's nice to remember flowers during the winter! These ones are made up of 5 round granny squares slip stitched together.
 The third one I've made is bigger than the lap rugs, and I just called it a 'therapy rug'. I wanted to make a rug purely for relaxation, and didn't want the added pressure of planning the colours like the other two rugs. It's just made up of random colours of similar ply wool. When one colour ran out, I just chose a new colour. This is one big granny square, so not much thinking required, but the changing of the colours meant it wasn't too boring.
 Since then, I've bought $10 worth of wool from lincraft on my birthday last year to make a 'birthday rug'. I am only up to the second ball of wool as I've kinda ran out of steam for that one. Having a big project in progress is good, as you can just grab it when you're watching some boring tv. I've got several projects in progress, starting them seems a lot more fun that seeing them through to the end!
 |
| white hexagon jacket |
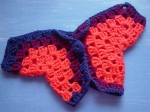 |
| hexagon jacket for a toy |
 So today, in preparation for the special day tomorrow, we are baking as much as we can in advance, then we will be cleaning the house together! /awww isn't that romantic? Yes, I could have cleaned the house yesterday when David was at work, but that would not have swept away any bad luck from this year that came into our house today (that's my excuse and I'm sticking to it!).
 I really liked this print of Japanese fans so just got half a metre, not knowing what I would make with it, although I did think perhaps I would make a little cami. The grand total cost of this top was $4.49! I didn't have any orange thread which would have been best, but this emerald green thread worked just fine, it's good to have finally found a use for it! I don't ever remember buying green thread, it must have come to me along with some other coloured threads. I already had the elastic in my kit and that's all I needed to make this.
 I simply sewed up one side of the half metre fabric forming a tube. Then I made a pocket along the top to thread the elastic through. I cut 10cm off along the bottom to form straps which I've decided not to use. Then I sewed a fine hem along the bottom. This has got to be the simplest top to make. It might look it too, unless you find some really nice material like this silky look print, and at less than $4.50 its not bad. This simple tube top is fine for wearing around the house, seeing as I don't have a strapless bra because this thing is unsuitable for 'outside' unless I get one!