 |
| a fleece blanky edged with crochet |
 |
| detail of crochet edge on a fleece blanky |
 |
| a fleece blanky edged with crochet |
 |
| detail of crochet edge on a fleece blanky |
 |
| small crocodile stitch purse |
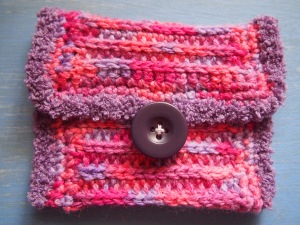 I just finished this small purse today, completing the purple fluffy edge. I had made this to give to a friend as a gift, but I've decided to make her something else instead! I don't know who I'll give this one to.
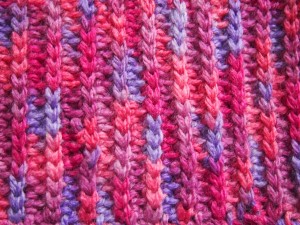 The other week while on youtube, I stumbled upon some videos of a stitch I didn't know. It was called the 'camel stitch'. It was interesting because it's supposed to resemble knitting, so I decided to give it a try. I made a rectangle that measures 18cm x 8cm of the camel stitch. Then I went around it with a border of 2 rounds of sc. I used the last of my berry pink yarn from Lincraft, and a 4mm hook. Then I folded it to make the purse and stitched the sides and the lip in sc, leaving a 5 ch loop for the button, using the fluffy purple yarn. I ended by stitching a large purple button on the front. Hey presto! A small purse!
 |
| variegated slanted shell cap for a 9yo girl |
 <<< This drink coaster is proving to be handy, I'm using it by my pc to sit my bottles of water on. This was with a 4mm hook and my thickest cotton, it's great for soaking up the condensation on my drinks. The pattern for this coaster is at Crochetspot.
 >>> I haven't made a crochet dishcloth before, so I started with this small one to test it out. It's about the size of a hand's palm, we've started trialling it in the kitchen, and so far so good. I made this basket-weave dishcloth with a 3.5mm hook and some thick aqua coloured cotton my mum gave me for my birthday. The pattern for the basket-weave stitch is at Crochetspot.
 <<< I had a go at this small flower from Crochetspot for fun. This was with a small hook and fine cotton and is currently hanging from my pc with the my purple premmie booties.
 I'm really pleased how delightfully light the lacy trellis stitch on this scarf turned out. Finished with a nice scalloped edge, it has a cute detachable flower scarf ring.
 The scarf took me a couple of evenings to complete while watching Battlestar Galactica on our tivo. I used some of the left over winter warmth yarn from Lincraft and an 8mm hook, following the 'plain trellis' lace stitch which is basically made up of 5 chains, on page 94 of Crochet Basics by Jan Eaton. It's a handy book so I extended my library loan on it for an extra month. The light purple yarn turned out beautifully I think, and I made it nice and long, too. The edges are some scallops I added to make it a bit more 'pretty', putting 7 trebles (US dc) in each one, 4 in the corners, each edge has 2 rows of scallops to round it out nicely.
 I still felt the scarf needed 'more' so I searched for a new flower pattern. I wasn't happy that the ones I know would 'match', so I found this flower on youtube by Teresa. She does heaps of very well explained crochet tutorials on youtube and has helped me with several things so I do recommend her. This flower turned out real cute, using a 4.5mm hook to make the shape more defined than the loose stitch in the scarf. By making a chain on the back, the scarf can be threaded through and held firmly, so this flower can be used as a scarf ring which can be removed.
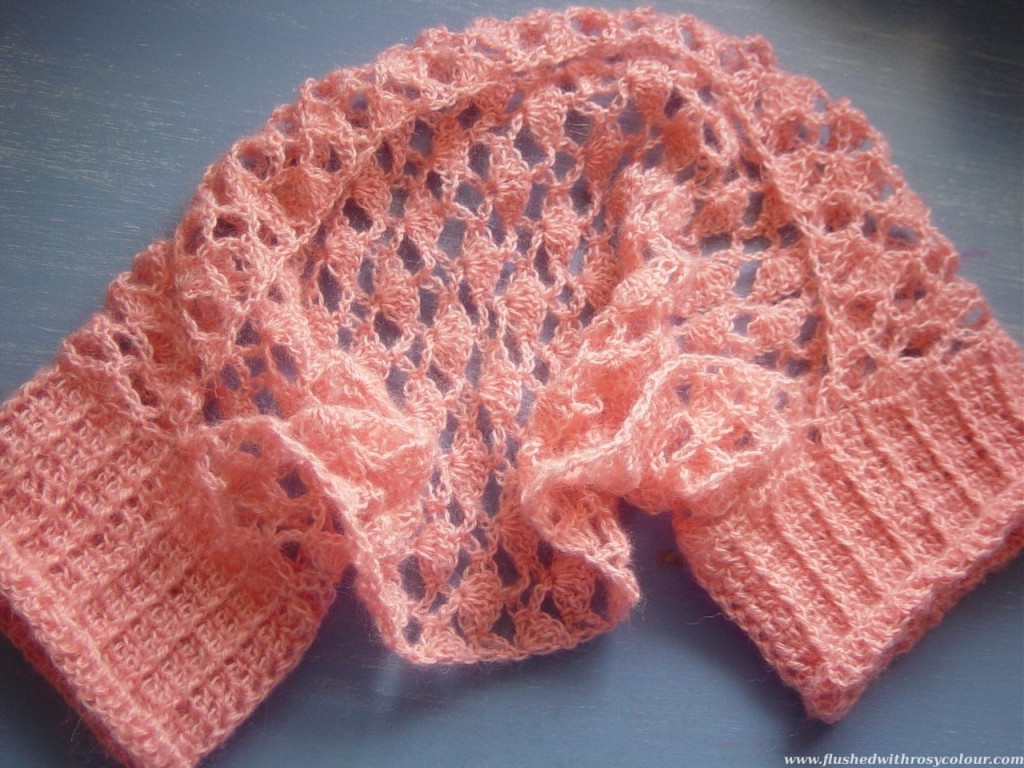 |
| a simple shrug made from imported Angora |
 |
| lace detail of my shrug |
 |
| folded shrug |
 I was very surprised when this beanie hat worked out so well, because I made up the pattern myself!
 Then I just had to make a big rose brooch to go with it didn't I? This is the 4th flower I've made using Rachel's pattern from Crochet Spot. But this time I remembered the pattern as I had done the Berry Pink one the day before. But I made this one different. There are 14 petals, and for the 1st 7 I did trebles (English db tr) instead of doubles (English trebles) to make the petals at the bottom bigger. The other 7 petals are double crochet (English trebles) as usual. It makes the rose more full at the bottom.
 2. 2 ch counts as 1st treble, treble front around the post of the treble below, treble into each treble (as well as front treble around each post) = 24 trebles
These are a pair of embroidered doilies my great-grandmother made which are edged with pink crochet. This is my post for this week's Pink Saturday hosted by Beverly @ How Sweet The Sound.
Here is another doily, this one my grandmother Beverly embroidered. That is my mother's mother. The fine embroidery is so lovely, I hope one day to improve my skill with this, but I don't think I will get it this good.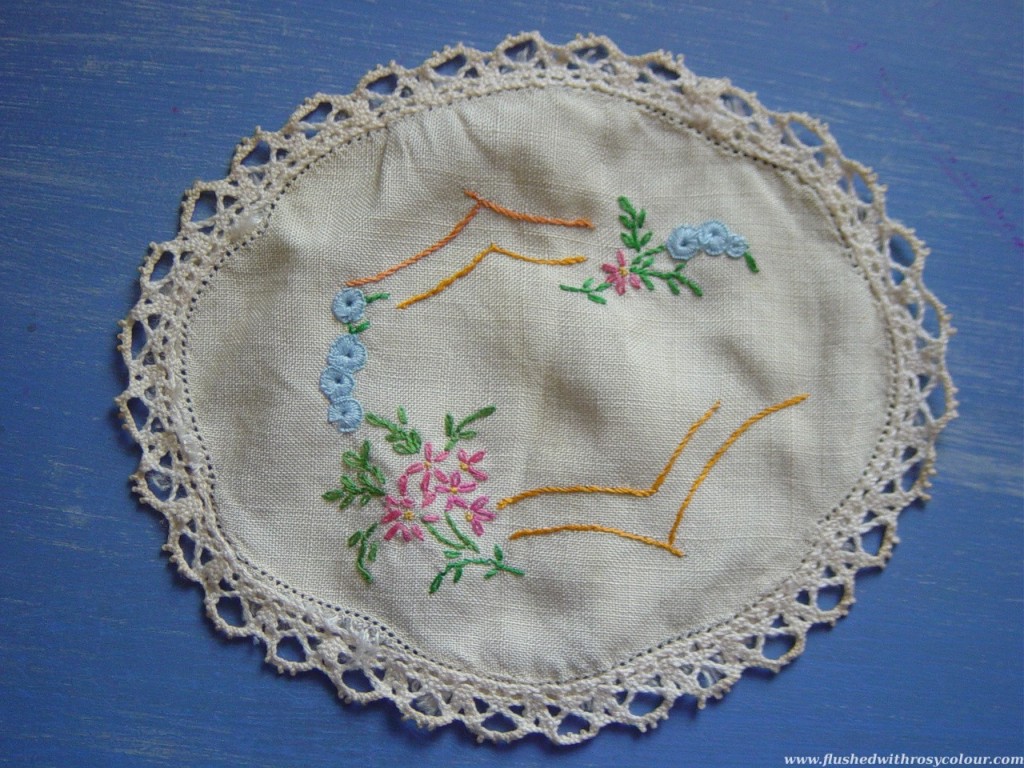 I hope you enjoyed seeing these two samples of our very special family treasures made by my great-grandmother, and my grandmother.
<3 <3 <3
Be sure to check out other pretty pinks @ Pink Saturday!
 It took me about a week to do this, only working on it while downstairs when David was cooking or watching TV, using a 5mm hook and some soft thin yarn so the end result is nice and lacy. I'm linking this post in with Transformation Thursday, a blog party hosted by The Shabby Chic Cottage.
 Edging
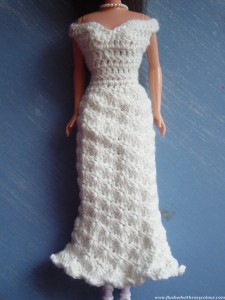 I'm very surprised how this turned out, how could it be that the bodice of this dress fits so perfectly? This is my post for White Wednesday which is hosted by Faded Charm. I'm also putting this in for this week's Transformation Thursday hosted @ The Shabby Chic Cottage.
 I used white dimples baby yarn from Lincraft, that's their cheapest baby yarn and it costs $1.99 for 50g. I started with the bodice as usual with all of these dresses I make, working up from the waist. When I got to the cleavage area I attempted a sweet heart neckline. I have attempted this before on a top I've made but undid it as it didn't work out. This time I did it over two rows and I am totally amazed at how perfectly it sits, I was certain it would be a little wonky.
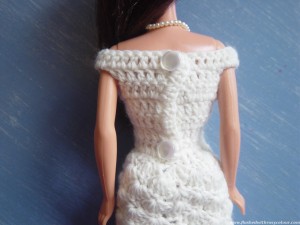 The skirt is the 5 cluster separated by english doubles in the cluster below pattern which I saw in a picture of a Barbie doll wedding dress, although that's the only thing I used from that pattern. I didn't plan for the skirt to be this shape at all, it just kind of happened. I forgot to increase more before starting the shell pattern so the skirt is more fitted at the top, so then I flared out at the bottom. It was nice
 but it needed something more so I finished off with a row of picots, and low and behold, they really wanted to sit up in the air like that! It kind of looks funny but it is a 'white dress' after all, so they are kinda of required by law to look a bit frilly and silly!!! lolzzz
 The last thing to do was to make something white for her hair so I just whipped this thing up. It's simply a row of English trebles (US dc) to allow room for ribbon to be threaded through, then some shells like the skirt on top of that.
  I didn't really know what I was making, this kind of just happened! I threaded the ribbon through then around again to form a loop that the hair could go through. Tying it tightly keeps her flyaway hair in place and every bride needs a little something white on the head, don't you think?
 |
| bolero shrug, pattern by Lincraft |
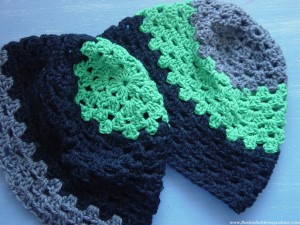 This is the post I planned for today's Transformation Thursday party hosted by The Shabby Chic Cottage, but who would have known that today we also have some special news to share? We have a 3rd member of our little family on the way or so the home test I did this morning says, so this family of three beanies seems especially appropriate!!!
 Basically, you start with a round of 6 clusters of 3 trebles (American doubles) each separated by a chain, the second round has 12 clusters, 2 in each space, each pair is also separated by a chain. Except for rows 5 and 9, you just put a cluster of 3 trebles in each space. For rows 5 and 9, put an extra cluster in every 3rd space, divided by a chain. I know that's not the right way to write a crochet pattern, but I can hardly read them myself, so that's my understanding of the pattern! It's pretty basic and very quick to do.
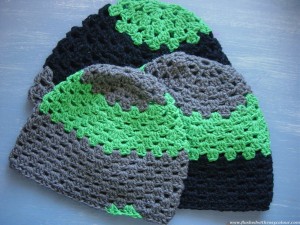 For the first hat, I used a 5mm hook which made it fit me. For the second hat I used a 6mm hook so the hat is bigger and fits David. To consolidate the pattern in my mind, I made a 3rd beanie just with left over green and grey as I'd run out of black. The pattern and the wool are the same, the only thing that's changed is the hook. For the smallest hat I used a 4.5mm, and it's a good thing I didn't use the 4mm like I nearly did then it would have been too small! I rather like how the odd two green clusters look at the brim, it makes it look quirky!
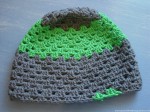 This was a great exercise for me to do. I've now found a great, easy and quick beanie pattern that I can memorise and I can simply change the size of the beanie by using smaller or bigger hooks! These three beanies were very quick and took less than a day to whip up!
 This set began with a shell pouch I made for my mum to say thank you for teaching me how to crochet. Now the set has grown to include more purses! This is my post for this week's Transformation Thursday which is hosted by The Shabby Chic Cottage. I transformed a ball of lovely and soft multi-coloured wool into these purses.
 I made the tiny purse without a pattern. I again used the shell pattern for one side then plain for the other so the shape would not turn out wonky. I then made a lid for the purse. I was inspired by the lid on the quick clutch at Crochet Spot but I did not follow the pattern. If I did I probably would not have had to pull it apart two times before I got it right on the third try! I also made up my own tiny button, although I might replace it with a proper button if this doesn't work out. This tiny purse took one morning to do.
 I completed the tissues cover over two days without using a pattern. I had been planning to make one with a slit down the middle but then I saw the tissues I had bought for this opened a different way. I made this tissue purse using the shell stitch on the front only and plain treble crochet on the back and sides so it would keep it's shape. I had trouble deciding if I would make a lid for it, but settled on leaving it open because the shell stitch made a nice wavy edge.
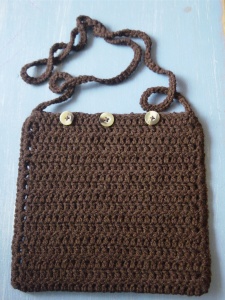 I've quickly made up another chocolate-coloured handbag in case my sister doesn't like the other brown bag I made for her. This is my post for Transformation Thursday at The Shabby Chic Cottage. The materials transformed for this was about 50g of yarn and three buttons. Using a 3.5mm crochet hook it didn't take long at all, maybe one afternoon.
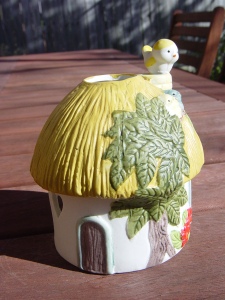 Last Wednesday I managed to get myself along to a craft workshop organised by the Women's Creative Centre in Greenslopes. I post every Wednesday to help motivate me to write about getting out of the house. Included are some photos of things I bought when David took me to the Lifeline shop at Mt Gravatt the previous Sunday, like this cute little garden charm we now have sitting on our garden outdoor table.
 It was a challenge to even find out about this craft group in the first place, as I've been looking on the internet for a while and hadn't found anything local. I only happened to be told about this group when I asked at the Kingston Butter Factory craft shop if they held lessons. After searching the net for "Creative Women's Centre" I found one short page as part of some listing site which had precious little information, just an email address. So I wrote to the email address and got sent a document that I couldn't read because I didn't have the software. Luckily, David helped me download it so I could read a little more. Last Saturday David drove me out to Greenslopes to see the place, as I wasn't going to go by myself without 'casing the joint' first! I plucked up the courage to speak to two ladies in the shop about going along to a lesson.
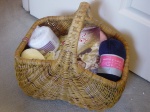 The lessons, or workshop which cost only $4.50, is not held at the craft shop but in another room in the shopping centre. It was nervous for me to walk into a strange room with strange people, its a pity they kept the window blinds closed. One lady went to close the blinds because she 'didn't want people looking at us'. I think that's a shame because it makes it harder for new people. I'm really glad I went to the craft group, and it went for two hours which was just the right length of time. I fit right in with my wonderfully perfect cane sewing basket which I got second-hand for an amazing $3 from the Lifeline shop last Sunday.
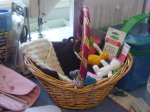
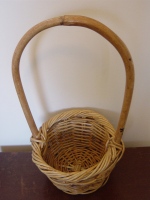 I learnt a new way of starting and ending my crochet work, which is great. I also talked with the instructor about tension and how to better judge which wool and hooks I should be using for certain projects. I had a go at an Irish Rose and I got a copy of the pattern, which is great. I also talked about the bolero I want to make, ending up changing my mind about which wool to use. There was a lot of inspiration for me to get going on several projects, I just don't know which to start next! I'll be going along again today, taking my patterns and cottons to ask about making doilies and to try and use up my pile of wool ... which doesn't seem to be shrinking yet!
 <<< There is no pattern for this finger puppet, it is merely one of my early attempts at making a crochet toy. I decided to pop a little dress on her, along with a matching flower headband. It was after I embroidered her face that I realised she was back the front. Oh well, her backwards legs are hidden beneath the skirt so it doesn't really matter. She is just for practice after all, and was fun to make. You can see her before she was decorated in my Five Tiny Teddies post as one of my early attempts at making a crochet toy. I think she makes a great companion for my Octopus Boy!
 >>> When I asked David what he thought I should make next, his idea was for me to make a lovey-dovey blanket for the lounge, one with a heart motif. I've seen lots of square heart motifs so went back to the net for some ideas. One I saw was a cross my heart granny square. I didn't use that pattern, just looked at it for the idea. I think I might have a go at making a granny square all in one colour then out-lining just one of the four hearts in a contrasting colour using chain stitch.
 <<< I was feeling brave so was ready to give making a doily another go. I found a simple doily diagram at a page of beginner crochet doilies. I hit a snag at the 10th round so took it to the Women's Creative Centre to see if I could get some advice on it. Apparently my tension was too tight and I need to use a bigger hook, so after we unravelled the mistake we fastened this one off to make a small doily. It's just the right size to put under the phone that is sitting on my piano.
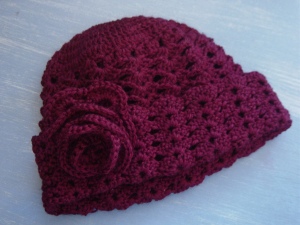 This pretty wine-coloured beanie was not planned and has ended up being a small adult or teenager size. I wonder who will wear it?
 I don't think I'd ever wear a hat with a big flower on it, but this is just begging for one! I had a go at the rose pattern from Crochet Spot. A big thankyou to Rachel for sharing this free pattern on her site, I'm really happy with how this turned out! Because I wouldn't normally be keen on wearing a big flower on a hat myself, I've made the rose detachable by securing it to a safety pin. This way, you can wear the beanie with or without the flower, you could even pin the flower to other things like a bag.