Showing posts with label Thrifty and Frugal. Show all posts

Friday, January 20, 2012

My Ten Essential Baby Items

We're not planning on having another child, but if we change our minds, these are the things I'll need to remember to buy next time. It won't be before two more years because I don't want two in nappies at the same time, so I'm selling my baby things now because I don't have room to store things we probably won't need. If we change our minds I'll just buy the few essential things we need. At least now we know what to buy, and what not to buy!
white bassinet on wheels
There are lots of pages on the net that list the 'essential baby items' you need as new parents. On all the ones I saw they always listed many more items than you actually need, it's almost as if these sites are sponsored by these products and just want you to buy extra stuff! Having a baby is worse than a wedding in this way, they see you coming and try and sell you all sorts of junk you do not need. I want to list here the things we think we do need, just in case we change our minds about another baby.

1. convertible car seat
This of course is a no brainer, they say they won't let you leave the hospital without one in your car. Although no one checked our car when we left the hospital with our son! The question is, do you get a convertible or one with a detachable baby carrier? We got a convertible so it will last us for 4 years, these things are pretty expensive! The detachable baby carrier would be really nice but you can only use it for about 6 months so its very expensive, although you can hire them for a lot cheaper.

2. bassinet on wheels
I just loved my love n care bassinet (sorry for the free advertising there). I got white so it's nice for both a baby boy or girl. It had wheels so I could move it easily around the house as I needed, you can also detach the bassinet from the stand which I rarely did as I didn't want to wake the sleeping baby while I did it. You only use this for a few months though, until they can sit up or roll over. Our son was premmie, so we got to use ours for a few extra months than usual. It makes it so much easier to put your baby down and pick him up, if he is in a little bassinet. If I have to buy another one, I'll just get it second hand from ebay.

3. convertible cot
Again we got white, which is good for a boy or girl, we got the 3 way kind which can not only be used as a toddler bed, but also as a little sofa. We will get years use out of this cot even if we only have the one child.

4. high chair with wheels
You don't need a high chair until they are 6 months old, but I must remember the next one we buy has to have wheels! If we have to buy another one, it will be a good one as you use this for quite a while.  I'm always moving Thomas around in his high chair, but the one we have now is a cheap plastic one from Big W without wheels, so I have to lift it to move him around. Also this one is not easy to clean even though it said it would be, but I think all high chairs are probably hard to clean. A baby eating is a very messy affair!

5. reversible, light weight pram
I had a romantic vision of carrying my baby around in a sling all the time, so we bought 3 slings. We weren't sure we even needed a pram and waited until after he arrived to see. But our son was premmie and too tiny for the slings as it turned out. I still remember the relief I felt the day we finally bought a pram and were able to go shopping without carrying him around. We got a wonderful reversible pram where you can choose to have your baby rear facing or front facing. We had him rear facing for most of the first 12 months, it was so nice to be able to see him sleeping happily in it while we had some time out at the shops. I practised folding it up and putting it up many, many times in the shop before we left so I was sure  I could do it. It's not too big to be too clumsy, just big enough to do the job. The only difference I would make would be to have more room underneath for my bags, and a drink holder in the handle.

6. a wooden rocking chair
I was lucky enough to borrow an old fashioned, wooden rocking chair from a neighbour. This turned out to be a god send as it was the only thing that would help my baby to sleep for many months. Surprisingly, I found you don't need one with padding, so you can rule out the expensive upholstered breastfeeding chairs with stools. I was rarely in the chair for very long, as my baby nodded off so quickly, it worked so well. An old, second hand one would work just fine.

7. baby bag or similar
I resisted buying one of these for a lot longer than I should have, using a simple bag crammed full of the stuff you need to carry around with you when you have a baby. I thought they were unnecessary. Reality taught me that this is a very handy thing to have, and I love the cheap one I picked up from K-Mart. It has a little change mat that folds out, but I have only used that once or twice. It has compartments that make finding things easier, so a similar bag would be fine, just a one compartment bag was not good enough. Also, it has a good handle with extra padding which is important because it can get heavy and sometimes you are carrying it, but thankfully not too often.

8. portacot and portable highchair
Thankfully these things have been borrowed, and were useful when we had to do the obligatory visiting rounds of the extended family at Christmas. The portacot is also now getting used in the office as an extra playpen. I can pop him in there if I don't want him crawling around in the pc wires.

9. pull apart play pen
This has also been borrowed, and is useful pulled apart and set up in different places in the loungeroom to keep Mr Crawler away from the TV. Also, we use it to close off the loungeroom area when I don't want him in the kitchen.

10. safety gates
We are just using these now as my son is big enough to crawl around and explore the whole house. These are especially important because we live in a townhouse with stairs, so we have them set up to stop him from escaping up them without us being right there.

And I'll tell you what you don't need, you don't need a change table, nor expensive matching furniture. I just use a $20 plastic change mat on top of what will become Tom's study desk. We're keeping one sling for when we go to the markets which is a place you do not want to take a pram, despite some people insisting on it. The other two slings I'm trying to sell as we've never used them. You don't need fancy baby shelves or baby drawers and you certainly don't need to paint your nursery! How ridiculous is that, painting a room especially for a baby. Paint your walls off-white once a decade or two, save your time and money, and it goes with everything! I bought some small and cheap $2 baskets to keep his clothes in, which I can move around to his change table, laundry and some old shelves I have in his room. I also keep some toys in these baskets as I got half a dozen and they've been really handy.

A bouncinette was handy, but only usable for a few short months. When he flipped it over it was time to put it away. And when they can't crawl you can just put them on the floor. I don't think we really needed the play mats either, certainly not two, you can just use any rug or pillow. Although the a-frame was used for several months before he could crawl so maybe another one of those would be good. We were given so many clothes, it was unbelievable, we didn't buy any clothes for months and months, and when we finally did we didn't really need to, we just wanted to. And the same was for toys. Whenever possible I choose unisex colours, so the clothes and toys can be recycled for any baby. I think that's much better for the environment, it increases the chance of things getting used by another baby. Maybe it will be ours!

Thursday, January 19, 2012

The Wooden Blocks Pa Murphy made

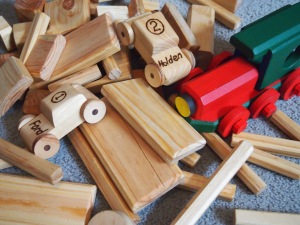
Here are some simply delightful wooden blocks, and a special red and green wooden train made by Pa Murphy as a gift for Thomas!
the wooden blocks Pa Murphy made
Isn't this collection of wooden toys just lovely? Its so much nicer than the mass produced blocks you buy from the store. All the more special are these toys because they were made for Thomas by his grandfather. These are something you would want to keep and treasure, and hopefully pass on one day, because no one has anything quite the same as these wooden toys. I'm not sure where the wood came from originally, but I think these are at least some what environmentally friendly because they were made from scraps of wood from Pa Murphy's workshop. For something like this you really shouldn't buy any wood especially, as any tiny bits of left over scrap wood of any shape will do. These were lightly coated with vegetable oil so a very nice, environmentally friendly toy for Thomas!
two small wooden toy cars by Pa Murphy
Another reason why I like these toys is because they are a classic and timeless toy that doesn't have the branding you see everywhere nowadays. As much as possible, I'd like to help Thomas learn the true value of things, and not according to if they have some recognisable logo or image on them, as hard as I know that is going to be!

Definitely an addition to my collection of hand crafted family heirlooms! Thankyou Pa Murphy <3

Wednesday, October 19, 2011

Small Cream and Wine Pentagon Lap Rug


I'm not sure how useful this item I finished yesterday will turn out to be, it's very small due to the amount of this wool I had. But it was so nice to make, I had to use it all up to make this small rug. It could be used as a baby rug, or maybe a small lap rug.
star shaped lap rug in cream and wine coloured acrylic
I've known for a while, I'd really prefer to make items using yarn that is locally grown, spun and dyed. This way, you can reduce your carbon footprint - its better for the environment if we use products sourced locally. Before I saw this yarn, any attempt to source something like that was way over priced in my opinion. But I found some assorted blends that were on special in Lincraft, which were from the Wangaratta Mill Shop. This may include synthetic fibres, so they are blended with local wool, but spun locally. I even found a local spinners site that sells drop spindles if I ever buy some raw local fibre.I've already made a beanie for Thomas using a sea green yarn from the same Wangaratta package.
the star lap rug is the perfect size and shape for our rocking chair
This thick yarn has a nice, soft feel and it was a pleasure to make this small rug. But it is a bit small to be very useful, as I only had 3 balls of this type. I used a 7mm hook to make the stitches large and the rug quick to make up.

In other news, I sold my first item on ebay today, my old queen size mattress! We got a new mattress after Thomas was born, and my old mattress has been taking up room and had to go so I started bidding at .50c hoping someone would come and get it, and they did! The experience was a positive one, so I hope to sell a few other things from around the home that need to go. Who knows, maybe I can sell some crochet projects as well?!

Saturday, October 8, 2011

Colourful Scrap Rug for a Toddler

This rug started off as a pile of scraps given to me by my mother last year, and is now the second rug like this I've done. I'm hoping it will be a useful rug for Thomas.

I really enjoy making these rugs. The material is not expensive, you can pick it up at op shops or find it in your own craft cupboard, and it's satisfying to turn balls of left over yarn into something that can actually be used. I enjoyed making the first one so much I called it a 'therapy rug'! There's no pattern to the colours, the only rule is whenever I change yarn it's a different colour to the last. It's therapeutic because there is no stress at all about the design, it just comes down to a decision at the moment it's time to pick a new colour.  And the idea of these rugs is to use up all of that left over yarn, that's why there are not finished rows, rather they run into each other like spirals until the yarn runs out. Then I choose a contrasting colour to continue. This way there are no little bits left over at all.  That's why this is much better than making a rug out of small granny squares sewn together. And I find sewing all those squares together at the end very tedious! For this rug, I used a 4.5mm hook, so not too small so it doesn't take too long.

The first thing to do is sort the balls of left over yarn according to size. The very smallest ball of yarn is the one you want to start with, next choose a contrasting colour that looks to be amongst the smallest of the balls left. I've even resorting to weighing the balls on a small kitchen scale! This way you get the spiral effect. I'm rather proud how this one turned out, the pattern is quite nice considering there was little planning in it. It's good to know I have something useful to do with all those annoying left over balls of yarn!

Friday, December 31, 2010

To catch a dream (three small things)

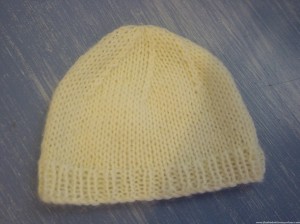
The last two weeks have been surreal to say the least, like a walking dream or day-mare. Some thoughtful soul gave this special beanie to David to give to me, it's what Thomas was wearing in the photo that was taken on his first day. Someone even printed up the photo so I could have it in my room. I didn't see Tom until the second day as I left the ICU to go to the maternity ward. I clung to this special little yellow beanie during my stay while I was away from my baby, I even imagined it smelled like him! I give thanks to the person who made and donated the beanie, and to the person who took the photos of Thomas wearing it, and also to the person who thought I might like to keep it when our baby went into the humidicrib and no longer needed to wear a beanie.

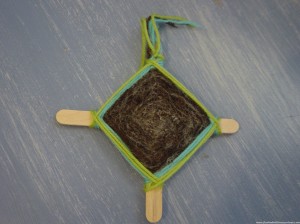
While we were in the maternity ward, on the meal tray was a paddle pop stick. We guessed they were meant to be for stirring tea and coffee, which we thought was a waste of wood. Imagine throwing all those not needed paddle pops away? What a waste of trees! So I collected a few and made some into dream catchers to pass the time. When we left the maternity ward and David went home to sleep, I told him to take the brown dream catcher to place above his bed. It is meant to be for good luck in catching your dreams so they can come true. I learnt how to make these from school, you just weave wool in and out, around the sticks.

Saturday, November 27, 2010

Three Small Things - soap saver, dishcloth, square motif

<<< I don't really understand why I woke one morning thinking I needed to make a soap saver for the laundry soap, but I did! I don't usually use these things, but the soap I have in the laundry at the moment was a gift and really needed one as it was making a mess. I didn't follow a pattern as it's a pretty basic shape, but I did look at crochetspot and google for some inspiration, and used my thick cotton and a 4mm hook. I got the idea of continuing the first round all the way round the bottom of the first row from the free pattern at crochetspot, there are also pictures and patterns of other soap savers there. I've tested it out, so far so good. The plan is, when you get the little shards of soap left over at the end you keep them in the bag so you don't waste them. Very thrifty, I like it!

>>> I have been working on a spiral dishcloth using the same aqua cotton as my first cotton dishcloth, but I'm not happy with it so it's currently in my pile of unfinished projects. I bought some 'amalfi' yarn from Lincraft for $4, which is 100% cotton. I think the choice of colours look 'dishclothy', if there is such a thing, so chose the aqua greenish one. This time I made a bigger version of the basketweave dishcloth, as David asked for a bigger one. This used most of the 50g ball, there isn't enough left to make another one this size. Consolation is that this cloth can be washed and reused for quite a while, so I can get my money and effort's worth out of it. This didn't take long to do, I used a new bamboo 3.5mm I thought to try for fun. I found working with the bamboo hook that it stuck a little, and is not as smooth as using a metal one. The final product measures 22cm x 18cm.

<<< I tried this square motif, I'm thinking of using it to make some baby play cubes. This coaster pattern is at crochetspot.

Monday, October 25, 2010

How to have a simple wedding

David and I decided early last year that we would get married, after he romantically proposed during a holiday at a place called Secrets on the Lake in Montville. The how and when of it was all up in the air. The thought of organising a wedding was very daunting for both of us as we have become real hermits in recent years! But it was pretty obvious to us from the onset that whatever we did, it would have to be very simple and low stress!
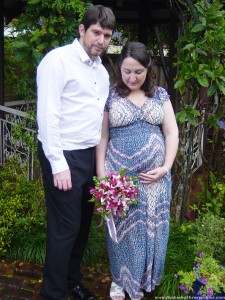
By holding the ceremony in the cute and quaint backyard garden of a local celebrant, and only inviting parents to witness it, a relaxing lunch for 6 topped off the day and rain by no means dampened the mood.  The day was all about David and I celebrating our love and making our marriage official, skipping a lot of traditions but keeping the few that were meaningful for us. Below I outline the details of our little wedding for future reference, and how we organised it in about 6 weeks and for a cost of less than $1200 (if you don't count our rings!).


Our major purchase
The most expensive things we bought were the rings. We got those about 18 months ago when David's mum Beverly worked at Michael Hill so we could get a discount. We decided we could afford to splurge on these so got ones we both really liked, as these were the items that would last forever. We even got David a diamond engagement ring, as I feel it's very important that he get treated like a 'prince'. Getting married should not be all about the bride being 'princess for a day', imho. We got titanium and diamond engagement rings and plain titanium wedding bands to match, once made these can not be resized but we preferred it to white gold so we wouldn't have to get it coated every year. Soon after getting them we realised we had no idea when we would make our wedding official. It seemed a shame to not wear our wedding bands for an indeterminate amount of time, seeing as we were otherwise married and living as man and wife. So we put our rings on each other one night at home alone soon after buying them, and that was about 18 months ago. I usually wear my diamond ring when leaving the house, and David wears his on a neck chain, as he can't wear both at the same time on his left hand and it doesn't fit on his right hand.

What's in a name
Now I'm pregnant we realised life would be that little bit more convenient if we had that same family name in time for our baby's arrival. Of course, you don't have to be married to have a baby, and the wife certainly does not have to change her name - I didn't for my first wedding. But that was a lifetime ago and I really do feel like a different person now with different motivations. My sister has 4 children but did not marry their father for a long time. But recently she said it was just too inconvenient and too annoying for her to have a different name to her children, so they got married in a very simple family ceremony early last year. I took that as a cue and decided that I should do the same before our baby came.

The first thing to do
As winter drew to a close, the spring weather turned beautiful and inspired us to think what a great time to get married so started to make plans. We short-listed about a dozen local celebrants, which took us a while, but by the 7th September we were ready to start emailing them. But we had to check with David's mum when she would be back in town as she had told David but he'd forgotten. It takes a month and one day's notice to put in the form of intent to marry, as it turns out Bev had already arranged a trip with Michelle for the 1st of October so it wasn't meant to be. David and I went ahead and organised our wedding by emailing the celebrants, having little idea who we could ask to be our witnesses. We simply settled on the most local celebrant who replied to our email the quickest. It turned out Joy Jensen was a lovely lady, gorgeous with her manner of speaking and poise. She turned out to be the perfect celebrant for us.

The matter of witnesses
Every wedding needs two witnesses, if you elope you can often ask staff members to witness it. Joy offered to supply the witnesses, but by that time I'd already asked my mum. Our original thought was simply to invite the two mums only, that way hopefully the rest of the family wouldn't be too offended. For me, the matter of witnesses turned out to be the most unnecessarily stressful part of organising our wedding. We purposefully wanted something simple to avoid all that. We should have just had two witnesses that were not in the family at all, as I just felt too obligated to 'do the right thing' by every one else, especially the parents. But like all weddings, it pulled together beautifully in the end. We had a perfect wedding where both our father's came and signed the registry which was simply gorgeous. My mum and David's step-mum helped during the ceremony by holding our rings, which was really nice and special.

Our reception
For our celebration we went for lunch afterwards at one of our favourite places called Fleet Street in Indoorpilly. It was a bit of a drive away, but once we got there we knew it would be perfect. I worried the whole time how long everyone else had to drive that day, only coming for a day trip 2 or 3 hours away, then having the return trip. The other option was Yum Cha at the Landmark, which we love doing and would have been a lot of fun, but even if we made reservations it's such a popular place, we probably would have had to wait to be seated,  even on a weekday. So Fleet Street it was, and at one point we had the place to ourselves, so we could have a leisurely lunch and really enjoy the food. David and I insisted on paying for the lunch, for only the 6 of us it was considerably cheaper than a traditional reception. We even took photos of the deserts for a laugh to share on Facebook.

Including the rest of the family and friends
A month before the wedding we created a Facebook group called 'David and Teena's Virtual Wedding' and invited people from our friend's list. We kept the date a secret for as long as possible, simply telling everyone it was coming up. A week before I announced the date, and joked that our virtual gift registry had just one item on it, a toaster! We asked our friends and family to post 'virtual' gifts of toasters or whatever they wished on the page. We got a few pictures of funny and pretty looking toasters, as well as a punch set, which was fun. I was careful to point out that for a 'virtual' wedding, only 'virtual' gifts were appropriate, so I was very glad that almost everyone respected that. When we got home after lunch, David and I quickly chose about a hundred favourite shots to download immediately to Facebook to share with our friends and family. This was our way of having a virtual wedding, so we were able to invite and include everyone on our special day.

What's in a date
It turns out to be convenient later on if you choose dates carefully. David is not one likely to forget such a thing, but making the number easy to remember helps make life that little bit easier. We wanted to get married in October, or possibly early November. It being 2010, I knew the 10th of October would be especially lucky. The problem was it was a Sunday and it would be hard for me to get my hairdresser to help me on a Sunday. Then there was the option of the 20th of October, I was surprised I didn't realise earlier what a neat number it was (Twenty Ten Twenty Ten 20.10.2010). That was a Wednesday so I could get help with my hair, which I really wanted as my hair would have been a real flop if I tried to do it myself! I did have a problem with the hairdresser, as the first couple I wanted let me down, then the salon I had wanted screwed me around so much I went somewhere else. So it was the 5th hairdresser that did it on the day. I knew she would do a good job, but she has a problem of running chronically late, which she did do on my wedding day but it was no surprise so it wasn't a huge disaster. Just would've been nice if we started on time. Maria, a beautician at Amaroo Essential Therapies, helped me with my make-up, which was fun.

What to wear
I did try on some ivory coloured wedding dresses at a maternity store, but they just weren't right. I also tried on some expensive dresses which just looked silly. In the end I found a really nice simple maxi print dress at Katies for a bargain price! The good thing is, I can wear it again and there is room for baby to grow. And blue is good luck!  I've been married before and have done the whole 'white wedding dress' thing, so I didn't feel like I had to. But David hadn't been married before, and I wanted to make an effort for him. I didn't want him to feel like he missed out so I tried to look as nice as I could manage. When our relationship started to get more serious years ago, we were joking about getting married one day and that we would wear blue. I really didn't think at the time that it would come true, I was very much of the mind of 'wait and see'. Now the four years is up and we are happily married and all has turned out well. We decided David should wear the white instead so found him a very smart white shirt from Myer.

Whether the weather's fine or not
We were thinking to have the ceremony in a park, but Joy offered us her backyard. I was doubtful at first but it turned out to be very simple and easy to just do it there. She has a very cute garden with a gazebo and it was perfect. Although the weather forecast was fine, we always had the option to stand under cover if it was raining. If we went to a public park it would not have been so good, especially if it was raining. The two days preceding our wedding were beautiful and fine, the forecast for our day was partly cloudy and otherwise fine. But when I left the beautician it was pouring down with rain! It was fortunate indeed that we had kept that 'in case it rains' in mind when deciding where to hold the ceremony. In the end, the rain caused us very little inconvenience at all because of that, and everyone kept telling me 'rain on a wedding day is good luck'. And I think it was ...

Taking the photographs
We thought to get professional photographers, mainly because I didn't do that for my first wedding and regretted it. But they wanted waaaaay too much money for something that would be all over in 30 minutes! And then you don't own their images, can you even put them on Facebook? We all own digital video cameras, so decided we should do it ourselves! With only the 6 of us and Joy there, how many photos were you going to need to take? The minimum photographer's package we saw was something like 4 hours which was laughable, we just didn't need that. In the end, we took our own photographs, everyone had a camera and away we snapped. After lunch we were able to download them to our computers and select the best 100 to share on Facebook with all our family and friends who missed out on being there. It turned out to be the best way for us.

Beautiful Flowers
I was pretty sure that if I was wearing a dress that didn't look like a wedding dress, I needed a bouquet. Just to help make it look a bit more like a special occasion. That turned out to be a bit of a drama, unfortunately, because when I went to the florist I had in mind with less than a week's notice she literally freaked! I swear I could see the whites of her eyes when I made such an outrageous request so I walked out of her shop. I rang my mum that night and she told me not to worry at all, that she would ask her florist friend, Wendy at Wendy's Flowers to help. The professional bouquet she prepared was perfect. David's father also brought a lovely bunch of home-grown roses and lavendar from his garden, and my high school friend secretly sent a bunch which arrived on my doorstep as a surprise! So in the end, there was plenty of flowers, even without worrying a stressed out florist who couldn't handle the pressure!

So with the purchase of wedding rings well out of the way 18 months before, the preparation of our official wedding took just 6 weeks. My initial guess was it came in under a grand, but after adding it all up, including several trips to the beautician, it was just under $1200. But it wasn't about the money so much as keeping it simple and low key. In the end, the day was about David and myself celebrating our love and making it official legally. We had a lovely day, skipping a lot of traditions but keeping the few ones that were meaningful to us.

Saturday, September 4, 2010

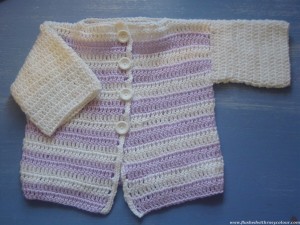
Purple and White Stripes Baby Jacket

How many of these things am I going to need? I do not know, but I just feel like making a bunch!

My baby is expected in summer, so I really don't know how many of these will be worn if at all! I guess if they don't get used they might make nice gifts for someone else. The jackets I've been making are different sizes, so maybe some will fit for the first winter. I've already started on my next baby jacket which is white!

This one was easy and boring to do. If I use this pattern again, I'll try and use a more interesting stitch. I think the stripes saved me from absolute monotony! This simple baby set pattern comes from the Lion Brand Yarn website, to access their free patterns all you have to do is register. This is the same site I got the baby socks pattern from.

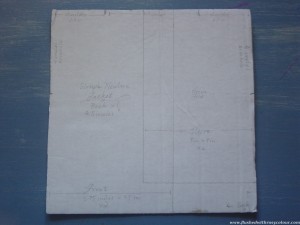
I drew up this simple pattern on a square piece of card. This way I could do it while watching tv, when I prefer not to have to read patterns. The square board is as big as the back of the jacket, and I've made markings for the sleeves and front sections. This pattern really was very straight forward and easy, all you have to do is make 5 rectangular shapes and sew them together. But instead of making up the sleeves separately, I just worked them right onto the made up vest in rounds.

I used my left over purple and white dimples yarn from Lincraft, I think I used the 4mm hook. I chose some very cute recycled flower buttons, and gave them a quick scrub with Earth Choice detergent and a recycled toothbrush so they came up just like new.

Although this is newborn size, it looks a bit bigger than that to me.

<3 <3

Wednesday, September 1, 2010

Simple Blue Pouch

This was very easy to whip up, it took me just over an hour using some nice blue wool from my left overs bag.

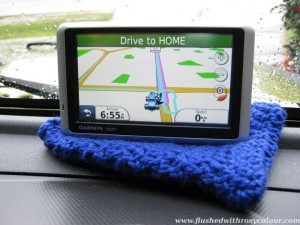
An internet friend asked me if I could make a pouch for his GPS which measures 125mm x 76mm x 16mm. Usually I don't sell what I make, preferring to make gifts for family, but I figured that this wouldn't be too hard so gave it a go.

My pattern for a simple pouch
1. ch 18, treble (US dc) in 3rd ch from hook, tr in ea chain to end, ch 2, turn (16 trebles)
2. treble in each treble, ch 2, turn
3-25. continue row 2 until piece measures 25cm long (about 25 rows)
26. fold at 12th row, making a base of one row, 3 dc (US sc) in ea space down the sides joining two sides together, last space has 1 dc then 2 dc in base row, dc in bottom of ea treble of row 12 to form bottom ridge, dc up the other side like the first side, ch 36 (long enough to be twice the width to form draw string).
27. cut the yarn and thread through first row of trebles, sl st in 1st ch to form draw string, fasten off
LoL! well that's my pattern as I understand it, I don't know if anyone else will!

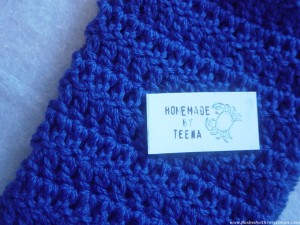
I wrapped it up in some recycled tissue paper with a tiny homemade tag and posted it off to Western Australia! It fit inside a prepaid envelop which only cost $1.40 which I thought wasn't too bad at all.

Today these fotos came back from my friend in W.A. I'm very pleased to see the GPS actually fits inside. Really, why wouldn't it? Oh, I don't know, I thought I might have made it too small!!

I'm glad something I made so simply is a useful thing!

<3 <3 <3

P.S. Thanks to Louis for the fotos featuring the GPS! <3

Sunday, August 22, 2010

Green Hexagon Baby Jacket

I'm quite pleased and surprised this one turned out so cute!

I used some green craft wool my mum gave me for my birthday, I've got quite a lot of that colour left. The darker green was a small amount I have in my scraps bag, as was the white. I'm not sure if that dark green is real wool so I'll have to wash this one carefully, which might turn out to be too inconvenient later on. But this jacket was a bit of a 'practice' item for me to try, recycling some old buttons that I think look really cute, so making this jacket turned out to very thrifty and frugal indeed!

I used the hexagon jacket idea which I've tried before. I've since found another blog that explains the hexagon jacket pattern in more detail, I did the bottom edging and collar following that blog's pattern. The 11 rounds of green used 60g from my 100g ball of craft wool.

Even if this jacket doesn't fit my baby, it will be cute for a toy teddy to wear!
<3 <3

Saturday, July 24, 2010

A Pink Outfit for a Kelly Doll

I just have to show again a closeup of this pink outfit I made for a Kelly Doll. I just think she is soo cute!
Here she is with her friends ready for a fun trip to the beach!
I found these dolls at a second-hand market and cleaned them up. I used crochet cotton I bought second hand from thrift shops to make their clothes.
This is my post for this week's Pink Saturday hosted @ How Sweet the Sound.
Be sure to check out other pretty pinks @ Pink Saturday!
<3 <3

Thursday, July 22, 2010

Four Little Lost Angels

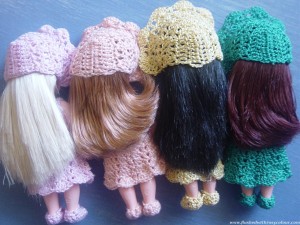
As I was taking them home from the market, I knew I would have so much fun cleaning up these second-hand dolls and dressing them in new crochet outfits, perhaps even with angel wings! In the end I settled on summer dresses complete with pretty bonnets and mary jane slippers. These tiny Kelly dolls are just 4.5 inches tall.
pretty outfits for four Kelly dolls
I first found the little blonde in a washing basket full of toys. The stall holder was busy selling a set of Dora dolls, so when I said I would like the tiny doll, she dismissed me saying I could have it for free. Well, I wouldn't take something so special for free, it just wasn't right! Her hair is in excellent condition, and she even has two near new shoes. I was thinking to give a dollar, but when we looked in David's wallet a 50 cent coin was sitting on top so I grabbed that and pressed it into hand of the man that was helping her with the stall. I think it must have been Karma, because later on at another stall, I saw the three other dolls, all with different coloured hair and all just 50 cents each! It was so uncanny it must have been fate that these four tiny Kelly dolls should meet in this way!
how I found these 4 dolls at the market for 50 cents each
Crochetting some clothes for these dolls turned out to be a lot more challenging than I first anticipated. I made several attempts before I ended up with a dress I was happy with. At first, I did a smaller version of the Barbie doll dress I usually do, using baby yarn, but I decided the result looked too bulky. Later, I made matching knickers for that dress using a free pants pattern I found on an old blog, again using the baby yarn. I made a top using baby yarn and a free ruffle top pattern, but I did not use the right size hook and yarn, and it didn't fit. The problem was, I was using baby yarn when I should have been using fine cotton thread.

At first, I really didn't think I would need to follow a pattern for this project, but I did. I had a little success with a free dress pattern @ Crochet Crafts by Helga, using fine cotton and 1.5mm hook as recommended. But I didn't like the skirt, I thought it was too short so added more rows, which then made the result bulky. Finally, I made a dress I liked using the bodice from Helga's free pattern, but adding my own skirt. Using the same cotton, I made some panties using Helga's free pants pattern,shortening the legs by making just one row of sc. I stitched up the gap at the back of the pants as I don't think it needs a button, pull on pants are fine for this small doll. I then made matching pull on panties for the other dresses I made, one each of pink, green, apricot and yellow. Each dress has one button on the back of the bodice.
matching beach outfits for four Kelly dolls
Because you can't see the panties underneath the dresses, I decided the dolls needed some little tops to show them off! Maybe these outfits can be PJs or summer beach outfits? The tops are just the bodice part of the dress, with every stitch in the bottom frill incr. The tops looked a little plain, so I crochet a tiny heart, clover, flower and sun to attach in contrasting colours to the front, to make them look more fun (hopefully!). The flower is just clusters to form 5 petals, and the sun is a round of 15 trbls, with a 2nd round of a picot in every 3rd trbl. I used the heart and clover patterns explained in previous posts.

Then I made them all matching Mary Jane slippers with my own made up pattern.

Mary Janes for Kelly Dolls by Teena Sutton
using 1.25mm hook, fine cotton
1. ch 7, trb (US db) in 3rd ch from hook, 2 trb, 2 db (US sc), turn
2. ch 2, trb in next 5 trb, 3 trebles in the stitch space at the toe, go round to the other side of the shoe and do trb in ea 5 trb, 1 trb at the heel, sl st in 1st trb of this round
3. ch 2, db in next 2 trb, sk 2 trb, trb in next 3 treble to form top of toe, sk 2 trb, db in next 3 trb, sl st in 1st db  of this round
4. ch 8 to form ankle strap and sl st in 1st ch

after some hair care the bonnets fit perfectly
Finally, I finished the outfits with bonnets, again with a pattern I made up myself. When I found these dolls, their hair was mostly 'fly-away' and a real mess. After shampooing, conditioning, air drying and finally smoothing with baby oil, their hair came up very nicely indeed. The pretty bonnets help keep the hair in place.

Pretty Bonnets for Kelly Dolls by Teena Sutton
using 1.25mm hook, fine cotton
1. chain 10, trbl (US dc) in 3rd ch from hook, trb in ea next 6 ch, 5 trbl in last ch which is the bottom of the last trbl, trb in the bottom of the other 7 trbl, turn
2. ch 2, trb in ea trbl, extra 3 trbl in last trb, trbl in bottom of each trb, turn
3. ch 2, sk trb, (3 trb in next trbl, sk trb, trb in next, sk trb) twice, 3 trbl ea in next 3 trbl (9 trbl), sk trb, trbl in next trbl (sk trbl, 3 trb in next trbl, sk trb, trb in next) twice, turn
4. ch 2, (sk trbl, 3 trb in next trbl, sk trbl, trbl in next) thrice, 3 trbl in next, trbl in next, (sk trbl, 3 trb in next trbl, sk trbl, trbl in next) thrice, turn
5. ch 2, repeat (sk trbl, 3 trbl in next, sk strbl, trbl in next) seven times, each cluster of 3 is in centre of cluster below, turn
6. repeat row 5 except don't turn, ch about 12 or enough to be long enough to form the chin strap, measure, slip stitch into the other side of the bonnet to form chin strap, don't turn
7 (bonnet frill), ch 2, repeat the pattern from previous row, except each cluster has 5 trebles instead of 3, turn
8. ch 2, repeat the previous pattern, except each cluster has 7 trebles instead of 5, fasten off.

Making outfits for these four Kelly dolls was heaps of fun and very satisfying. I learnt more about adjusting patterns for size, and also how to make pants. These are such a joy - but I think they will be going in a box soon. One day I'll bring them out again as a special treasure.

This is my post for this week's Transformation Thursday hosted @ The Shabby Chic Cottage. Be sure to check out fun crafty stuff at this blog party!

Monday, July 5, 2010

Cream Ribbed Hat with Rose Brooch

I was very surprised when this beanie hat worked out so well, because I made up the pattern myself!

I learnt how to do ribbed stitches when I made my purple bolero shrug using a pattern from Lincraft. I had seen round ribbed crochet hats before but I'd never read a pattern when I made this hat. I sat down to watch tv with David with a new ball of Sullivans Softply in cream which cost $2.49. I flicked through an old stitches book my mum has leant me but couldn't find what I was looking for, but I did start thinking about the ribbing, and wondered if it would work. It easily worked out, it was a lot simpler than I thought!

Then I just had to make a big rose brooch to go with it didn't I? This is the 4th flower I've made using Rachel's pattern from Crochet Spot. But this time I remembered the pattern as I had done the Berry Pink one the day before. But I made this one different. There are 14 petals, and for the 1st 7 I did trebles (English db tr) instead of doubles (English trebles) to make the petals at the bottom bigger. The other 7 petals are double crochet (English trebles) as usual. It makes the rose more full at the bottom.

My easy ribbed beanie pattern, using 5mm hook and thickish wool
1. 1st round is a beginning 3 chain, sl st, then 12 trebles (American doubles) in the round, sl st
2. 2 ch counts as 1st treble, treble front around the post of the treble below, treble into each treble (as well as front treble around each post) = 24 trebles
3. 2 ch counts as 1st treble, treble into each treble, treble front around each 3rd post (the one thats raised from the previous round) = 36 trebles
4. 2 ch counts as 1st treble, treble into each treble, treble front around each 4th post, sl st = 48 trebles
5. 2 ch counts as 1st treble, treble into each treble, treble front around each 5th post, sl st = 60 trebles
6. 2 ch counts as 1st treble, treble into 5 trebles, skip one treble, treble front around each 6th post, sl st = 72 trebles
7+ repeat row 6 until desired length is reached

The wool I used feels soft to touch, but after wearing this hat for a short time the skin on my forehead started to itch. I'm assuming this is why people usually use nicer wool for beanies. I will live and learn! Still a fun hat to make, and I'm very glad my mother in law liked it enough so I could give it her last time she dropped by for a visit. She didn't think it was scratchy, so I hope she will get some use out of it.

<3 <3

Thursday, July 1, 2010

Green and White Baby Blanket

It took me about a week to do this, only working on it while downstairs when David was cooking or watching TV, using a 5mm hook and some soft thin yarn so the end result is nice and lacy. I'm linking this post in with Transformation Thursday, a blog party hosted by The Shabby Chic Cottage.

I just wanted something easy to do without a pattern, so I made this one up! It's pretty easy. I just started with 80 chains, plus 2 more to make the first treble (American double) of the first row. There are 4 x 20 chain sections, each consists of the same pattern. I used a couple of big balls of wool in the stash I've been given which I want to use up, and I thought green and white were good uni-sex colours for a baby. The end result is 60cm x 65cm.

4 x 20 chain pattern - 6 trebles (US dc), sk 2, 2 tr in next ch 2 2 tr in same, sk 2, 2 tr ch 2 2 tr in same, sk 2, 6 tr

repeat pattern 4 times for each row, turn, ch 2 to form 1st tr of next row

I changed colours every 5 rows, with a total of 50 rows (10 stripes of 5 rows each)

Edging

row 1.  (in each corner 3 tr 2 ch 3 tr in same), sk 1 space, 2 tr 2 ch 2 tr in same, sk 1 space, repeat to end,  sl st (one space needed 2 sk instead of 1 to even it up)

row 2. in contrast colour (in each corner 3 tr 2 ch 3 tr in same), in next 2 ch space 2 tr 2 ch 2 tr, repeat to end, sl st

I'm planning to use up most of the wool I own, making items that will hopefully be useful in our future. Hopefully this light and lacy blankie will be handy!

<3 <3 <3

Be sure to check out other crafty transformations @ The Shabby Chic Cottage!

Here are my favourite highlights from this week's party

  • homemade air fresher @ http://www.homemademamas.net/2010/06/homemade-air-freshener.html

  • rag quilt made from recycled jeans @ http://memoriesbyannadawn.blogspot.com/2010/07/jean-quilts-new-and-improved.html

  • crochet rug with link @ http://www.flamingotoes.com/2010/06/cute-crochet-rug/

  • fridge magnet bag idea @ http://terelauritsen.blogspot.com/2010/07/fridge-magnet-bag.html

  • big brother, big sister t-shirts @ http://lemontreecreations.blogspot.com/2010/06/big-brother-sister-bags.html

  • reversable baby dress made from recycled t-shirts @ http://jessicakenenske.blogspot.com/2010/06/reversible-baby-dress.html

  • turn children's art into soft toys @ http://www.camilledawn.com/2010/07/childs-art-turned-softie.html

  • home sewn child's play tent @ http://3punkmom.blogspot.com/2010/06/childrens-play-tent.html

Saturday, June 19, 2010

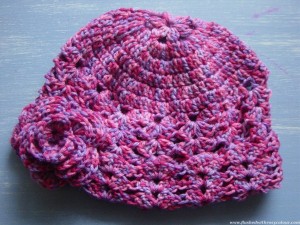
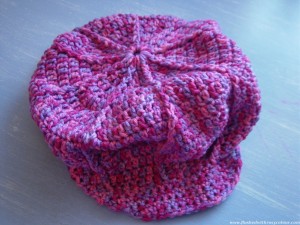
Two Berry Pink Hats

I bought 5 balls of this 'Berry Mix' Lincraft DK wool last year for my birthday, thinking I might make a simple rug with it, but of course that hasn't happened! This is my post for this week's Pink Saturday blog party hosted by Beverly @ How Sweet the Sound.

I made this flower hat one evening while watching some television, the final episodes of Bones and Castle to be exact! I call this hat a 'flower' hat because I started it off with a small 6 petal flower. Each petal is a cluster of 3 trebles all pulled together in one stitch, each petal is then separated by 3 chains. Then I work out in flat rounds, increasing slightly each round until it was just slightly smaller than my out-stretched hand. Then I used the shell pattern down the sides as I did with my wine coloured beanie. This pattern usually makes hats smaller so I was careful to make sure this hat would fit an adult.

This is now the 3rd rose I've made like this to make into a detachable brooch to go with the hat. I still had to refer to Rachel's pattern at Crochet Spot as I haven't yet memorised it. I highly recommend Rachel's website if you are in need of some crochet patterns, its very nicely set out. Just remember her patterns are in American crochet, not English. The cost of the wool I used for this hat and matching brooch was less than $2, and I used a 4mm hook.

Using the same wool I also made a hip-hop cap following the pattern in the Crochet 08/09 booklet from Lincraft. I didn't check the gauge so that might be why this hat turned out a bit on the big side, although I'm not sure if it's meant to be like that! It didn't take me long and I whipped it up in about 3 or 4 hours while we watching tv and David was cooking.

I hope you like seeing two more of my hats, this time they are Berry Pink! And be sure to check out other pinks at this week's Pink Saturday blog party @ How Sweet the Sound!

<3

Some selected highlights from this week's party

Tuesday, June 15, 2010

Purple Bolero Shrug


It took me a week or two, doing a bit now and then while we were watching tv in the evenings, to finish this bolero shrug. This is the first crochet thing I've made to wear, other than beanies and scarves!
bolero shrug, pattern by Lincraft
I used the pattern from the Lincraft booklet I bought a month or so ago. I bought the book for this pattern specifically, as I've been looking for free patterns on the net and haven't had much luck with them working out or being simple enough for me to follow. I tried one pattern and it was totally epic fail! I had trouble starting this one too, and in the end settled on buying the specific wool stated in the pattern from Lincraft, because they won't tell you what ply the wool is. This is a purple "Winter Warmth" wool which cost $3 for 50g, and it used just over one ball so there is some left over as I got two balls. Maybe I can make a nice little beanie or something with what's left?
Now I know the pattern I think I could make this again with other wool... hopefully! Making this bolero shrug taught me how to do raised ridges which you can see at the cuffs. I've been enjoying adding this new stitch to a couple of other projects I've done since, like a beanie and a doll's dress, which I will post about soon.

Friday, June 11, 2010

Winter Hat Collection 2010

Here is a gallery of all the hats and beanies I've finished so far!

I'm hoping to give some of these to family as gifts, I just don't know which ones they would like so I hope they can tell me! <3 <3 <3

I have already written on my blog about some of these hats, but I'll be posting more in future, explaining how I made them, the pattern and washing instructions for the wool.

[gallery columns="5"]

Thursday, June 10, 2010

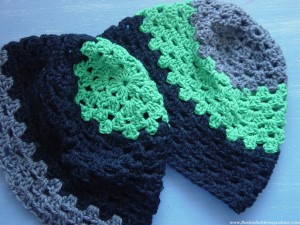
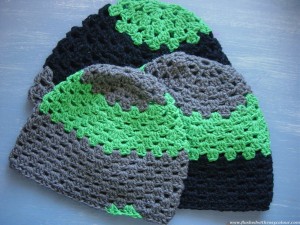
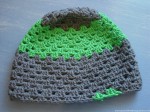
A Family of Grey and Green Beanies

This is the post I planned for today's Transformation Thursday party hosted by The Shabby Chic Cottage, but who would have known that today we also have some special news to share? We have a 3rd member of our little family on the way or so the home test I did this morning says, so this family of three beanies seems especially appropriate!!!

Back to the beanies ... The first beanie I did followed part of a pattern in the Lincraft booklet I bought. I just made it longer, skipping the ears and edging, so it's a bit different. That's the hat with the grey pinwheel at the top. I don't really like how the pin-wheel doesn't match the rest of the hat, so the second hat I did was different. I based it on the first hat but this is my version.

Basically, you start with a round of 6 clusters of 3 trebles (American doubles) each separated by a chain, the second round has 12 clusters, 2 in each space, each pair is also separated by a chain. Except for rows 5 and 9, you just put a cluster of 3 trebles in each space. For rows 5 and 9, put an extra cluster in every 3rd space, divided by a chain. I know that's not the right way to write a crochet pattern, but I can hardly read them myself, so that's my understanding of the pattern! It's pretty basic and very quick to do.

For the first hat, I used a 5mm hook which made it fit me. For the second hat I used a 6mm hook so the hat is bigger and fits David. To consolidate the pattern in my mind, I made a 3rd beanie just with left over green and grey as I'd run out of black. The pattern and the wool are the same, the only thing that's changed is the hook. For the smallest hat I used a 4.5mm, and it's a good thing I didn't use the 4mm like I nearly did then it would have been too small! I rather like how the odd two green clusters look at the brim, it makes it look quirky!

This was a great exercise for me to do. I've now found a great, easy and quick beanie pattern that I can memorise and I can simply change the size of the beanie by using smaller or bigger hooks! These three beanies were very quick and took less than a day to whip up!

<3 <3 <3

My selected highlights from this week's party
Related Posts Plugin for WordPress, Blogger...