Showing posts with label clothes for toys. Show all posts

Friday, December 14, 2012

Green clothes for a baby doll

I've decided to give this baby doll to my son for his 2nd birthday because he can say the word 'baby' and likes to give his smaller one a bath. He sometimes moves the doll's head from side to side while saying 'no no no', its so cute!
a green outift for a baby doll
I chose this doll because it was the least ugly, in fact I think its quite gorgeous. I wanted to also use it as a photo prop, but as it turns out it's too small for the newborn hats and only fits the premmie ones. The problem was the doll is a girl and came dressed in very pretty pink clothes. Although the outfit I've made for her still looks feminine, I think its unisex colours are more suitable.

The tiny shells premmie beanie I made with cleckheaton baby wool fits perfectly, so I made an outfit to match. I simply did a hexagon jacket that was joined at the sides to make a sweater. Then I quickly made up some shorts in a matching aqua colour. I used a narrow strip of brightly coloured material I used for his toddler pillow to edge the shorts. But because I am more handy with a crochet hook than a sewing machine, yet again the shorts were way to wide around the waste but short up the middle! I solved the problem by turning the shorts into bloomers by threading elastic around the bottoms of the legs.

Now she looks like a genie baby doll! All ready for my son's second birthday party on Friday. Yippee!!

Saturday, December 8, 2012

Sindy doll underwear

One thing I did after I first got the Sindy dolls, which I blogged about yesterday, was to make this doll's underwear. I'll be including it with the package I've sold on ebay which will end in a few days, so I thought I should record what I did.
some custom made underwear I made for a Sindy doll
I don't remember clearly how I made this so I can't share the pattern with you. I improvised this to fit the doll, which is why I'm not keeping it for my Barbie collection. It's s simple slip on top, made the same way I've made other tops for the Barbie dolls. The underwear was custom fit, with scallops around the edges. Hopefully you can see what I mean from the photographs.
back view of the underwear
Every doll needs a proper set of underwear, don't you think?

Thursday, October 18, 2012

Doll's Blue Easter Bonnet, free pattern

The pattern for this doll's Easter bonnet has been something I've worked on since Easter, now I think I'm ready to share. Please let me know what you think, or if there are any problems with it. The gauge is determined by measuring the diameter of the first 2 rounds, which should be 3cm if this hat is being made for a fashion doll like Barbie by Mattel.

7 easy rounds make up this doll's hat, including 6 scallops in the brim
doll's blue Easter bonnet with contrasting drawstring to help keep the hat on tight
Doll's Easter Bonnet by Teena Sutton Murphy
~ worked in rounds ~
recommended 2mm hook with 4 ply cotton or 4 ply baby yarn
gauge - 1st 2 rounds has a diameter of 3cm

1. 3 ch (counts as 1st dc throughout), 11 dc into 1st ch, sl st into 3rd ch (12 dc)

2. 3 ch, 1 dc in sl st, 2 dc into each dc around, sl st into 3rd ch (24 dc)

3-5. 3 ch, 1 dc into next, 1 dc into ea dc around, sl st into 3rd ch (3 rounds of 24 dc to form sides of hat)

6. (sk 1, 7 dc in next, sk 1, sc) repeat 5 more times, sl st (6 dc scallops for 1st round of brim)

7. 4 ch (counts as last trb), sk next 3 dc, sc in centre dc (4th dc) of 1st scallop, sk next 3 dc, (7 trb in next sc, sc in centre of next scallop) repeat 4 more times, 6 trb into last sc of prev. round, sl st into 4th ch, fasten off (6 trb scallops)

8. ch a length to weave in and out of the dc in round 5 (about 30 ch), sl st into 1st ch to form a drawstring to keep hat on tight
doll's blue Easter Bonnet modelled by an old Barbie

Sunday, September 30, 2012

Easy Outfit for a Teddy

I'm not sure why my mum gave me this teddy bear, her arm was off and she needed repairing. Mum said she thought I might like to repair it, so I have. Then of course she needed a new outfit!
a repaired and dressed teddy ready for a new home
The dress is simply two 6 round granny hexagons with a skirt added to make a dress. After joining the shoulder seams and the two pieces together at the back, I over lapped them at the front and added the pink skirt. I did all 3 parts in different colours so you can see what I mean. Then I lengthened each sleeve with a contrasting colour.

I decided she needed pants to go with it so whipped the trousers while my toddler son slept. I used a tiny bit of vintage floral print my mother gave me. The pants came out a lot better than the last pair I made, so I must be getting better at it! I think I might try and give this back to my mum, I wonder what she will think?

Tuesday, September 25, 2012

A Sweater for Scout

I made this sweater by joining 4 small granny squares, for a toy called 'Scout'. I made it up quickly so my son could take him to bed with him as a comfort toy.
a sweater for Scout, made of 4 small granny squares
This toy is perfect for Thomas to take to bed because it sings him songs to go to sleep, and you can programme them to say your child's name/ I would never spend this much on a toy like this though, so its a special gift from Aunt Debbie to enjoy.
back detail of 4 granny square sweater
I simply did 4 granny squares, each have four rounds. Because the toy is short and stout, it had to be a short, wide sweater. Two pairs of squares were joined with invisible stitch down the sides, then the pairs were joined at the corners to form arm holes. Lastly, I did 6 rounds of sc to form a turtle neck. I quickly chose colours from my acrylic stash that matched the toy. Now my son can grab the short of the toy to comfort him at night.

Friday, September 7, 2012

Easy Baby Doll Outfit


I found this tiny dolly in the RSPCA op shop on Wednesday, I got it with a pink plastic doll bath for $1.50! I thought it would be perfect for Thomas to play with in the bath, and to dress, its just the right size for him. This doll is 8 inches long.
a cute baby doll I found at an op shop, and dressed in a quick to make outfit
When I gave it to him he loved it straight away, cuddling and kissing it. I was surprised when he moved the baby's head while saying 'no, no, no, no, no', something he's only just learnt to say himself recently. So today I decided I should quickly make something to dress it in, so I made this outfit because it was very quick and easy.

blue square and sleeve, with yellow sleeve

yellow square and sleeve, with blue sleeve
I started with the sweater, which is simply two granny squares of 4 rounds each. I used a 3mm hook and 4 ply acrylic baby yarn. After I finished the 1st square I did not cut the yarn, but left it ready to use for one of the sleeves. When I finished the 2nd square I then attached it to the 1st square right away, just joining 2 clusters with slip stitch. I sl st along 2 clusters to leave a gap for the arm hole then joined the corners only at the shoulder. Then I went straight into the 1st sleeve, doing 4 rounds of dc, finally fastening off when that was done. I then went to the yarn left at the end of the 1st square and joined 2 clusters at the other side seam, left a gap of 2 more clusters for the other arm, then joined at the corners for the 2nd shoulder. I finished with the 2nd sleeve of 4 rounds of dc. Because I used two colours I hope you can see what I mean, with one square and one sleeve in each colour. This made a very quick project, with only 2 fasten offs. You certainly are too busy to spend too much time on something like this, aren't you?
this outfit for a baby doll was very quick and easy to make
For the hat, I did 3 increasing rounds in blue, the 1st round is 10 dc, the 2nd is 20 dc, the 3rd is 30 dc. Then I switched colours and did the rest in non-increasing rounds. 7 rounds were enough to cover the doll's head with a turned up brim. This was also really quick to make up, I used the same yarn and hook as for the sweater.
detail of the crown of the hat, and back with contrast sleeve
Lastly, I made the shorts using 2 squares of printed material I had left over from other projects. I'm not too happy with how the shorts turned out, but I'll be the first to admit that working with fabric is not my forte! But I do think they look cute, with wide legs like a little sumo wrestler! The elastic waist sits very low, because I didn't leave enough room for the elastic pocket. Something I'll have to remember next time I sew pants!

Over all, this was a quick little project so my son can enjoy his new toy. If I ever get the chance I'd love to make a cute pink outfit for this doll to make it look like a girl, but who knows if I'll ever have time for something like that?

Monday, May 7, 2012

Tiny Bow Tie for a toy

I quickly did this up while my son was on my lap. I did this to amuse him, as he has shown some interest in carrying around this toy lately. I'm thinking it will fit into his childcare bag better than the glow worm comfort toy he usually takes.
a tiny bow tie for a small toy
I quickly did a short chain, then sc into every ch, and another row of sc. Then sl st to the centre and a ch to go around the middle of the bow. Then I slst to secure the ch, then ch around the neck. There is no attachment, its just sl st right onto the toy. I figured that was the best thing to do with such a tiny bow tie!

This was just a quick fun thing to do that I thought I would share!

Wednesday, April 4, 2012

The Best Dressed Glow Worm

I took some time out and whipped up this cute jumper for my son's glow worm comfort toy using two granny squares I made a few weeks ago.
granny square sweater for a glow worm toy
I've been working on a pair of winter boots for Thomas and they're proving to be more difficult than I thought, so this cute little project was a welcome break. I made the two granny squares last week sometime, or the week before, using a mandala pattern I found. I had grouped some 8 ply acrylic together and decided the blues, yellow and red would be a good combination and planned to make some little pillows for Thomas' small lounge chair. But when I finished these two squares I decided I didn't like the red and thought I should have used green instead. So they went into my samples bag and the project was abandoned.

But I realised they would make a great little sweater for this glow worm. Thomas is being so cute lately, carrying the comfort toy around with him, and pressing the button to make it sing to him. I think its really nice to put a personal touch to a special toy my son seems to like so much.

Thursday, May 5, 2011

Green Dress for a Doll

I thought I'd make a post today as I haven't written for a while. It's been challenging to do everyday things and feel normal again. Even though Thomas is being a perfect baby it's still hard, I wonder how we would cope if he wasn't!

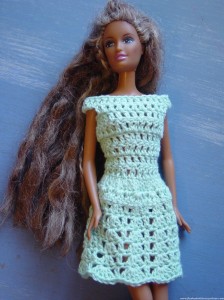
I recently made this green cotton dress for a doll on an impulse. No reason really, just felt like finishing something quick. I have several projects on the go at the moment, and they are all rugs so are taking me a while to finish. For this dress I used a 3mm hook and some light green cotton that took my fancy. The doll is one of three I got in a bag for $2. I haven't restored her hair because it's too much of a big job, but she needed a dress all the same.

Another thing I did today to feel more 'normal' was to paint my toenails bright pink while I sat on the deck and worked on my vitamin D deficiency. When I was an early childhood teacher in Darwin, I wore open toed sandals so painted my toenails bright colours like green or pink and topped them off with some glitter. The children sitting at my feet would notice, it was all a bit of fun and seems like a life time ago. It seems like another life completely, but remembering nice things like that helps me feel more 'real'.

Monday, December 6, 2010

How to make shoes for a flat-footed Barbie

My niece is turning 4 soon, and an order for new shoes for her flat footed Barbie has arrived so I set to work!
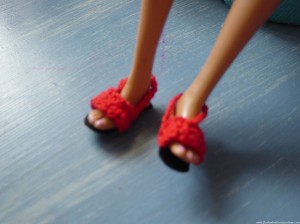
a pair of orange sandals for a flat footed Barbie doll
two pairs of shoes for a flat-footed Barbie

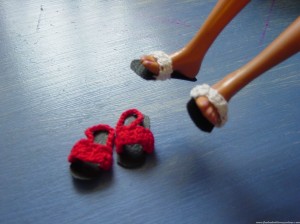
These are now the 3rd and 4th pair I've made for flat footed Barbie dolls. The shoes for these flat feet are very hard to find, and when you do find them, they are overpriced. So I make my own, and it's very easy. The first pair of flat-footed shoes I made were these slip on pink shoes which went to Darwin with my niece. The second pair I made were these orange sandals with ankle strap, which were for a flat footed doll I picked up at an op shop for $1. I'm most happy with those ones, they worked out quite well.

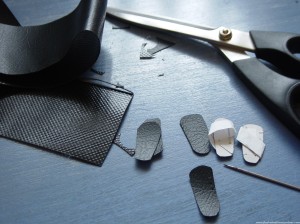
To make these doll shoes, I use some recycled black vinyl, I can't even remember where I picked it up from. You sometimes can find this on packaging or old things you might throw away, so keep an eye out for it, you don't need much. Any kind of flexible plastic you can pierce with a needle will do. I trace around the soles of the doll's feet to make a paper template, then trace that with white crayon onto the vinyl, and cut out the soles with sharp scissors. Then I pierce the plastic with the largest needle I have, pushing it all the way through, 3 times each side where the shoes strap will go.

I then use my 1.25mm crochet hook, and push that through the needle holes to make sure they are big enough. Then using fine crochet cotton, the first row is three single stitches (UK dc), then 4 rows of 2 ch 3 dc (UK trbl). The last row is some slip stitches and singles again to attach to the other side. Sometimes I'll add an ankle strap of chain stitches like I did with these red ones. I always put the shoes on before finishing the final stitch to make sure they'll fit. They don't take long to do, especially as I chose not to spend too much time fiddling on these ones.

In the package I'm sending to Darwin, I'm also popping in some doll knickers which I made ages ago using a pattern I found at crochetville. I'm not happy with them, they have ties but I'll pop them in the package none the less.

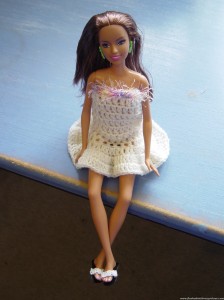
So I had a go at making my own Barbie doll knickers, they are 'boyleg hipsters' so very easy to make. They simply pull on and sit on the hips, which will be easier for my 4 year old niece to dress her doll.

My own pattern for Barbie doll 'boyleg hipsters'
1. ch 28, sl st to form ring, treble into ea ch (US dc), sl st, do not turn, 28 stitches
2. ch 2, treble into ea treble (US dc), sl st, do not turn, 28 stitches
3. ch 2, treble ea into next 5 treble, turn
4. sl st into next treble, ch 2, treble into next 2 treble, turn
5. ch 2, treble ea in next 2 treble, sl st into 3 trebles on opposite side of ring to form two leg holes
fasten off and turn inside out to hide the seam at the crotch.

Then I just had to make a simple pull on party dress, didn't I?
My own pattern for a pull-on dress for Barbie
* using 3.5mm hook, gauge depends on the yarn and how many stitches it takes to go around the chest, check every few rows to check fit.
1. ch enough ch to go around chest, sl st to form ring, pull on over hips up to chest to check fit, ch 2, trb in ea trb (US dc), sl st in 1st trb, 23 trb
2. ch 2, trb in ea trb, sl st in 1st trb, 23 trb
3 - 8 repeat row 2
9. ch 2, 2 trb in ea trb, sl st in 1st trb, 46 trb
10. ch 2, 2 trb in ea trb, sl st in 1st trb, 92 trb
11. ch 2, 1 trb in ea trb, sl st in 1st trb, 92 trb
12. in bottom of row 1 using contrast yarn, ch 1, dc (US sc)  in bottom of ea trb, sl st in 1st ch, fasten off

Saturday, July 24, 2010

A Pink Outfit for a Kelly Doll

I just have to show again a closeup of this pink outfit I made for a Kelly Doll. I just think she is soo cute!
Here she is with her friends ready for a fun trip to the beach!
I found these dolls at a second-hand market and cleaned them up. I used crochet cotton I bought second hand from thrift shops to make their clothes.
This is my post for this week's Pink Saturday hosted @ How Sweet the Sound.
Be sure to check out other pretty pinks @ Pink Saturday!
<3 <3

Thursday, July 22, 2010

Four Little Lost Angels

As I was taking them home from the market, I knew I would have so much fun cleaning up these second-hand dolls and dressing them in new crochet outfits, perhaps even with angel wings! In the end I settled on summer dresses complete with pretty bonnets and mary jane slippers. These tiny Kelly dolls are just 4.5 inches tall.
pretty outfits for four Kelly dolls
I first found the little blonde in a washing basket full of toys. The stall holder was busy selling a set of Dora dolls, so when I said I would like the tiny doll, she dismissed me saying I could have it for free. Well, I wouldn't take something so special for free, it just wasn't right! Her hair is in excellent condition, and she even has two near new shoes. I was thinking to give a dollar, but when we looked in David's wallet a 50 cent coin was sitting on top so I grabbed that and pressed it into hand of the man that was helping her with the stall. I think it must have been Karma, because later on at another stall, I saw the three other dolls, all with different coloured hair and all just 50 cents each! It was so uncanny it must have been fate that these four tiny Kelly dolls should meet in this way!
how I found these 4 dolls at the market for 50 cents each
Crochetting some clothes for these dolls turned out to be a lot more challenging than I first anticipated. I made several attempts before I ended up with a dress I was happy with. At first, I did a smaller version of the Barbie doll dress I usually do, using baby yarn, but I decided the result looked too bulky. Later, I made matching knickers for that dress using a free pants pattern I found on an old blog, again using the baby yarn. I made a top using baby yarn and a free ruffle top pattern, but I did not use the right size hook and yarn, and it didn't fit. The problem was, I was using baby yarn when I should have been using fine cotton thread.

At first, I really didn't think I would need to follow a pattern for this project, but I did. I had a little success with a free dress pattern @ Crochet Crafts by Helga, using fine cotton and 1.5mm hook as recommended. But I didn't like the skirt, I thought it was too short so added more rows, which then made the result bulky. Finally, I made a dress I liked using the bodice from Helga's free pattern, but adding my own skirt. Using the same cotton, I made some panties using Helga's free pants pattern,shortening the legs by making just one row of sc. I stitched up the gap at the back of the pants as I don't think it needs a button, pull on pants are fine for this small doll. I then made matching pull on panties for the other dresses I made, one each of pink, green, apricot and yellow. Each dress has one button on the back of the bodice.
matching beach outfits for four Kelly dolls
Because you can't see the panties underneath the dresses, I decided the dolls needed some little tops to show them off! Maybe these outfits can be PJs or summer beach outfits? The tops are just the bodice part of the dress, with every stitch in the bottom frill incr. The tops looked a little plain, so I crochet a tiny heart, clover, flower and sun to attach in contrasting colours to the front, to make them look more fun (hopefully!). The flower is just clusters to form 5 petals, and the sun is a round of 15 trbls, with a 2nd round of a picot in every 3rd trbl. I used the heart and clover patterns explained in previous posts.

Then I made them all matching Mary Jane slippers with my own made up pattern.

Mary Janes for Kelly Dolls by Teena Sutton
using 1.25mm hook, fine cotton
1. ch 7, trb (US db) in 3rd ch from hook, 2 trb, 2 db (US sc), turn
2. ch 2, trb in next 5 trb, 3 trebles in the stitch space at the toe, go round to the other side of the shoe and do trb in ea 5 trb, 1 trb at the heel, sl st in 1st trb of this round
3. ch 2, db in next 2 trb, sk 2 trb, trb in next 3 treble to form top of toe, sk 2 trb, db in next 3 trb, sl st in 1st db  of this round
4. ch 8 to form ankle strap and sl st in 1st ch
after some hair care the bonnets fit perfectly
Finally, I finished the outfits with bonnets, again with a pattern I made up myself. When I found these dolls, their hair was mostly 'fly-away' and a real mess. After shampooing, conditioning, air drying and finally smoothing with baby oil, their hair came up very nicely indeed. The pretty bonnets help keep the hair in place.

Pretty Bonnets for Kelly Dolls by Teena Sutton
using 1.25mm hook, fine cotton
1. chain 10, trbl (US dc) in 3rd ch from hook, trb in ea next 6 ch, 5 trbl in last ch which is the bottom of the last trbl, trb in the bottom of the other 7 trbl, turn
2. ch 2, trb in ea trbl, extra 3 trbl in last trb, trbl in bottom of each trb, turn
3. ch 2, sk trb, (3 trb in next trbl, sk trb, trb in next, sk trb) twice, 3 trbl ea in next 3 trbl (9 trbl), sk trb, trbl in next trbl (sk trbl, 3 trb in next trbl, sk trb, trb in next) twice, turn
4. ch 2, (sk trbl, 3 trb in next trbl, sk trbl, trbl in next) thrice, 3 trbl in next, trbl in next, (sk trbl, 3 trb in next trbl, sk trbl, trbl in next) thrice, turn
5. ch 2, repeat (sk trbl, 3 trbl in next, sk strbl, trbl in next) seven times, each cluster of 3 is in centre of cluster below, turn
6. repeat row 5 except don't turn, ch about 12 or enough to be long enough to form the chin strap, measure, slip stitch into the other side of the bonnet to form chin strap, don't turn
7 (bonnet frill), ch 2, repeat the pattern from previous row, except each cluster has 5 trebles instead of 3, turn
8. ch 2, repeat the previous pattern, except each cluster has 7 trebles instead of 5, fasten off.

Making outfits for these four Kelly dolls was heaps of fun and very satisfying. I learnt more about adjusting patterns for size, and also how to make pants. These are such a joy - but I think they will be going in a box soon. One day I'll bring them out again as a special treasure.

This is my post for this week's Transformation Thursday hosted @ The Shabby Chic Cottage. Be sure to check out fun crafty stuff at this blog party!

Thursday, July 15, 2010

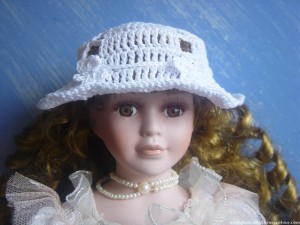
White Sunhat with Daisy Garland

The purpose of making this sun hat was to practice before trying to make one for a child, possibly my niece who has gone back to live in Darwin and has no use whatsoever for one of my winter beanies!

This is a very special doll my mother gave to my grandma. When nanna went to hospital I was given this doll for safe keeping. I think my mum wants this doll back one day but when I offer she says 'next time'. So I am taking good care of her by making her a pretty hat, so she doesn't feel left out because all the other toys are getting clothes made for them, too!

I have real trouble reading patterns as I often say, I need to understand in my mind beforehand how what I am making will work. This means I have a lot of trial and error while I try and make up my own patterns when I want to do something a little more complicated. I looked at images of cotton crochet sun hat on google but did not follow a pattern or any one image idea. I started with a five petal flower then continued with a flat round, then stopped increasing down the sides, making gaps in the five corners. With the brim I started increasing again at the corners, filling in the gaps with increasing stitches. I mostly used double trebles (American trebles) for this hat.

The hat was a little loose on the doll and I made it that way so it wouldn't ruin the doll's curls. But it wouldn't stay on! Looking at the completed hat I decided it needed some more five petal daisies to match the one in the centre. So I came up with the idea to make a little daisy garland to go round the hat to keep it tightly on the doll. The daisies in the garland are the same size as the daisy on the hat, but are made differently so the tips of the petals are not joined in a round. The daisies on the garland were (3 ch, sl st, 3 ch US treble into centre cluster, 3 ch, sl st into centre) repeat 5x, then each flower was joined with 15 ch. I had to do the final sl st of each flower on the opposite side to front so they would sit properly on the garland, all nicely facing the front.
I'm still not sure how I will make one to fit a child though. This used cheap 4ply mercer cotton from Lincraft and a 1.5m hook. It might be a bit fine for a child's hat, but I wouldn't want a summer hat to be much thicker either. Making a child's sunhat is just one more thing on my 'list of things to do'!

<3 <3

Friday, June 25, 2010

Planning Barbie's Big Day

 
Well, Barbie is not quite ready for her big day as she hasn't even met Ken yet, and he certainly hasn't figured out what he is wearing! But at least the girls are sorted,  the bridesmaids are already chosen!
Oh yes, Barbie has her priorities straight, doesn't she? She knows what she will wear and she will look Fabulous!!!

rofl!

This is my contribution to the Wedding blog party hosted by Angelic Accents, I hope it gives a little giggle. I hand crochet all the doll dresses myself and each have a blog post. The White wedding dress, Strapless pullon dress, Teal Dress and the Pink Dress were all inspired by a doll dress I still have from my childhood that was made by my grandmother.
This post is tongue in cheek because my partner and I agree we want to be married officially before our baby arrives, but all we have done so far is get our rings, we can't seem to bring ourselves to organise anything else!

I hope you liked my little wedding blog party post!

<3 <3

Wednesday, June 23, 2010

A White Dress for Barbie

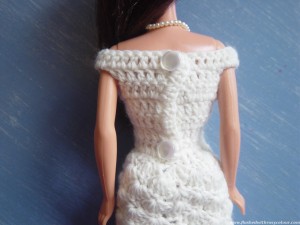
I'm very surprised how this turned out, how could it be that the bodice of this dress fits so perfectly? This is my post for White Wednesday which is hosted by Faded Charm. I'm also putting this in for this week's Transformation Thursday hosted @ The Shabby Chic Cottage.

I used white dimples baby yarn from Lincraft, that's their cheapest baby yarn and it costs $1.99 for 50g. I started with the bodice as usual with all of these dresses I make, working up from the waist. When I got to the cleavage area I attempted a sweet heart neckline. I have attempted this before on a top I've made but undid it as it didn't work out. This time I did it over two rows and I am totally amazed at how perfectly it sits, I was certain it would be a little wonky.

The skirt is the 5 cluster separated by english doubles in the cluster below pattern which I saw in a picture of a Barbie doll wedding dress, although that's the only thing I used from that pattern. I didn't plan for the skirt to be this shape at all, it just kind of happened. I forgot to increase more before starting the shell pattern so the skirt is more fitted at the top, so then I flared out at the bottom. It was nice but it needed something more so I finished off with a row of picots, and low and behold, they really wanted to sit up in the air like that! It kind of looks funny but it is a 'white dress' after all, so they are kinda of required by law to look a bit frilly and silly!!! lolzzz

I have many white buttons and I knew I wanted the one holed pearl kind, but the only ones I could find in my stash were a little too big or had peeling polish so I actually bought these buttons new /gasp! That really is naughty for a doll's dress isn't it? I got some really cheap ones and there are plenty left over to use on other things, so I figure I'm not toooo bad!

The last thing to do was to make something white for her hair so I just whipped this thing up. It's simply a row of English trebles (US dc) to allow room for ribbon to be threaded through, then some shells like the skirt on top of that. I didn't really know what I was making, this kind of just happened! I threaded the ribbon through then around again to form a loop that the hair could go through. Tying it tightly keeps her flyaway hair in place and every bride needs a little something white on the head, don't you think?

<3 <3

Be sure to check out other pretty whites @ White Wednesday!
My favourite highlight from this week's White Wednesday

Check out lots of cool & crafty ideas @ Transformation Thursday!
I checked every participant this week for this blog party as I always find so many useful posts. Here are some of my favourites.

I also found these Ten Parenting Tips @ Real Parenting Tips

  1. Read to your children.

  2. Have the courage to say “NO!” at times.

  3. Create meaningful family traditions.

  4. Make home a place where your children want to be.

  5. Have Family Dinner every night.

  6. Teach your children to work – and work with them.

  7. Support your child’s interests.

  8. Talk with, not at your children.

  9. Listen.

  10. Say “I love you” often.

Saturday, June 12, 2010

A Tiny Pink Baby Doll Jacket (My Barbie Wanted a Baby!)

The other week when I went to K-Mart to buy a new doll for my niece I saw these tiny baby dolls and just had to have one!!!
Barbie doll with a baby
It was when I was making the tiny teddy bears that the smallest pink one reminded me of a baby, then it occurred to me that my Barbie wanted a baby!!! I'd actually been looking for a doll like this over 6 months ago, before I bought my Barbie doll with the excuse of using it to practice making clothes!
a tiny pink jacket for a tiny baby doll
Isn't the tiny pink jacket I made perfect for such a sweet little baby doll???
a tiny baby doll with tiny pink bottle
For the tiny baby doll clothes I used a 3mm hook, white and purple 'dimples' yarn from Lincraft, as well as some old pink baby yarn my mum gave me. These are my own patterns that I made up to fit the doll. The doll is a 'My Mini Baby Born' which I bought from K-mart for $8.
crochet outfits for Barbie and Baby
This is my special post for Pink Saturday hosted by How Sweet the Sound! I hope you like it and be sure to check out other pinks at the party! <3 <3 <3

Friday, June 11, 2010

Winter Hat Collection 2010

Here is a gallery of all the hats and beanies I've finished so far!

I'm hoping to give some of these to family as gifts, I just don't know which ones they would like so I hope they can tell me! <3 <3 <3

I have already written on my blog about some of these hats, but I'll be posting more in future, explaining how I made them, the pattern and washing instructions for the wool.

[gallery columns="5"]

Saturday, June 5, 2010

Tiny Pink Treasures

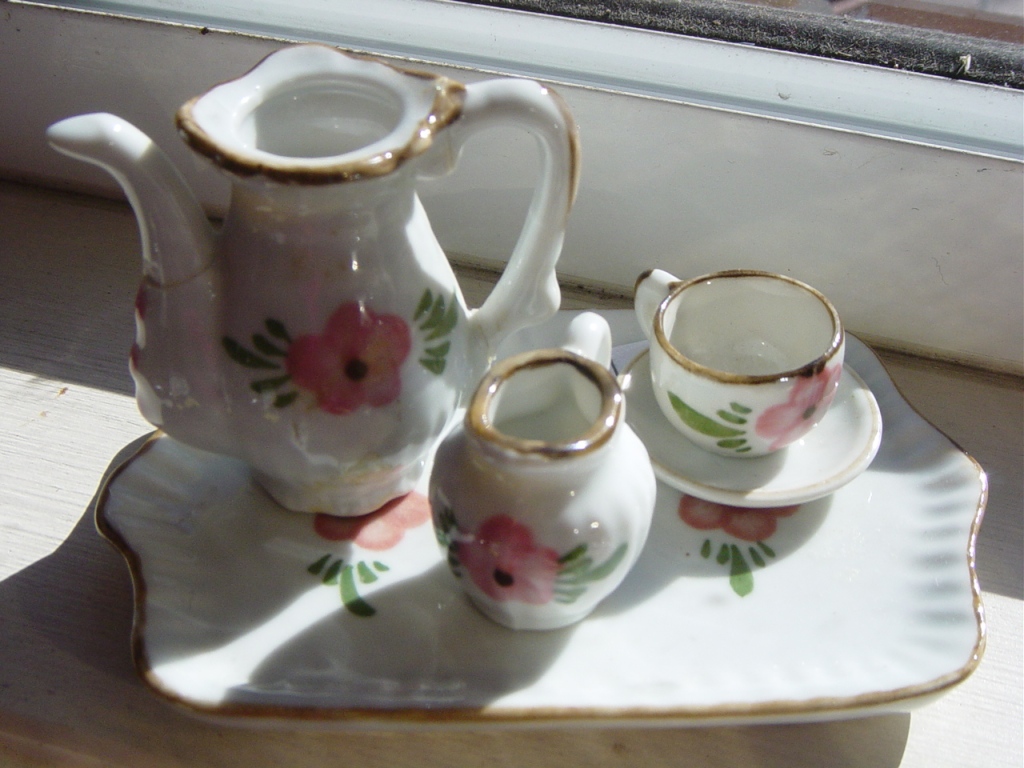
When I went to the Salvo's store a couple of weeks a go with David, I picked up a couple of special pink treasures! This is my Pink Saturday post for this week, which is hosted by How Sweet the Sound!I had already looked on ebay for some miniature doll's tea sets and found they were a bit overpriced for my very modest doll collection. I remember when I was little, I was given a couple of tiny doll's tea sets. I'm really sad I haven't been able to keep any of them. I did treasure them for a little while, but as a child I lost them or they broke. Then I saw this set for just $1! This tiny tea set is part of my Barbie's Pink Tea Party setting.
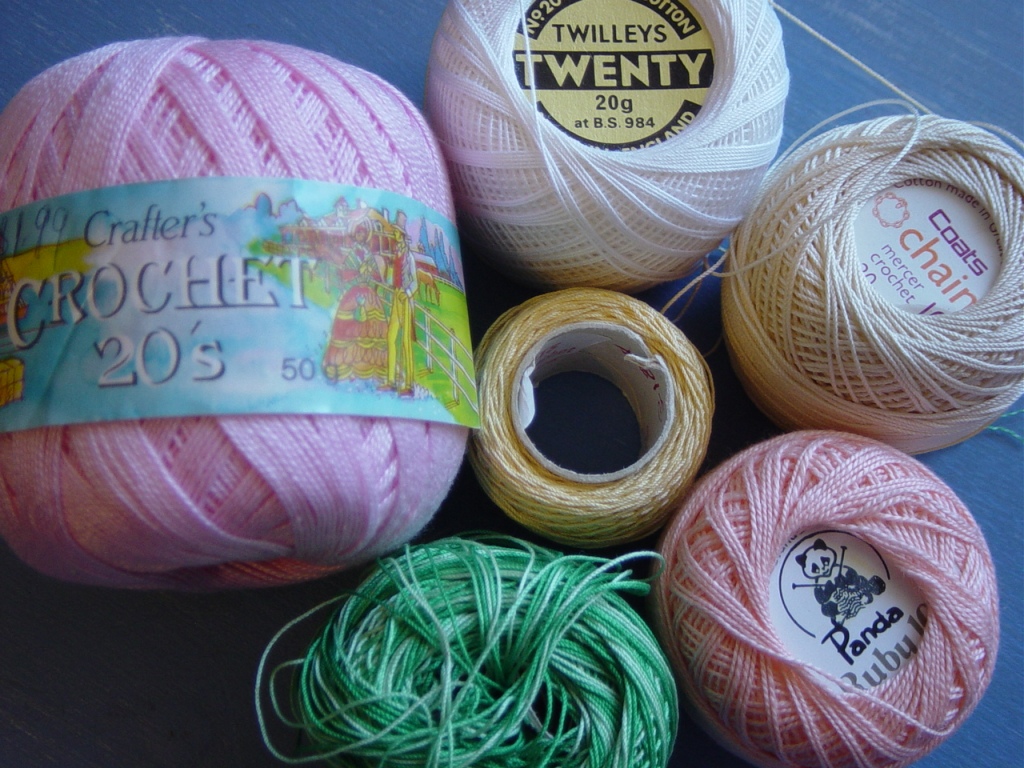
Also at Salvos, David spotted this small bag of cheap crochet cotton. Well spotted, David! Most of you will know how expensive new crochet cotton can be, but I picked this up for a total of $2. I'm really keen on that unused ball of pink, it's the perfect shade for something special! And it hasn't even been used, what a bargain find! I've already made my first small pink doily with it, which I use as a doll's coffee tablecloth.
Using the pink cotton, I also made these special tiny pink scuffs for the flat footed Barbie I gave my niece. They were very easy, I just pierced some black plastic vinyl with a large sewing needle, then used those holes to crochet tiny straps to form the top part of the shoe. Easy Peasy!
Thanks for stopping by for my Pink Saturday post this week, be sure to check out the other great pinks at How Sweet the Sound!
<3 <3 <3


My selected highlights from this week's party


Saturday, May 29, 2010

Barbie's Pink Tea Party


The pink dress I made especially for today's Pink Tea Party could very well be the most beautiful thing I've made so far! I think my Barbie is very pleased to have something so nice to wear to the party today, which is to celebrate the 2nd anniversary of Pink  Saturday and is hosted at How Sweet the Sound.

The vintage doll's cane furniture is the first thing I've ever bought from Ebay about two weeks ago. I remember when I was a little girl some of my friends had these but I didn't, and when I saw them on Ebay I just had to grab it! There was also a four piece lounge set for sale with normal chairs instead of the peacock chairs, but because it was my very first ebay purchase, someone else bid at the very last minute so I lost! I didn't make the same mistake on the peacock chairs though, and got them for $16 including postage. Probably a little on the expensive side for my modest doll collection as I'm not too serious about it, but I do believe the seller when they said this cane set is about 40 years old! I think it's a very special thing.

Using a 2.5mm hook and a small ball of baby pink yarn, I started the doll's dress on Monday afternoon and finished midday Tuesday, so it took less than one day. This is not the first dress I've made like this, although I think it's an improvement on the orignal because it crosses over at the back so you can't see her knickers - if she is wearing any! The Barbie dresses I make are inspired by a dress I've kept and treasured from my childhood which my mother tells me was made by my Nanna Pam. You can't tell when she is sitting down, but you can pinch the skirt to make pleats appear. I am so tickled pink I could manage to make something as pretty as this!

In an attempt to preserve the doll's hair as long as possible, I try and keep it tied up in a little snood. Anyone who has collected dolls knows how synthetic hair can ruin over time. But the pretty pink dress needed it's own hat, so I decided to give making a bonnet a go! I looked on google for images of crochet doll bonnets, but there were not many that I could see. I remember a knitted bonnet I wore as a young child which folded neatly into a square, so I made one up kind of like that. I didn't follow a pattern at all, and used the same stitches as in the skirt of the pink dress.

The tiny coffee table needed a pink doily, don't you think? This is my first completed proper doily and it took me between 2 to 4 hours I think, finishing it last Thursday morning. I used a pattern in a book I borrowed from my local library on Monday called "101 Easy Scrap Crochet Projects". The pattern for this doily is on page 40-41.

This doll's setting would not be complete without a tiny doll's teaset but when I looked on ebay for those I decided they were too expensive. But when David took me to the Salvo's store last Saturday I saw this set for just $1! That was more like it I thought, but didn't notice until I got to the counter that the teapot has been broken and glued back together. Oh well, I don't think Barbie minds! And the tiny teddies don't drink tea anyway. The cheeky things have hidden a big bottle of liquor to sip during today's party, those Party Animals!!! A good thing too, because there is only one teacup!

I hope you enjoyed reading about my special pink tea party!
<3 <3 <3

For more pinkness check out today's special anniversary of Pink Saturday at How Sweet the Sound.

Highlights from this week's party
Related Posts Plugin for WordPress, Blogger...