Showing posts with label recycling. Show all posts

Sunday, January 6, 2013

The Stanthorpe Potato Patch

Two visits ago we helped plant this potato patch in Brian and Freya's garden in Stanthorpe. Now they have grown so much that some of them were ready to harvest. We're hoping the rest can come out next time we visit Stanthorpe, which is a 3 hour drive away from where we live in Brisbane.
Thomas in the potato patch in Stanthorpe
potatoes fresh from the ground lightly steamed are very tasty
a potato flower
After the plant flowers and starts to wilt and die, its time to harvest the potatoes. We got two small bunches of potatoes while we were there. I don't think I've ever eaten potatoes so fresh, we pulled them out of the ground one afternoon and ate them that night for dinner. And they were delicious!
as the flowers die and wilt, the plant is ready to harvest
Besides the potato patch, Brian also has some potatoes growing inside some old tyres piled on top of each other. A set of 4 old car tyres will suffice and produce a large amount of harvest. Brian cut off some of the tyre with a sharp knife so there was little overlap. You plant the potatoes in the bottom, then as the leaves pop up you cover it lightly with mulch material. This produces clean potatoes with not much dirt to be removed. As a tyre fills up, you add another tyre on top. This encourages the plant to produce more potatoes along its roots in the deeper tyres.
mulching on top of some potatoes in a vertical patch made of recycled tyres

Monday, July 23, 2012

Recycled Project Bags

Over time I've worked out the kind of bags that are perfect for crochet projects. Its best to keep a project in its own bag so you can grab it and go when you need something to do while you wait for a doctor, etc. Clear plastic bags are the best, so you can see what's inside without having to rummage around. I used to use recycled paper bags, and although you can see into the top, if you have as many projects on the go as I do they don't work so well!
The absolutely perfect project bag is a clear plastic bag that secures at the top, with a zip or a drawstring like this shopping bag I've recycled from Coles. Its a special bag for their new line of clothes, which I scored last week when I bought a new singlet. Other perfect bags are the zippered clear bags you sometimes get when you buy new sheets for your bed. For a few years now I've kept all zippered and closable clear plastic bags, as well as some bags that aren't quite perfect like clear bags that don't close as well, for when I have too many projects in progress!

Monday, December 6, 2010

How to make shoes for a flat-footed Barbie

My niece is turning 4 soon, and an order for new shoes for her flat footed Barbie has arrived so I set to work!
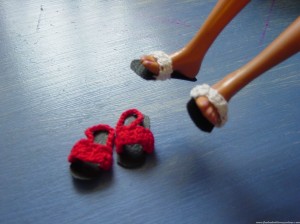
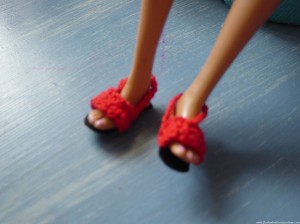
a pair of orange sandals for a flat footed Barbie doll
two pairs of shoes for a flat-footed Barbie

These are now the 3rd and 4th pair I've made for flat footed Barbie dolls. The shoes for these flat feet are very hard to find, and when you do find them, they are overpriced. So I make my own, and it's very easy. The first pair of flat-footed shoes I made were these slip on pink shoes which went to Darwin with my niece. The second pair I made were these orange sandals with ankle strap, which were for a flat footed doll I picked up at an op shop for $1. I'm most happy with those ones, they worked out quite well.

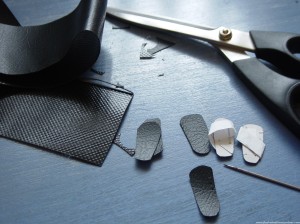
To make these doll shoes, I use some recycled black vinyl, I can't even remember where I picked it up from. You sometimes can find this on packaging or old things you might throw away, so keep an eye out for it, you don't need much. Any kind of flexible plastic you can pierce with a needle will do. I trace around the soles of the doll's feet to make a paper template, then trace that with white crayon onto the vinyl, and cut out the soles with sharp scissors. Then I pierce the plastic with the largest needle I have, pushing it all the way through, 3 times each side where the shoes strap will go.

I then use my 1.25mm crochet hook, and push that through the needle holes to make sure they are big enough. Then using fine crochet cotton, the first row is three single stitches (UK dc), then 4 rows of 2 ch 3 dc (UK trbl). The last row is some slip stitches and singles again to attach to the other side. Sometimes I'll add an ankle strap of chain stitches like I did with these red ones. I always put the shoes on before finishing the final stitch to make sure they'll fit. They don't take long to do, especially as I chose not to spend too much time fiddling on these ones.

In the package I'm sending to Darwin, I'm also popping in some doll knickers which I made ages ago using a pattern I found at crochetville. I'm not happy with them, they have ties but I'll pop them in the package none the less.

So I had a go at making my own Barbie doll knickers, they are 'boyleg hipsters' so very easy to make. They simply pull on and sit on the hips, which will be easier for my 4 year old niece to dress her doll.

My own pattern for Barbie doll 'boyleg hipsters'
1. ch 28, sl st to form ring, treble into ea ch (US dc), sl st, do not turn, 28 stitches
2. ch 2, treble into ea treble (US dc), sl st, do not turn, 28 stitches
3. ch 2, treble ea into next 5 treble, turn
4. sl st into next treble, ch 2, treble into next 2 treble, turn
5. ch 2, treble ea in next 2 treble, sl st into 3 trebles on opposite side of ring to form two leg holes
fasten off and turn inside out to hide the seam at the crotch.

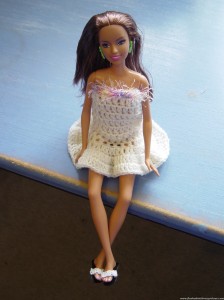
Then I just had to make a simple pull on party dress, didn't I?
My own pattern for a pull-on dress for Barbie
* using 3.5mm hook, gauge depends on the yarn and how many stitches it takes to go around the chest, check every few rows to check fit.
1. ch enough ch to go around chest, sl st to form ring, pull on over hips up to chest to check fit, ch 2, trb in ea trb (US dc), sl st in 1st trb, 23 trb
2. ch 2, trb in ea trb, sl st in 1st trb, 23 trb
3 - 8 repeat row 2
9. ch 2, 2 trb in ea trb, sl st in 1st trb, 46 trb
10. ch 2, 2 trb in ea trb, sl st in 1st trb, 92 trb
11. ch 2, 1 trb in ea trb, sl st in 1st trb, 92 trb
12. in bottom of row 1 using contrast yarn, ch 1, dc (US sc)  in bottom of ea trb, sl st in 1st ch, fasten off

Saturday, September 4, 2010

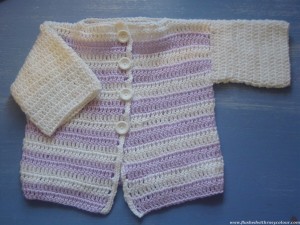
Purple and White Stripes Baby Jacket

How many of these things am I going to need? I do not know, but I just feel like making a bunch!

My baby is expected in summer, so I really don't know how many of these will be worn if at all! I guess if they don't get used they might make nice gifts for someone else. The jackets I've been making are different sizes, so maybe some will fit for the first winter. I've already started on my next baby jacket which is white!

This one was easy and boring to do. If I use this pattern again, I'll try and use a more interesting stitch. I think the stripes saved me from absolute monotony! This simple baby set pattern comes from the Lion Brand Yarn website, to access their free patterns all you have to do is register. This is the same site I got the baby socks pattern from.

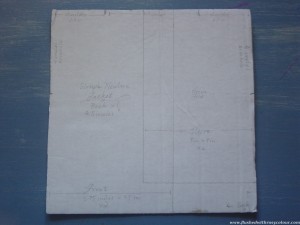
I drew up this simple pattern on a square piece of card. This way I could do it while watching tv, when I prefer not to have to read patterns. The square board is as big as the back of the jacket, and I've made markings for the sleeves and front sections. This pattern really was very straight forward and easy, all you have to do is make 5 rectangular shapes and sew them together. But instead of making up the sleeves separately, I just worked them right onto the made up vest in rounds.

I used my left over purple and white dimples yarn from Lincraft, I think I used the 4mm hook. I chose some very cute recycled flower buttons, and gave them a quick scrub with Earth Choice detergent and a recycled toothbrush so they came up just like new.

Although this is newborn size, it looks a bit bigger than that to me.

<3 <3

Wednesday, September 1, 2010

Simple Blue Pouch

This was very easy to whip up, it took me just over an hour using some nice blue wool from my left overs bag.

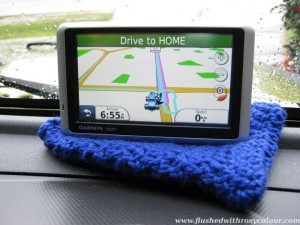
An internet friend asked me if I could make a pouch for his GPS which measures 125mm x 76mm x 16mm. Usually I don't sell what I make, preferring to make gifts for family, but I figured that this wouldn't be too hard so gave it a go.

My pattern for a simple pouch
1. ch 18, treble (US dc) in 3rd ch from hook, tr in ea chain to end, ch 2, turn (16 trebles)
2. treble in each treble, ch 2, turn
3-25. continue row 2 until piece measures 25cm long (about 25 rows)
26. fold at 12th row, making a base of one row, 3 dc (US sc) in ea space down the sides joining two sides together, last space has 1 dc then 2 dc in base row, dc in bottom of ea treble of row 12 to form bottom ridge, dc up the other side like the first side, ch 36 (long enough to be twice the width to form draw string).
27. cut the yarn and thread through first row of trebles, sl st in 1st ch to form draw string, fasten off
LoL! well that's my pattern as I understand it, I don't know if anyone else will!

I wrapped it up in some recycled tissue paper with a tiny homemade tag and posted it off to Western Australia! It fit inside a prepaid envelop which only cost $1.40 which I thought wasn't too bad at all.

Today these fotos came back from my friend in W.A. I'm very pleased to see the GPS actually fits inside. Really, why wouldn't it? Oh, I don't know, I thought I might have made it too small!!

I'm glad something I made so simply is a useful thing!

<3 <3 <3

P.S. Thanks to Louis for the fotos featuring the GPS! <3

Thursday, July 22, 2010

Four Little Lost Angels

As I was taking them home from the market, I knew I would have so much fun cleaning up these second-hand dolls and dressing them in new crochet outfits, perhaps even with angel wings! In the end I settled on summer dresses complete with pretty bonnets and mary jane slippers. These tiny Kelly dolls are just 4.5 inches tall.
pretty outfits for four Kelly dolls
I first found the little blonde in a washing basket full of toys. The stall holder was busy selling a set of Dora dolls, so when I said I would like the tiny doll, she dismissed me saying I could have it for free. Well, I wouldn't take something so special for free, it just wasn't right! Her hair is in excellent condition, and she even has two near new shoes. I was thinking to give a dollar, but when we looked in David's wallet a 50 cent coin was sitting on top so I grabbed that and pressed it into hand of the man that was helping her with the stall. I think it must have been Karma, because later on at another stall, I saw the three other dolls, all with different coloured hair and all just 50 cents each! It was so uncanny it must have been fate that these four tiny Kelly dolls should meet in this way!
how I found these 4 dolls at the market for 50 cents each
Crochetting some clothes for these dolls turned out to be a lot more challenging than I first anticipated. I made several attempts before I ended up with a dress I was happy with. At first, I did a smaller version of the Barbie doll dress I usually do, using baby yarn, but I decided the result looked too bulky. Later, I made matching knickers for that dress using a free pants pattern I found on an old blog, again using the baby yarn. I made a top using baby yarn and a free ruffle top pattern, but I did not use the right size hook and yarn, and it didn't fit. The problem was, I was using baby yarn when I should have been using fine cotton thread.

At first, I really didn't think I would need to follow a pattern for this project, but I did. I had a little success with a free dress pattern @ Crochet Crafts by Helga, using fine cotton and 1.5mm hook as recommended. But I didn't like the skirt, I thought it was too short so added more rows, which then made the result bulky. Finally, I made a dress I liked using the bodice from Helga's free pattern, but adding my own skirt. Using the same cotton, I made some panties using Helga's free pants pattern,shortening the legs by making just one row of sc. I stitched up the gap at the back of the pants as I don't think it needs a button, pull on pants are fine for this small doll. I then made matching pull on panties for the other dresses I made, one each of pink, green, apricot and yellow. Each dress has one button on the back of the bodice.
matching beach outfits for four Kelly dolls
Because you can't see the panties underneath the dresses, I decided the dolls needed some little tops to show them off! Maybe these outfits can be PJs or summer beach outfits? The tops are just the bodice part of the dress, with every stitch in the bottom frill incr. The tops looked a little plain, so I crochet a tiny heart, clover, flower and sun to attach in contrasting colours to the front, to make them look more fun (hopefully!). The flower is just clusters to form 5 petals, and the sun is a round of 15 trbls, with a 2nd round of a picot in every 3rd trbl. I used the heart and clover patterns explained in previous posts.

Then I made them all matching Mary Jane slippers with my own made up pattern.

Mary Janes for Kelly Dolls by Teena Sutton
using 1.25mm hook, fine cotton
1. ch 7, trb (US db) in 3rd ch from hook, 2 trb, 2 db (US sc), turn
2. ch 2, trb in next 5 trb, 3 trebles in the stitch space at the toe, go round to the other side of the shoe and do trb in ea 5 trb, 1 trb at the heel, sl st in 1st trb of this round
3. ch 2, db in next 2 trb, sk 2 trb, trb in next 3 treble to form top of toe, sk 2 trb, db in next 3 trb, sl st in 1st db  of this round
4. ch 8 to form ankle strap and sl st in 1st ch
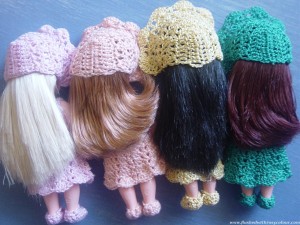
after some hair care the bonnets fit perfectly
Finally, I finished the outfits with bonnets, again with a pattern I made up myself. When I found these dolls, their hair was mostly 'fly-away' and a real mess. After shampooing, conditioning, air drying and finally smoothing with baby oil, their hair came up very nicely indeed. The pretty bonnets help keep the hair in place.

Pretty Bonnets for Kelly Dolls by Teena Sutton
using 1.25mm hook, fine cotton
1. chain 10, trbl (US dc) in 3rd ch from hook, trb in ea next 6 ch, 5 trbl in last ch which is the bottom of the last trbl, trb in the bottom of the other 7 trbl, turn
2. ch 2, trb in ea trbl, extra 3 trbl in last trb, trbl in bottom of each trb, turn
3. ch 2, sk trb, (3 trb in next trbl, sk trb, trb in next, sk trb) twice, 3 trbl ea in next 3 trbl (9 trbl), sk trb, trbl in next trbl (sk trbl, 3 trb in next trbl, sk trb, trb in next) twice, turn
4. ch 2, (sk trbl, 3 trb in next trbl, sk trbl, trbl in next) thrice, 3 trbl in next, trbl in next, (sk trbl, 3 trb in next trbl, sk trbl, trbl in next) thrice, turn
5. ch 2, repeat (sk trbl, 3 trbl in next, sk strbl, trbl in next) seven times, each cluster of 3 is in centre of cluster below, turn
6. repeat row 5 except don't turn, ch about 12 or enough to be long enough to form the chin strap, measure, slip stitch into the other side of the bonnet to form chin strap, don't turn
7 (bonnet frill), ch 2, repeat the pattern from previous row, except each cluster has 5 trebles instead of 3, turn
8. ch 2, repeat the previous pattern, except each cluster has 7 trebles instead of 5, fasten off.

Making outfits for these four Kelly dolls was heaps of fun and very satisfying. I learnt more about adjusting patterns for size, and also how to make pants. These are such a joy - but I think they will be going in a box soon. One day I'll bring them out again as a special treasure.

This is my post for this week's Transformation Thursday hosted @ The Shabby Chic Cottage. Be sure to check out fun crafty stuff at this blog party!

Saturday, June 5, 2010

Tiny Pink Treasures

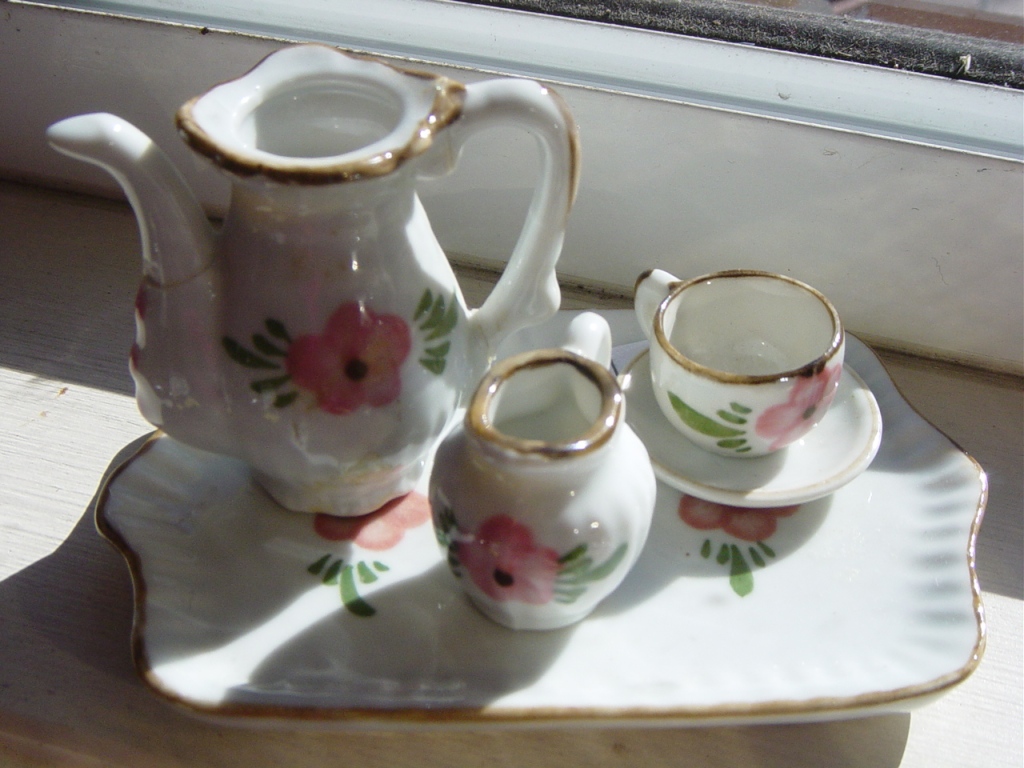
When I went to the Salvo's store a couple of weeks a go with David, I picked up a couple of special pink treasures! This is my Pink Saturday post for this week, which is hosted by How Sweet the Sound!I had already looked on ebay for some miniature doll's tea sets and found they were a bit overpriced for my very modest doll collection. I remember when I was little, I was given a couple of tiny doll's tea sets. I'm really sad I haven't been able to keep any of them. I did treasure them for a little while, but as a child I lost them or they broke. Then I saw this set for just $1! This tiny tea set is part of my Barbie's Pink Tea Party setting.
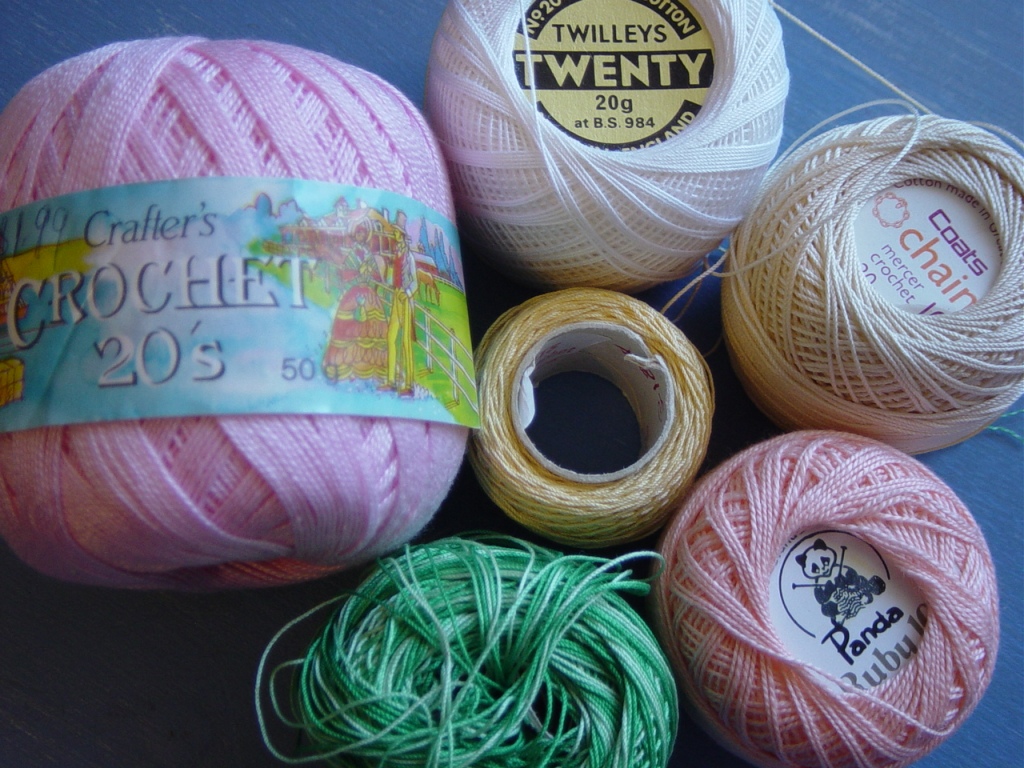
Also at Salvos, David spotted this small bag of cheap crochet cotton. Well spotted, David! Most of you will know how expensive new crochet cotton can be, but I picked this up for a total of $2. I'm really keen on that unused ball of pink, it's the perfect shade for something special! And it hasn't even been used, what a bargain find! I've already made my first small pink doily with it, which I use as a doll's coffee tablecloth.
Using the pink cotton, I also made these special tiny pink scuffs for the flat footed Barbie I gave my niece. They were very easy, I just pierced some black plastic vinyl with a large sewing needle, then used those holes to crochet tiny straps to form the top part of the shoe. Easy Peasy!
Thanks for stopping by for my Pink Saturday post this week, be sure to check out the other great pinks at How Sweet the Sound!
<3 <3 <3


My selected highlights from this week's party


Wednesday, June 2, 2010

Brisbane Markets @ Rocklea

David and I now have a goal to get around to all the markets at least once to check them out, and the Brisbane Markets at Rocklea are apparently one of the most popular. So the first one we have gone to was two Saturdays ago, for the Saturday Fresh Market.

There were heaps of people and I must admit the crowds were daunting for me, but I did the right thing and did not insist David take me home right away like I wanted him to. I don't think the fresh food prices were cheap, but that wouldn't be the reason you bought food from here. The food is fresher and straight from the farmer, or so we are told, but it's not the place for a bargain you can't get anywhere else.  I can get in season fresh food from coles online, I just get what's on special so the prices are very similar. And there are no crowds to contend with! There was also a bit of traffic, thank goodness David was driving.

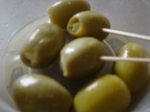
As I walked past an antipasto stall I got a good whiff of the mouth-watering aroma. I just love marinated artichokes but settled on some feta stuffed olives. I didn't realise how expensive they were until I felt like it was too late to decline. I should have just been honest with the guy and said "doood, that's too expensive!" but you know, I couldn't do that could I? These very, very yummy stuffed olives cost me $8 for a small container. That's $8 that could have been better spent, so I had to enjoy them! David doesn't even like olives so I got to eat them all by myself. Oh no, what a sad, yummy loneliness!

Then last weekend, we went to the Sunday Discovery Markets, also at Rocklea. Once again the weather was gorgeous with cloudless blue skies, but there was a chilly bite to the wind as well. We got there just before 11am and they started packing up early for the midday finish. So we had about an hour to wonder around, looking at all the treasures. Besides the blue vase I posted on Monday which we picked up for $3, we also got some cute little trinket boxes which we thought were a good price for $6-$7.50 ea. I also grabbed another cane basket for $2, which was solid except for a small break in the handle which I can cover up with ribbon.

I wonder which market we will check out next?!
<3 <3 <3!

Sunday, May 30, 2010

I Love my Husqvarna

Yes, it is true. I am having a hot and steamy secret love affair - with my sewing machine!

Of course, this does not mean I love David any less, how could I? "He da man!" (pretty much, pretty much). And there is no law written that a happily married woman must not love her trusted sewing machine dearly.

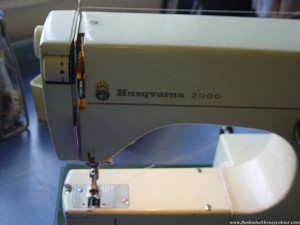
What an absolute treasure my old sewing machine is, and oh so lovely. A much-loved well-worn relic, it always works like a smooth charm whenever I feel brave enough to venture near it. I'm not sure why I don't use it more often, this wonderful refined beast intimidates me with its perfectness. It simply purrs as it glides the seams all my itself, all I have to do is turn it on! But so patiently it waits for me, never pesters me for attention. Just is always there for me when I need it.


And just like a good friend, if I'm making a mistake sewing something the wrong way around, it Knows it isn't the sewing machines fault. So it says nothing, and just keeps sewing, trusting I will see my own error sooner or later. My sewing machine ain't gonna tell me I'm wrong and remains silent. I've known people like that!

This machine came to me second hand by a friend of my mother who I believe didn't use it much, and I didn't realise straight away just how precious this thing truly is.  It's had two services so far, one in Darwin and one in Brisbane, I should try and find someone I trust here on the south side to do it, but I'm a bit nervous about that! We all know how I have 'trust issues'! How I would be lost without my Husqvarna, no other could possibly replace it.


Oh, I love my sewing machine!
/smiffle!

Tuesday, May 25, 2010

Red Hearts of Love

All these photos were taken last Sunday morning. When I saw them in my pictures folder together I realised they were all red so that gave me an idea for a post to join in with Ruby Tuesday hosted by Mary at Work of the Poet!

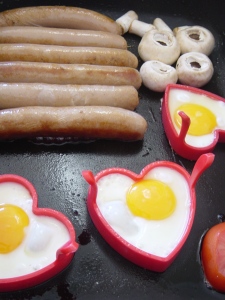
After a couple of hours of me checking the Pink Saturday blogs and he playing a computer game, we got peckish for some breakfast. We were in the mood for our favourite lovey dovey breakfast, sausages and tomato with love heart eggs and mushrooms!

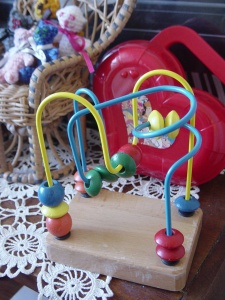
On Saturday, David took me to a Salvo's store (Salvation Army charity shop). We hadn't been there before and there were lots of bargain treasures to be found, some of which I decided I coudn't bring home. One thing I did grab was this very good toy for developing fine motor and hand-eye coordination in very young children. It's pretty solid, not flimsy, so I grabbed it for $3. In the background you can see a red love-heart bag. I can't remember where I got it from but I keep some Barbie things in it, it's so cute. Also in the background you can see my tiny teddies where they live now, sitting on one of the vintage doll's chairs to keep Barbie company. The doily you can see I believe was made by my great-grandmother, which I hope to try copying one day.

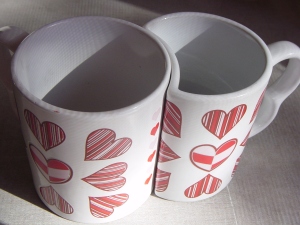
Another bargain treasure we found at the Salvo's store on Saturday were this pair of lovey dovey coffee mugs. We've decided to collect coffee mugs with love hearts on them, as well as other things with love hearts because we are sooo lovey dovey! /awwww... lol! These are probably not so great because the shape means that one is smaller than the other. I don't like the idea that to be in love one person must be smaller.

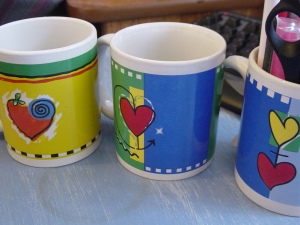
Our first love heart coffee mugs we bought were these very cheap ones we saw at the supermarket a couple of years ago. We got four, one broke and has been thrown away. That's a shame, I really must remember to keep broken crockery for my mosaic projects I hope to do one day. Two of the remaining three mugs have broken handles, so one is now used as my pens holder by my pc. That's why I'm afraid to use the 3rd mug for drinking as I have a terrible vision of someone spilling hot coffee over them when the silly handle breaks! But they are just too cute to throw away, they are too lovey dovey! When a coffee handle breaks, it can still be recycled into something useful.

I also took a photo of this very cute red chocolate tin. It cost me $5 full of chocolates from Coles online last Valentine's Day. I havent' decided what it will be used for yet, but I'm sure it will turn out to be nice. It's sitting on top of the table my great-grandfather made, which I will do a post about one day.

I didn't realise how many red love hearts I have about my house!
<3 <3 <3

Be sure to check out other Ruby Reds at Ruby Tuesday!

Highlights from this week's party

Thursday, May 20, 2010

Five Tiny Teddies

I've been wanting to try making a crochet toy for quite a while thinking it wouldn't be too hard, and I must say I'm pleased with my first set of tiny teddies.
a  family of 5 tiny teddies
I didn't follow a pattern for these teddy bears, and it took me several failed attempts before I settled on a method to use. I had been trying to make the whole teddy in one piece, not wanting to cut, tie in and start new pieces. But in the end I settled on making the head, arms and body in one piece, then adding two legs and the ears afterwards. After I got the hang of it, I started adding the ears at the start while I was making the head. Although I did not follow anyone's pattern for these, I did look at some google images of crochet tiny teddies for inspiration.
practice teddies while I worked out the pattern
These were heaps fun to do and I'd like to make more. The brightly coloured embroidery thread I used for their faces were one of the purchases I made from the Lincraft store in the city on Monday. The ribbons are all recycled from packaging or cut off from clothing (those annoying ribbons you get inside clothes to help them hang nicely in the store but always manage to embarrassingly poke out when you wear them - I cut them off and recycle them).

I think these tiny teddies are just so cute! They'll make great companions for my Barbie doll (you know, the one I have to practice making real clothes on!), to sit with her on my new vintage cane doll furniture.
Wednesday, February 24, 2010

Pretty Covered Coathangers

Every wardrobe is not complete without a few of these covered coathangers! I don't know why I haven't made these before, they are so easy.

Many years ago I replaced all the old coathangers in my cupboard with plastic ones. But you know how these things multiply, right? Somehow, I now have three old wooden hangers in my cupboards and I'm not sure how they got there! They really needed covering, the wood catches on delicate clothes, and the corners leave imprints in the shoulders. Covering them fixes that!

I searched around on the net for ideas on how to do it, but they all  seemed a bit too fussy. For mine, I just cut up some recycled foam packaging and secured it with elastic bands. Then I simply hand stitched the pretty material straight over the top, folding in the edges, using blanket stitch. I folded in the ends and stitched that down, too. The lavender ones have pretty white buttons to secure the ends. I then finished off with a very simple little bow to cover the tiny gap for the hook. These are a cinch and don't take long to make at all.

Wednesday, February 10, 2010

Lovey Dovey Buttons

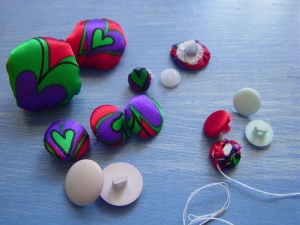
I've been wondering if I could use recycled plastic milk bottles to make buttons, and thought to try it today with some of the left over love heart print.

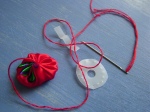
This post about how to make a fabric button made me wonder if I could make the pieces from recycled plastic, instead of buying the kits from the craft store. Buying new something so simple just to make a button seems wasteful to me. I had three goes at making the pieces from the plastic, going smaller and refining it as I went. My result is, I don't think this makes a very strong button! You could use it as a decorative button only, not a functioning one on clothing. I also cut and covered a small piece of plastic to form the missing piece for an old fabric button, which worked ok.
So then I went back to the net. This post about how to make a fabric button without a kit prompted me to go through my large button collection for any faded buttons that were candidates for a fabric covering. The large once-were-purple buttons worked the best, the smaller faded blue ones were more fiddly. By trial and error I found the smaller ones really need a round of cloth that was neither too small or too large. I also watched this video on making fabric buttons with a kit, it looks very simple and I wonder if I could make my own. I really like the picture frame on the wall behind her, it's holding 4 rows of cotton threads, looks cool! (wonder if I could make one from recycled materials ... )

So that was a productive day today - I learnt how to cover buttons with fabric! I'm sure to need that skill at some point ....

edit: I'm thinking of trying to make fabric covered thumbtacs when I've collected enough tiny plastic bottle tops (eg. toothpast etc).
Related Posts Plugin for WordPress, Blogger...