 |
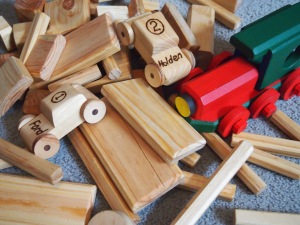
| the wooden blocks Pa Murphy made |
 |
| two small wooden toy cars by Pa Murphy |
Definitely an addition to my collection of hand crafted family heirlooms! Thankyou Pa Murphy <3
 |
| the wooden blocks Pa Murphy made |
 |
| two small wooden toy cars by Pa Murphy |

 My mother made this clever cardboard box, she gave it to me for Easter filled with little chocolate eggs. The lid is part of the box, when you lift it reveals an opening in the middle. After the eggs were removed, I peeked inside and saw more pretty eggs printed inside!
 |
| small sea green beanie for a premmie |
 |
| wavey yellow and green dishcloth |
 |
| crochet headband |
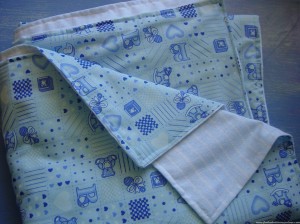 These two wraps are about a metre square each and have a cotton print side and a flannelette backing. Hopefully these will come in handy very soon!
 Thomas is still a few weeks away from coming home, so we'll be able to see then. David are I are so very excited about how well Tom is growing and putting on weight, we just can't wait until he finally comes home. I hope we will be ready for him in time!
 A hot water bottle is just what I needed for these aches and pains, the rice hot packs don't hold their heat for as long. But then I needed to make a cover for the water bottle, didn't I?
 I still have an inflammed liver from the pre-eclampsia, or more specifically the H.E.L.L.P. syndrome which is very rare, so my liver aches but the doctors said that means it's getting better. For this cover I used a 5mm hook and a blend of 70% mohair and 30% PAC (whatever that is). I got this yarn from Lincraft when they had 50% off wool, this one was labelled "Mohair Linate Classic" so I got 5 balls of it at a reasonable price. The washing instructions are cool wash, dry flat in shade, do not hang or tumble dry, cool iron. This is a very simple pattern I made up to fit the bottle and I completed it over a day.
 I know Freya likes purple so I went to Lincraft to get some of their 'plum' coloured cotton so I could whip up another set of drink coasters!
 Washing instructions are on the Frangipani post.
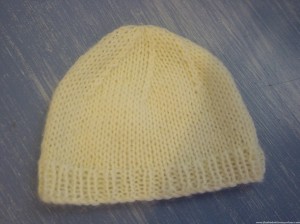 The last two weeks have been surreal to say the least, like a walking dream or day-mare. Some thoughtful soul gave this special beanie to David to give to me, it's what Thomas was wearing in the photo that was taken on his first day. Someone even printed up the photo so I could have it in my room. I didn't see Tom until the second day as I left the ICU to go to the maternity ward. I clung to this special little yellow beanie during my stay while I was away from my baby, I even imagined it smelled like him! I give thanks to the person who made and donated the beanie, and to the person who took the photos of Thomas wearing it, and also to the person who thought I might like to keep it when our baby went into the humidicrib and no longer needed to wear a beanie.
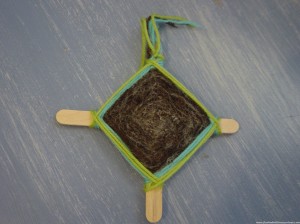 While we were in the maternity ward, on the meal tray was a paddle pop stick. We guessed they were meant to be for stirring tea and coffee, which we thought was a waste of wood. Imagine throwing all those not needed paddle pops away? What a waste of trees! So I collected a few and made some into dream catchers to pass the time. When we left the maternity ward and David went home to sleep, I told him to take the brown dream catcher to place above his bed. It is meant to be for good luck in catching your dreams so they can come true. I learnt how to make these from school, you just weave wool in and out, around the sticks.
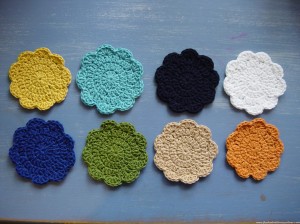
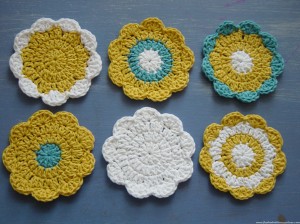 This is the last coaster set I'll do for now. I guess if anyone else wants one, I'll just get some more cotton and make more! But next time I buy cotton, I'll get some red, pink and purple so I can get different colour combinations. Below is a photo of the colours I used for this gift giving season.
 Then as the wet season approaches, the trees would become full of flowers and the smell was gorgeous. Most of them were the yellow and white variety, some had a light blush of pink. And very rarely, there was a deep red variety which didn't seem to grow as thick but had the rich fragrance of a rose and was very special. The blue in this set represents the clear blue skies of the Darwin dry season.
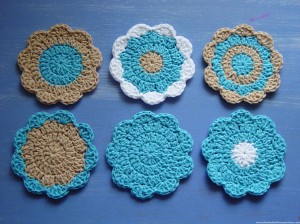 Here are the second and third sets I've made for this Summer Drinks coaster collection, I call these colour combos "Sandy Beach" & "River Boat".
 Navy and white are common sailor stripe colours and is the theme of the upholstery on our "River Boat", and of course it has timber decking!
 Here is the first set of six coasters I am making to give as Christmas gifts. I hope the recipients don't think they are too silly!
 <<< I don't really understand why I woke one morning thinking I needed to make a soap saver for the laundry soap, but I did! I don't usually use these things, but the soap I have in the laundry at the moment was a gift and really needed one as it was making a mess. I didn't follow a pattern as it's a pretty basic shape, but I did look at crochetspot and google for some inspiration, and used my thick cotton and a 4mm hook. I got the idea of continuing the first round all the way round the bottom of the first row from the free pattern at crochetspot, there are also pictures and patterns of other soap savers there. I've tested it out, so far so good. The plan is, when you get the little shards of soap left over at the end you keep them in the bag so you don't waste them. Very thrifty, I like it!
 >>> I have been working on a spiral dishcloth using the same aqua cotton as my first cotton dishcloth, but I'm not happy with it so it's currently in my pile of unfinished projects. I bought some 'amalfi' yarn from Lincraft for $4, which is 100% cotton. I think the choice of colours look 'dishclothy', if there is such a thing, so chose the aqua greenish one. This time I made a bigger version of the basketweave dishcloth, as David asked for a bigger one. This used most of the 50g ball, there isn't enough left to make another one this size. Consolation is that this cloth can be washed and reused for quite a while, so I can get my money and effort's worth out of it. This didn't take long to do, I used a new bamboo 3.5mm I thought to try for fun. I found working with the bamboo hook that it stuck a little, and is not as smooth as using a metal one. The final product measures 22cm x 18cm.
 <<< I tried this square motif, I'm thinking of using it to make some baby play cubes. This coaster pattern is at crochetspot.
 Here is a small handbag that I made on an impulse a few days ago and am particularly pleased with how it turned out.
 This was very easy to whip up, it took me just over an hour using some nice blue wool from my left overs bag.
 My pattern for a simple pouch
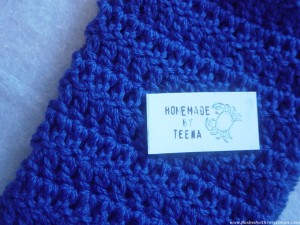 I wrapped it up in some recycled tissue paper with a tiny homemade tag and posted it off to Western Australia! It fit inside a prepaid envelop which only cost $1.40 which I thought wasn't too bad at all.
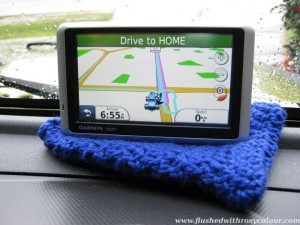 Today these fotos came back from my friend in W.A. I'm very pleased to see the GPS actually fits inside. Really, why wouldn't it? Oh, I don't know, I thought I might have made it too small!!
 I'm glad something I made so simply is a useful thing!
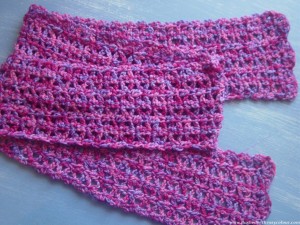 I liked the stitch from the purple baby jacket so much that I used it for this scarf! This is my post for Pink Saturday hosted @ How Sweet The Sound.
 I was very surprised when this beanie hat worked out so well, because I made up the pattern myself!
 Then I just had to make a big rose brooch to go with it didn't I? This is the 4th flower I've made using Rachel's pattern from Crochet Spot. But this time I remembered the pattern as I had done the Berry Pink one the day before. But I made this one different. There are 14 petals, and for the 1st 7 I did trebles (English db tr) instead of doubles (English trebles) to make the petals at the bottom bigger. The other 7 petals are double crochet (English trebles) as usual. It makes the rose more full at the bottom.
 2. 2 ch counts as 1st treble, treble front around the post of the treble below, treble into each treble (as well as front treble around each post) = 24 trebles
 It took me about a week to do this, only working on it while downstairs when David was cooking or watching TV, using a 5mm hook and some soft thin yarn so the end result is nice and lacy. I'm linking this post in with Transformation Thursday, a blog party hosted by The Shabby Chic Cottage.
 Edging
 I bought 5 balls of this 'Berry Mix' Lincraft DK wool last year for my birthday, thinking I might make a simple rug with it, but of course that hasn't happened! This is my post for this week's Pink Saturday blog party hosted by Beverly @ How Sweet the Sound.
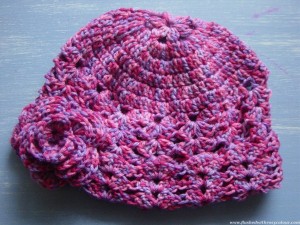
 I made this flower hat one evening while watching some television, the final episodes of Bones and Castle to be exact! I call this hat a 'flower' hat because I started it off with a small 6 petal flower. Each petal is a cluster of 3 trebles all pulled together in one stitch, each petal is then separated by 3 chains. Then I work out in flat rounds, increasing slightly each round until it was just slightly smaller than my out-stretched hand. Then I used the shell pattern down the sides as I did with my wine coloured beanie. This pattern usually makes hats smaller so I was careful to make sure this hat would fit an adult.
 This is now the 3rd rose I've made like this to make into a detachable brooch to go with the hat. I still had to refer to Rachel's pattern at Crochet Spot as I haven't yet memorised it. I highly recommend Rachel's website if you are in need of some crochet patterns, its very nicely set out. Just remember her patterns are in American crochet, not English. The cost of the wool I used for this hat and matching brooch was less than $2, and I used a 4mm hook.
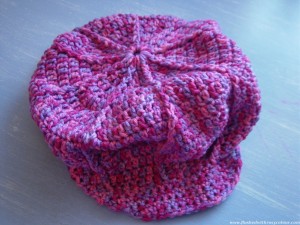 Using the same wool I also made a hip-hop cap following the pattern in the Crochet 08/09 booklet from Lincraft. I didn't check the gauge so that might be why this hat turned out a bit on the big side, although I'm not sure if it's meant to be like that! It didn't take me long and I whipped it up in about 3 or 4 hours while we watching tv and David was cooking.
 I've made a flower to go with the white hat I made about four years ago without a pattern. I like to call the flower I made for it "The White Rose of Peace" ! This is my post for this week's White Wednesday blog party hosted by Faded Charm.
 I prefer to attach these flowers to a safety pin so they are removable according to whim and fancy! This one was made with white wool I was given amongst a large unwanted stash by the mother of a friend, and I used a 3.5mm or 4mm hook for the flower.
 I started this apricot coloured beanie ages ago, and now it's finally finished!
 This set began with a shell pouch I made for my mum to say thank you for teaching me how to crochet. Now the set has grown to include more purses! This is my post for this week's Transformation Thursday which is hosted by The Shabby Chic Cottage. I transformed a ball of lovely and soft multi-coloured wool into these purses.
 I made the tiny purse without a pattern. I again used the shell pattern for one side then plain for the other so the shape would not turn out wonky. I then made a lid for the purse. I was inspired by the lid on the quick clutch at Crochet Spot but I did not follow the pattern. If I did I probably would not have had to pull it apart two times before I got it right on the third try! I also made up my own tiny button, although I might replace it with a proper button if this doesn't work out. This tiny purse took one morning to do.
 I completed the tissues cover over two days without using a pattern. I had been planning to make one with a slit down the middle but then I saw the tissues I had bought for this opened a different way. I made this tissue purse using the shell stitch on the front only and plain treble crochet on the back and sides so it would keep it's shape. I had trouble deciding if I would make a lid for it, but settled on leaving it open because the shell stitch made a nice wavy edge.