 |
| love heart shaped French toast with strawberries and maple syrup |
 |
| simple love heart cards for the whole family |
 |
| having fun cutting love hearts out of watermelon with cookie cutters |
 |
| love heart shaped French toast with strawberries and maple syrup |
 |
| simple love heart cards for the whole family |
 |
| having fun cutting love hearts out of watermelon with cookie cutters |
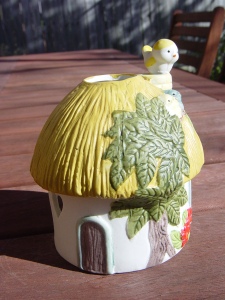 Last Wednesday I managed to get myself along to a craft workshop organised by the Women's Creative Centre in Greenslopes. I post every Wednesday to help motivate me to write about getting out of the house. Included are some photos of things I bought when David took me to the Lifeline shop at Mt Gravatt the previous Sunday, like this cute little garden charm we now have sitting on our garden outdoor table.
 It was a challenge to even find out about this craft group in the first place, as I've been looking on the internet for a while and hadn't found anything local. I only happened to be told about this group when I asked at the Kingston Butter Factory craft shop if they held lessons. After searching the net for "Creative Women's Centre" I found one short page as part of some listing site which had precious little information, just an email address. So I wrote to the email address and got sent a document that I couldn't read because I didn't have the software. Luckily, David helped me download it so I could read a little more. Last Saturday David drove me out to Greenslopes to see the place, as I wasn't going to go by myself without 'casing the joint' first! I plucked up the courage to speak to two ladies in the shop about going along to a lesson.
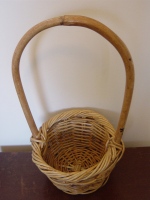
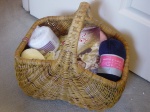 The lessons, or workshop which cost only $4.50, is not held at the craft shop but in another room in the shopping centre. It was nervous for me to walk into a strange room with strange people, its a pity they kept the window blinds closed. One lady went to close the blinds because she 'didn't want people looking at us'. I think that's a shame because it makes it harder for new people. I'm really glad I went to the craft group, and it went for two hours which was just the right length of time. I fit right in with my wonderfully perfect cane sewing basket which I got second-hand for an amazing $3 from the Lifeline shop last Sunday.
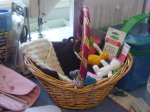
 I learnt a new way of starting and ending my crochet work, which is great. I also talked with the instructor about tension and how to better judge which wool and hooks I should be using for certain projects. I had a go at an Irish Rose and I got a copy of the pattern, which is great. I also talked about the bolero I want to make, ending up changing my mind about which wool to use. There was a lot of inspiration for me to get going on several projects, I just don't know which to start next! I'll be going along again today, taking my patterns and cottons to ask about making doilies and to try and use up my pile of wool ... which doesn't seem to be shrinking yet!
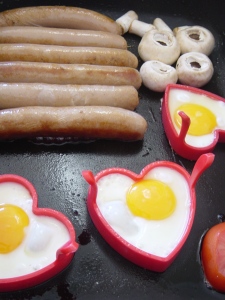 After a couple of hours of me checking the Pink Saturday blogs and he playing a computer game, we got peckish for some breakfast. We were in the mood for our favourite lovey dovey breakfast, sausages and tomato with love heart eggs and mushrooms!
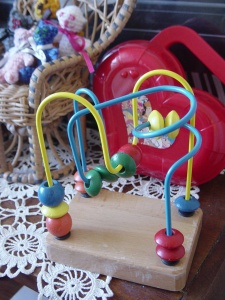 On Saturday, David took me to a Salvo's store (Salvation Army charity shop). We hadn't been there before and there were lots of bargain treasures to be found, some of which I decided I coudn't bring home. One thing I did grab was this very good toy for developing fine motor and hand-eye coordination in very young children. It's pretty solid, not flimsy, so I grabbed it for $3. In the background you can see a red love-heart bag. I can't remember where I got it from but I keep some Barbie things in it, it's so cute. Also in the background you can see my tiny teddies where they live now, sitting on one of the vintage doll's chairs to keep Barbie company. The doily you can see I believe was made by my great-grandmother, which I hope to try copying one day.
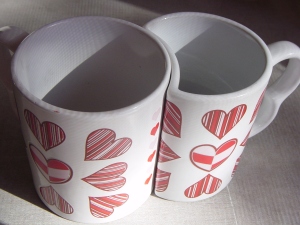 Another bargain treasure we found at the Salvo's store on Saturday were this pair of lovey dovey coffee mugs. We've decided to collect coffee mugs with love hearts on them, as well as other things with love hearts because we are sooo lovey dovey! /awwww... lol! These are probably not so great because the shape means that one is smaller than the other. I don't like the idea that to be in love one person must be smaller.
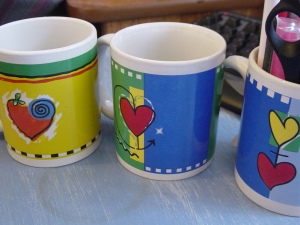 We got four, one broke and has been thrown away. That's a shame, I really must remember to keep broken crockery for my mosaic projects I hope to do one day. Two of the remaining three mugs have broken handles, so one is now used as my pens holder by my pc. That's why I'm afraid to use the 3rd mug for drinking as I have a terrible vision of someone spilling hot coffee over them when the silly handle breaks! But they are just too cute to throw away, they are too lovey dovey! When a coffee handle breaks, it can still be recycled into something useful.
 I also took a photo of this very cute red chocolate tin. It cost me $5 full of chocolates from Coles online last Valentine's Day. I havent' decided what it will be used for yet, but I'm sure it will turn out to be nice. It's sitting on top of the table my great-grandfather made, which I will do a post about one day.
 <<< There is no pattern for this finger puppet, it is merely one of my early attempts at making a crochet toy. I decided to pop a little dress on her, along with a matching flower headband. It was after I embroidered her face that I realised she was back the front. Oh well, her backwards legs are hidden beneath the skirt so it doesn't really matter. She is just for practice after all, and was fun to make. You can see her before she was decorated in my Five Tiny Teddies post as one of my early attempts at making a crochet toy. I think she makes a great companion for my Octopus Boy!
 >>> When I asked David what he thought I should make next, his idea was for me to make a lovey-dovey blanket for the lounge, one with a heart motif. I've seen lots of square heart motifs so went back to the net for some ideas. One I saw was a cross my heart granny square. I didn't use that pattern, just looked at it for the idea. I think I might have a go at making a granny square all in one colour then out-lining just one of the four hearts in a contrasting colour using chain stitch.
 <<< I was feeling brave so was ready to give making a doily another go. I found a simple doily diagram at a page of beginner crochet doilies. I hit a snag at the 10th round so took it to the Women's Creative Centre to see if I could get some advice on it. Apparently my tension was too tight and I need to use a bigger hook, so after we unravelled the mistake we fastened this one off to make a small doily. It's just the right size to put under the phone that is sitting on my piano.
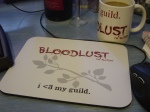
 Earlier this year, I tried to give up my World of Warcraft guild but found out just how much it really means to me.
 After we strip away the facade we are forced to wear in reality, having to play sometimes superficial roles at work or for family, the avatar we choose to play ingame is, in part, a mere fantasy, this is true. But during our work together as a team striving to achieve group goals, and for some this is for years, the 'true colours' of a player always appear, sooner or later. Here you are in your pure form. The facade we wear for society is stripped away, and then what is left? Your real personality, your true self is always there, hidden under purple loot and boss kill achievements. So there we find true heroes, with strength of character that you might not see in the ordinary people around you, living ordinary lives.
 It wasn't until after I left my first husband and found myself living in a strange city after living in a small town for 23 years, that I remembered when I was a little girl my favourite colours had been pink and silver.
 Somehow I forgot this while growing up and studying at university, fervently avoiding anything pink, dressing all in brown, black and navy with stripes, never anything frilly, accompanied with gold jewellery. Because I had to take myself oh-so-seriously, I was terribly grown up and professional! Then I started to develop a fancy for strawberry flavoured milk of all things, how strange! I never drank that stuff before? I found myself referring to it as "Pink Milk" and felt a need for it every now and again. Then there were the pink milkshakes, and I started to remember as a young child my favourite flavoured ice-cream had not been chocolate at all, it had been strawberry. Ever so slowly pink started to creep into my wardrobe when before this shade had always been shunned. In my old life, the colour most represented in my closet was black. Now, thankfully I've been working hard to fix that, although I still do have far too many black shoes and jackets ...
 Pink for me means a return to 'me', remembering who I was and what I wanted when I was a little girl, when I was not concerned with how other people saw me. It was my pure, untainted self, free of expectations. Pink for me is more than just all things girly and pretty, its more than getting in touch with being female. Its about surviving the trauma of a broken marriage, grieving my hometown which I loved dearly but simply had to leave in the end, its about getting away from all the things I thought I was expected to be, a modern professional career ice-woman, and just starting to enjoy life for what it is.
 I've been wondering if I could use recycled plastic milk bottles to make buttons, and thought to try it today with some of the left over love heart print.
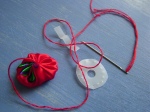 This post about how to make a fabric button made me wonder if I could make the pieces from recycled plastic, instead of buying the kits from the craft store. Buying new something so simple just to make a button seems wasteful to me. I had three goes at making the pieces from the plastic, going smaller and refining it as I went. My result is, I don't think this makes a very strong button! You could use it as a decorative button only, not a functioning one on clothing. I also cut and covered a small piece of plastic to form the missing piece for an old fabric button, which worked ok.
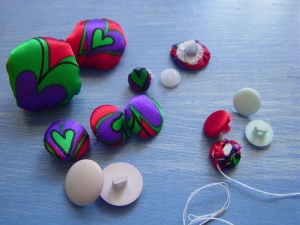 So then I went back to the net. This post about how to make a fabric button without a kit prompted me to go through my large button collection for any faded buttons that were candidates for a fabric covering. The large once-were-purple buttons worked the best, the smaller faded blue ones were more fiddly. By trial and error I found the smaller ones really need a round of cloth that was neither too small or too large. I also watched this video on making fabric buttons with a kit, it looks very simple and I wonder if I could make my own. I really like the picture frame on the wall behind her, it's holding 4 rows of cotton threads, looks cool! (wonder if I could make one from recycled materials ... )
 So that was a productive day today - I learnt how to cover buttons with fabric! I'm sure to need that skill at some point ....
It's important for strong mental health to mark the passage of time with friends and loved ones by celebrating special occasions together. This year, Valentine's Day falls on a Sunday so this will be the last weekend day for a couple of years. Next year, David will be at work. So David and I have decided we shall celebrate with a day long feast!
 To design the menu, we came up with three words to describe our greatest hopes for our relationship, this being the time to celebrate "love". We then assigned colours and foods to these themes, then created a menu with each dish containing at least one thing from each theme. Another way to describe this "spell" we made up is to describe it as a "positve affirmation", because after you eat each dish, you could think or whisper the three romantic words together! The only hocus-pocus here is to remind ourselves of our goals for our life together, and to consolidate it in a yummy but meaningful way.
 |
| love heart rag rug made by crochet strips of material |
 |
| the material was cut into thin strips with pinking shears |
 |
| rag rug in progress |
 |
| the love heart rag rug in its place by the back door |
 <<< While I was surfing the net for inspiration I stumbled upon this seemingly simple small heart pattern. I had success with the pattern from Crochetspot, so thought I should give this one a go, too! It's a little wonky I know, but I think my next one will be less so. I don't know what I'll do with it, but who knows, it might end up as a bag handle end or something, lol.
 quick project at the end of the day. I got the idea to make a scraptrap from Granny Judith's website. But I figured I could use it as a pin cushion when it was done, instead of a child's toy. I didn't use any pattern, I just made it up as I went along, so like my blue heart, its a little wonky! But for a pin cushion, I have a feeling that's going be quite ok (take That, perfectionist tendancy!) And at the end of the day, I had a heap of cotton and scraps to go in it already. It was an excellent way to finish up the day, with a quick tidy up!
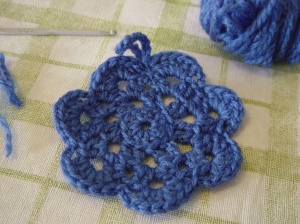 <<< While I'm waiting to go to the doctor, I'm keeping myself busy so I whipped up this one in a few minutes. I really liked this photo of a ten petal flower doily. I just looked at the picture and tried to copy it. My flower only has seven petals because I didn't count the dc in the 1st round. I just ... gave it a whirl!!
 Elastic Bands. You get these free all the time, from rolls of newspapers to bunches of broccolini. I keep my stash in a handy-for-nothing-else sugar bowl. Throw away old rubber bands as they age. Test them by stretching them out, if they break or don't stretch, they are too old!
 Buttons. Once you've got your initial collection you need never buy buttons again. When you buy clothes there's often a spare button, along with ribbon, safety pin and a small zip lock bag. Before throwing away old, ripped clothes, or if using them for rags, make sure you remove the buttons. The key to having a good collection of buttons is to have them sorted so you can find one of a certain colour and size when you need it. I collect the small zip lock bags buttons come in and use them to sort my button collection.
 Pretty Tins and Boxes, eg. biscuit tins. These are often given as a practical gift and I always save biscuit tins, after we've eaten up the bikkies! They are very handy all over the house to put things in. You also often get pretty boxes as packaging when you buy things. Especially useful are plain boxes with no labeling, or easily removable labels.
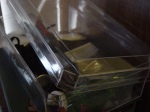 The see through ones you get with the pack of 30 Ferrero Rocher chocolates (my favourites) is particularly handy, as it's see through and stacks. Here's a picture of one that David uses as a bits and pieces box.
 Strong Plastic and Paper Shopping Bags. Bags with no advertisement on them are good, but even if they have one, if they are strong with good handles they can be recycled. I use some strong paper ones to hold different wool projects in. That orange one from T2 Tea is great, nice colour and it's got a strong rope handle. I've collected too many plastic ones though, so I'm thinking I might turn the pretty coloured ones into plastic wool. I'll let you know how that turns out with a future blog!
 Cosmetic and Toiletry Bags. I pick these up as special deals when I'm buying something else. I've also got some handy shopping-bag sized handbags when I've bought magazines. Here's a picture of cosmetic bags I didn't buy empty, and they're good quality. I get heaps of use out of them.
 The ritual of placing good luck charms in the garden is a way to remind yourself to do the best you can as it's caretaker. There is no voodoo or magic involved, other than the magic of self-motivation. I made up a little ceremony where David
 and I each chose a pebble from the collection of smooth river rocks sitting with my pony-tail palm. We then gave our pebble a peck and wrote the word 'grow' on it with a laundry marker. We then chose a plant to pop the pebble under and whispered 'grow' as we placed it. There is no witchery behind this, just a little ceremony to help us try hard while looking after our garden and to help us do our best. I believe it is a powerful thing indeed to convince the mind to have faith in something such as a little magical help in the garden.
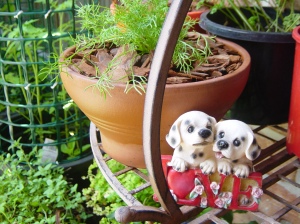 This pair of lovey-dovey puppies started off the whole business of me placing lucky love charms. They were a gift from my late grandmother, and at the time I really wondered what I would do with such an impractical gift. I was in an unhappy relationship at the time and the significance of these puppies were lost on me. Now, I'm very grateful they take pride of place in our garden.
 After some recent trips to the beach near David's mum's house, we couldn't help ourselves but to pick up some rocks from the sand that we thought looked like love-hearts! Of course, in some cases you need a good deal of imagination to see it, not unlike being able to see things in clouds. But that is part of the fun! One person insists a rock is shaped like a heart, when for another the connection is dubious. We have a few little rocks placed around our garden, that with some stretch of the imagination resemble love hearts. Here are a couple I think look like hearts!
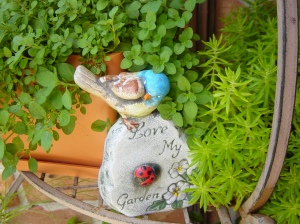 We almost never walk into what we call a 'junk shop', shops that sell poorly made bric-a-brac cheaply so those on a tight budget can get some retail therapy. But one day we were on the hunt for 'lovey-dovey' stuff to decorate our home, and we found this cute little piece to pop in our garden. I insisted a junk shop would have heaps of lovey-doveyness and I was right!
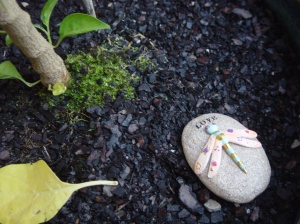 Here are two more examples of lucky love charms in our garden. We got the love-heart bird house for $1.79 at Bunnings, it's so cute! The dragonfly love charm was $2.95 from Turner's Nursery and sits with our new Thai Chilli plant.