Showing posts with label crochet clothes. Show all posts

Friday, July 27, 2012

The Poncho my Mother Made

Here is the poncho my mother made for me when I was a toddler. I remember wearing it until it no longer squeezed over my head! There's a photo of me when mum first put it on me and it reached down to my toes! I got a lot of wear out this, and 40 years later its still holding together.
The old cherished poncho my mother made for baby me, using Paton's Bluebell
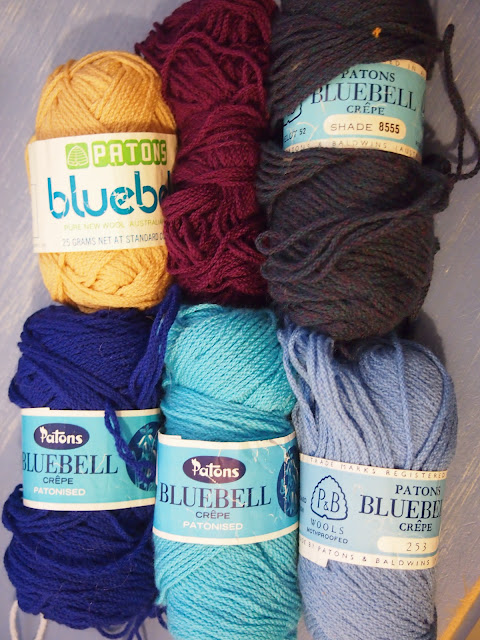
Mum used the 5 ply Paton's Bluebell for this, which you can still buy from Lincraft. I have a few vintage balls, some with the old labels still on. The poncho has started to felt in places after many washes, mum says she just chucked it in the washing machine! A couple of clusters are unravelling, so if I get a chance I might repair it.
vintage balls of Paton's Bluebell, which is still available
This is a precious thing I remember from my childhood which my mother made especially for me. Its the special things that are handmade by someone you know that are the most treasured.

Friday, July 6, 2012

Rings-on-a-Tree Jacket

Like rings on a tree, this jacket will grow with the child. This is my idea to extend hexagon jackets, to increase the amount of wear you get out of this valuable garment, and to reduce the pile of small baby jackets that would otherwise accumulate if I made him a new jacket every winter. Perhaps one day it will get to be an adult sized cardigan?
18 month old Thomas wearing his extended jacket
The most time consuming part of this first extension was trying to unravel the original light blue jacket because when I made that I hadn't thought of the life-time jacket idea yet, so had not planned to unravel it. Next time it will be quicker! When I made the first blue jacket, I did the seams continuously from making the fabric of the garment, then continued to make some further extensions. Those extensions had to be unravelled before I could undo the seams for this dark blue extension. I then added the original extensions back onto the hexagons, leaving the seams undone. Then I changed to dark blue for a contrast. Like rings on a tree, you can see how the jacket grows with the child.
Thomas riding his musical rocker
I added the new dark blue extensions, also leaving the three seams undone, then sewed in all the ends with a yarn needle. Lastly, using a 3rd contrasting colour, I starting edging and joining the jacket. This way, if the contrasting trim is removed, the hexagons will come free and will be able to accept more extensions very easily. I started the white trim at one wrist then sewed one shoulder seam, I tied that with one simple knot and left the end to be woven in later. I then edged the other wrist and did the other shoulder seam the same way, using an invisible stitch with a yarn needle. The 3rd part of the white trim starts at the bottom middle of the back, edging the jacket in sc, working its way all around the inside and up to the collar. There I weave in the shoulder seam ends. I end up back at the middle of the bottom, so then I can cut enough to do the final invisible seam. The end is tied with a simple knot and woven in with a crochet hook so it can be found more easily when it comes time to undo it for the next extension. It is for this reason the contrasting yarn can be seen joining the seams.
contrasting white yarn can be seen in the seams, to make the next extension easier
I also made two ties from left over light blue wool, with 40 ch and sl st back and a 3 ch loop at the end. When I edged the inside of the jacket in white, I added these two ties the same length down the jacket as is allowed for the neck. This way, when the white trim is removed, the blue ties will come free and will be reused in the next extension. With infrequent gentle hand washes, it should wear quite well.
So that is how I make my Rings-on-a-Tree jacket! I hope to make many more extensions on this woollen garment as my son grows. I think that's far better than making a new jacket every winter, what will I do with all those too small baby jackets worn for just one season? Best to up-cycle it and keep on wearing it, I say! Especially if I look after this woollen hand-made jacket as well as I plan to. Better for the environment, better for my stash of wool ;)

Sunday, July 1, 2012

Beautifully Simple Shell Shrug

For months, I've been meaning to make a shrug with this lovely white wool acrylic blend with lovely flecks of pink and blue in it, from New Zealand which my mother gave me. It's the perfect colour to go with the dress I wore when I got married, but there were only 4 small balls of it. The design of the shrug would have to make economical use of the small amount of yarn, because I knew I needed something with sleeves down to my elbows so I could wear the dress in cooler months.
beautifully simple shell shrug designed by Teena Sutton Murphy
I put a lot of thought into the design of this shrug. Like I said, I didn't have much yarn to throw around. The amount of yarn I had would determined the length of the sleeves. So I started at the middle of the back, starting in the direction of one sleeve. I started with a chain and a row of sc, then straight into the shell stitch, which is a pretty common stitch, but I was inspired by this photo of a scarf on pinterest.  Using a 5mm hook complimented the yarn and this stitch quite nicely. I also started with the seam at the middle of the back so that the shell stitch would be symmetrical. In the first shrug I made, which followed a pattern I purchased from Lincraft, the lace stitch went in one direction, starting at one wrist and ending at the other, so it wasn't symmetrical. I didn't quite like that, although it was easy to make.
starting at the centre of the back creates symmetrical sleeves
I used up the first two balls of yarn making the section that covers the back from shoulder to shoulder, starting at that middle seam. Then I considered the collar. I knew I wanted a collar, but wasn't sure what a few rows would look like, as I haven't made a shrug like this with a collar before. I couldn't spend too much yarn on the collar though, so opted for just one round of the same shell stitch as the main part, which I think looks quite tidy. I used the 4th ball for one sleeve, and the rest of the 3rd ball for the other, and fooled around with the cuffs for quite a while. In the end, I decided on a slight flair at the cuff, although I did consider a tighter cuff of simple rows of dc. I joined the left over 4th ball to the shorter 3rd. The cuffs are simply three rounds of (3 dc 1 ch 3 dc, dc), when the main shell pattern was (2 dc 1 ch 2 dc, dc). I did try wider flairs but I thought they just looked silly.
collar detail
I used almost all of the yarn, with the tiny bit left I made a new flower and put it on a brooch. I think I'll give it to my mother, she might like it. After all, she did give me the yarn!

Saturday, May 26, 2012

Pink Princess Jacket

Happy 4th Birthday to Pink Saturday at How Sweet the Sound, the only blog party I join in with! Be sure to check out all the pretty things posted at this blog party. Four years and going strong! Here's a link to the jacket on Ravelry, which has a link to the free pattern. The hat is my own pattern and is available for free here on this blog.

I had my doubts about these colours when they arrived from Bendigo, but I had promised my friend two shades of pink and now its together I'm more convinced that they do actually work. I'm looking forward to seeing a photo of this jacket being worn by the baby girl so I can check my sizing. Making sure this is the right size is my main doubt now, although I do think it will fit!
Pink Princess Jacket with contrasting hat, size 00
To make sure it was a size 00, I lay down all of my son's size 00 clothes on top of it to check. There is quite a bit of variance in the sizes of baby clothes, so this jacket is on the larger of size 00. I think too small is a greater sin than too large as it can always be grown into. This is also what I call my lifetime jacket design. My lifetime jackets can be enlarged and worn for many years, by simply removing the contrasting trim and three seams. I plan to enlarge the blue winter jacket I made for my son for Easter as he has already grown, so I can demonstrate what I mean by my lifetime jacket design. But my first priority now is to finish my custom orders, of which this set is one.

So to make this size 00 jacket, I used a 4mm hook and 8ply luxury wool from Bendigo Woollen Mill.I started by I making two 11 round hexagons, each hexagon has an extension of 5 rows on one side to form the extended sleeves, then they are fastened off. Then the 3 sides that form the centre and bottom were extended by one row then fastened off. Then the top of the sleeves were joined with invisible joins leaving 5 clusters each side for the neck, and 5 clusters at the wrists to form cuffs. I then joined the back seam with another invisible join. Finally the jacket was edged in a contrasting colour using sc along the neck and front, and scallops of 5 dc at the base. The wrists were also edged with scallops, except for the 5 cluster gap which was edged in sc.

I took my project to craft class and my crochet teacher suggested to put ties at the wrists to make a better fit. I've made the size large so the sleeves could be too big, so these ties will keep it on more nicely if that is the case. My crochet teacher also suggested I make ch sl st ties, instead of ch sc, which I did and they turned out very nicely. Another suggestion my crochet teacher made was to put more stitches in the corners so they don't curve up as much, which I also tried to do.

I made a matching hat for this jacket, which will have its own post as this one is too long. On both hat and jacket I put a contrasting flower, how cute!

Thursday, May 3, 2012

Blue Easter Jacket

When I finished the Autumn Cardigan last week and tried it on Thomas, I realised it needed a simple tie to keep it on.
a tie is added to a blue winter sleeping jacket
A tie is perfect for a sleeping jacket as there is no button to dig into the skin. So I also added a tie to the blue Easter jacket I made for our Easter visit to Stanthorpe, which is a lot colder place than here. The tie is a chain of 35 then sc back the other way, and securely fastened into the edge. I put the tie down the front the same width as the neck. This blue jacket is made out of 8 ply, while the Autumn cardigan is made out of 4 ply, so this thicker one is to be worn during the coldest season.

Just in time for winter, perfect!

Thursday, April 26, 2012

Toddler's Autumn Cardigan

Its Autumn here in Australia at the moment, so its perfect timing to finish this cardigan that has been a work in progress for quite a long time! This cardigan is so very special to me, because I started the granny squares while I was in hospital after my son was born.
Autumn Cardigan
I was so very sick when Thomas was born, which is why he had to come 9 weeks early. He was in the baby nursery for nearly 8 weeks, and I was in hospital for 2 weeks. I chose this beautiful 4 ply baby yarn when I was pregnant before I knew I was having a boy. I now wish I chose dark blue instead of the orange, but at the time I thought these colours would be good for either a girl or boy, but now I don't like the orange.
Autumn Cardigan
I wanted to crochet when I was in hospital but couldn't do anything too complicated as it was too hard for me to concentrate. My husband brought in some yarn from home and I chose the most expensive yarn I have bought which I was saving for a nice cardigan. But when I was sick I simply started making granny squares thinking I would make a rug! Some of the granny squares are not even simple granny squares like most of them are. Some squares start with an attempt at a circle but I didn't know how to do them properly at that stage so the circles are wonky! I did do some strange things when I was sick.
the granny squares I made while I was sick in hospital
As summer was drawing to a close and the promises of a chill in the air could be felt, I went back to these granny squares. The thought of this very expensive yarn going to waste bothered me. I didn't want to waste it in another bunny rug, the yarn is so soft it should be worn. Thomas did need a cardigan, so I started increasing the rounds on some of the squares so they were all one of two sizes. I started to plan how I would put the squares into a granny square jacket. It was all I could do with these squares.
Doing a spot of autumn gardening
 I ran out of yarn towards the end and started unravelling a few of the tiny ones that were left over. I only just had enough to make this cardigan, but was determined not to buy any more of this wool. Its more than twice the price of the Australian wool I now buy from Bendigo in Victoria. With this 4 ply baby wool I used a 3.5mm hook.
checking out the baby cherry tomatoes
This cardigan took me a long time to finish, even though in the end the design is very simple and straight forward. I learnt a lot from making this one. I've now decided the best way to join granny squares is with a yarn needle to create an invisible join. I now also join yarn using a Russian join instead of knotting. These methods reduce the ends eventually showing through after wash and wear. And because I've made it for my own son I'll be able to see first hand how it wears. I expect the joins I made with these new methods will persevere longer than the old knotting and weaving methods I used to use.
"Hello" from Thomas
All in all I'm relieved and pleased how this turned out. This has been bothering me for quite a while, and I thought I would just have to end up making something not very good with the squares I started when I was sick. In the end, its turned out rather nice after all. Thomas seems happy with it!

Friday, April 6, 2012

Toddler's Blue & White Easter Jacket

This jacket is based on the granny hexagon idea, but the shape is modified by lengthening some of the sides for a better fit. I've made this jacket for my son to wear during Easter when we visit his grandparents in Stanthorpe, which is going to be a lot more colder than it is here now!
toddler's blue & white jacket for Easter
For this jacket, I used a 4mm hook and 8 ply luxury wool from Bendigo Woollen Mill. I used up most of the 200g ball of blue. I haven't put buttons on it yet, I'm going to wait and see if it needs it. It's the same size as a little jacket Thomas wears to bed, so this one might end up being a winter sleeping jacket, we shall see!

My plan is to share this pattern for free on this blog in the near future, but I want to do some more product testing first to see how this jacket wears and if there is anything wrong with it. Watch this space!


Friday, March 16, 2012

Baby's St Pat's Bow Tie

After I did my yarn stocktake, I realised I had quite a bit of this green acrylic, but what to do with it? Well for starters, with Saint Patrick's Day coming up, why not a cute little bow tie for baby?
Baby's easy St Patrick's bow tie
This is the same as my easy red bow tie, except a little smaller.  I used a 4mm hook and it took me less than an hour to make. Easy!

Tuesday, March 13, 2012

Baby's Easy Red Bow Tie

I quickly whipped up this smart looking bow tie for my baby to wear for good luck on a special day!

I looked on google for images of "easy crochet bow ties". I could see straight away how I could make one for my baby to wear so I made it within an hour. Luckily, it was a Saturday morning so David could look after Thomas while I made it before we got ready to go to the birthday parties!
easy red bow tie for a baby
Using a 4mm hook and some red acrylic I bought from K-Mart a while ago, I started by making a little red bag, then closed it up to form the main body of the bow. I fastened off then made the middle section, then the neck strap which is closed with a button. It was pretty easy!
easy bow tie in progress
I just meant for this to be a bit of fun, to lighten the mood on a potentially difficult day. Sometimes its a good thing to look silly. Especially if it's your baby, then he just looks super cute!

Saturday, March 10, 2012

Pink Plum Jacket

Here is the 2nd toddler jacket I've made this week, this one is to give to a little girl whose 1st birthday is today. This is the same pattern as the other toddler jacket I made this week, which was for a little boy who also has his 1st birthday today! These babies are in my mother's group, I hope their mummies like them! Here's a link to this project on Ravelry, which has a link to the free pattern.
Pink Plum Jacket and Hat
These jackets are based on the idea of using two folded hexagons joined together at the back. But to fit a toddler, the hexagon shape has to be altered, with some sides shorter, while others are longer with added rows. Otherwise the sleeves would be too wide and the middle too small. For this 'Pink Plum' jacket, I used a contrasting purple to scallop the edge which has turned out rather nicely, if I do say so myself!
Pink Plum Jacket
For the purple flower I followed my free crochet flower pattern, I'm chuffed this flower suited it so well. Sometimes I feel very surprised when my crochet stuff actually works out! I made a cute hat to match, I'll share the pattern for it tomorrow. For this I used classic wool from the Bendigo Woollen Mill and a 5mm hook.

I'm thinking I could make this set in other colours and give them fun names like Citrus Splice (yellow & orange), Festive Season (red & green), Blue Skies (sky & blue), Strawberry Cream (red & white), Jaffa (brown & orange) and Honey Bee (black & yellow). Maybe someone would like me to make them one, or I could even see if I could sell them. Maybe one day I could open an Etsy shop, but I don't know if I'm good enough for that!
Pink Plum Jacket detail
Today I am linking up with my favourite blog party, Pink Saturday hosted by How Sweet the Sound. I'm happy to share my pink creation with you today, I hope you like it!

Friday, March 9, 2012

Blue Toddler Jacket with wooden buttons

For some reason I thought making this jacket would be easy, as I was using the basic hexagon jacket principle. But it turns out the hexagon shape is not well suited to a one year old and I had to alter the pattern to fit. This is one of a pair of jackets I've been planning to make for a while now, to give to two babies whose birthdays fall on the same day, this Saturday. Here's a link to this project on Ravelry, which has a link to the blog that explains the pattern.
blue toddler jacket with wooden buttons
There was a moment when I thought these just weren't going to work. But it was a puzzle that needed solving, and I kept at it until I worked it out. At one point I was planning to make this one a double breasted jacket, with one side much wider than the other so it overlapped. Perhaps it could have two rows of buttons, I thought. At that time, I was also thinking to make this a two-toned jacket, with one side blue and the other green. Luckily my husband's opinion proved useful and honest, as he told me the two colours and the uneven shape 'looked funny'. This was just the kind of honest opinion I needed, so I pulled it apart and made it even, and all blue.
jacket in progress, working out a pattern
By the time I had two even sides both in blue, I was planning to finish with a green edge. I had coffee with my friends Tanya and Hazel yesterday, and they didn't like that idea, Hazel said because the green I had was not quite the right shade. So it was going to be all blue! Then we went to Lincraft and picked out some buttons.

I just hope this jacket fits nicely and ends up getting used. I used 8ply wool from the Bendigo Woollen Mill with a 5mm hook. It took me hours spread over the week while I fiddled around with it to work out the pattern, but if I was to make another one, now I know what I'm doing, my guess is it would take me about 3 or 4 hours. Maybe I will make a green one the same for Thomas?

Saturday, January 1, 2011

Red Jacket for Blue Boy toy

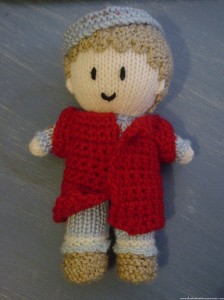
<<< This knitted toy was in the stocking the hospital gave us for Thomas and I just had to crochet a red jacket for it! I don't understand why, I just did. There is no pattern to follow for this, I just made it up as I went along to fit the toy.
Tuesday, September 14, 2010

White Baby Layette

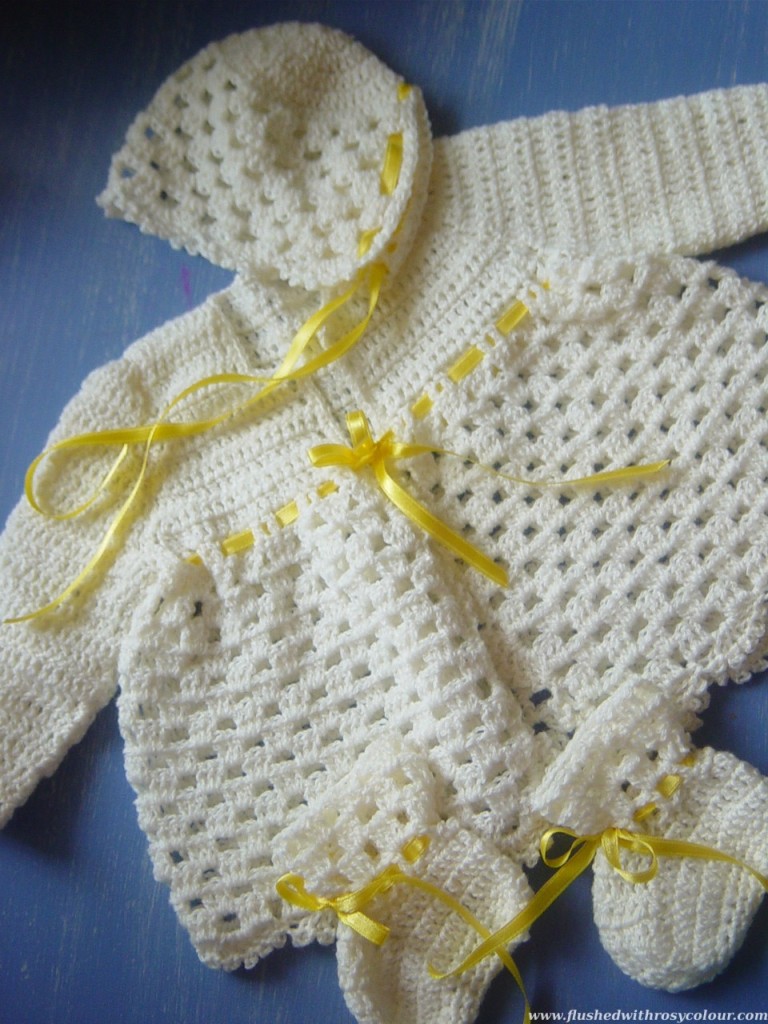
I don't think my baby will even wear these jackets I've been making, but I'm doing all these baby clothes now so I can learn more about crochet. The pattern is on page 77 in a book my mum lent me called "Crochet with Style", published by Murdoch Books in 1990. For this I used some really nice white wool my mum gave me for my birthday.
I've learnt a lot from from doing this jacket. It looks simple enough , but the challenge was interpreting the pattern for the shaping in the bodice and sleeves. As it was, I made a mistake in the front right yoke, so repeated it on the left side so at least they matched! I know what I did wrong. When the pattern said to repeat 3 more rows, I should have just done plain rows instead of decreasing like the previous row. I'll know better next time! I tried a red ribbon and some very cute strawberry buttons I bought years and years ago but have never used, but have settled on some lovely silky yellow ribbon, also given to me by my mum. I do have some white ribbon but it is a different white so didn't match. I could change the look of this set again and get some blue ribbon if I wanted.

I found the sleeves a real challenge and am quite proud that I figured it out! To join seams I usually use a crochet hook and dc, but that made this too bulky. So I undid the dc and sewed the seams with a yarn needle for a less bulky finish. And for these seams I did something I've not had to do yet with crochet - I actually pinned the pieces together first before sewing! I'm quite pleased and surprised these sleeves worked out. These are the first shaped sleeves I've done, and doing this has helped me learn more and makes me think I might be able to do an adult cardigan one day.
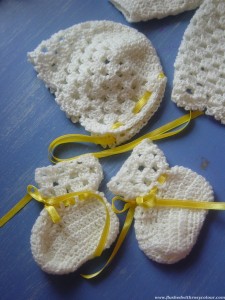
The bonnet was fairly straight forward, as were the booties. For the booties, the pattern gets you to fasten off twice, as the bootie is not all in one piece, but it wasn't too bad. I just left a length of yarn and used that to sew up the seams at the sole.

This was really nice to do, and was a pleasant surprise that I was able to complete it without any help which I thought I would need, especially with the jacket. And I don't know who will ever wear this. It's a newborn size, yet my baby is due in the summer, and my guess is, it's going to be a hot one!

At least I learnt more about crochet by doing this exercise, which can not be a bad thing at all!

<3

Monday, May 31, 2010

Barbie's Blue Jacket

I made this bolero jacket for a Barbie doll back in January using a beautifully soft blue wool kept from my childhood. It's particularly nice, and although its a very simple design, it required some fiddly fine work. This is  my post for today's Blue Monday which is hosted at Smiling Sally.
blue jacket modelled by Artsy Fashionista Nikki
the jacket in granny square pieces before joining
The purpose of me making this was to practice making a bolero jacket for myself. That is how all this Barbie thing started. I bought the doll purely for the purpose of practising making real clothes. But as I opened the box, the magic started all over again and I have fallen in love with Barbie once more!


the finished granny square jacket for a Barbie doll
I actually managed to keep my two childhood Barbie dolls up until I was in my early 30s, but lost them in a terrible accident that happened while I was moving around after I left my first husband. Before the 'accident', I used to look at them in disdain, wondering why I couldn't bring myself to throw them out, why was I carrying them around with me during such a difficult time? Now I know why, it was because I was in denial, I couldn't admit just how much I loved my Barbie dolls!  They were in excellent condition and I had hung onto them for 25 years. But after the 'accident' they absolutely  had to be discarded and it's a real tragedy!
a blue  glass find at a recycled market
Yesterday when David and I went to the Rocklea market, we saw a couple of  old Barbies from the 1970s and 1980s amongst the second hand treasures, all with very ratty hair so I didn't get any. Instead we grabbed this really pretty blue vase which turns out to be slightly flawed.

I found an excellent blog devoted to collecting Barbie called "Don't Just Play with Barbie, Be Barbie". The inspiration for this blue jacket I found at Barbie Basics.

There seems to be a real Barbie doll enthusiast community, how fun!!

<3 <3 <3

Highlights from this week's party include
Related Posts Plugin for WordPress, Blogger...