 |
| A Triceratops, pattern from Planet June. |
Friday, December 7, 2018
Light Brown Dinosaur
Wednesday, December 5, 2018
A Red Crochet Dinosaur
 |
| A stegosaurus in red BWM 8 ply cotton |
Monday, December 3, 2018
A Wonky Crochet Dinosaur
 |
| This is the 1st thing Ive made in 6 months, a crochet dinosaur! |
Tuesday, February 19, 2013
Planet June's Great Dane toy
 |
| A puppy designed by June Gilbert from Planet June |
Besides the mix up of the head position, the pattern was easy to follow and well laid out. Perhaps the instructions for attaching the pieces could have occurred in a different order, straight after the pattern for each piece. The photographs included were useful and helped a great deal. Button eyes were recommended, but I simply embroidered eyes on in a similar way to the nose.
 |
| "I was meant to be a Great Dane but I look more like a Dachshund!" |
 |
| "Please Love Me!" |
What do you think?
Wednesday, November 7, 2012
Rainbow Serpent Draft Stopper
 |
| Rainbow Serpent toy that is also a handy draft stopper |
I made this pattern up myself, starting with rounds of a few scales, then increasing to 6 scales in each round. This stitch is sometimes called 'crocodile stitch' but its a vintage stitch known as 'scale stitch'. This stitch is also sometimes known as mermaid tears. I learnt how to do it from youtube, when I made a small crocodile stitch purse to go inside my handbag.
I finally finished the head with 16 rounds of sc in dark green, with a red drawstring. I embroidered two black eyes onto the smooth rounds of sc before I filled the serpent with old socks and cut up t-shirt. Then I sewed the drawstring closed to form a forked tongue. This is a great toy that also doubles as a useful item in the home to keep out the drafts.
Wednesday, October 17, 2012
Colourful Pyramid Toy
 |
| small pyramid toy made from 8 triangles in contrasting colours |
 |
| 4 solid triangles are joined together with invisible stitch |
 |
| joining up the lattice layer of triangles |
 |
| a 4th seam makes the triangles sit up into pyramid shapes |
 |
| sewing up the last two seams with dried beans inside |
Wednesday, March 14, 2012
Red and Green Striped Toy Sleeping Bag
For this quick little bag I used some acrylic yarn. The pale green was given to me by my mum, and the red I bought from K-Mart. I can't remember the project I bought the red yarn for, but it's been used in lots of projects since then, like my red Lady Bird two way tea cosy. I used a 4mm hook to make this up quickly, it took about an hour.
Should I explain how I made this? It wasn't too hard. I began as if I was making another little bag I like to make, keeping the yarn and carrying it over to the next round to create the stripe. When I got to about head height of the toy, the rounds became rows as I left a space for the face, turning back the other way for the next round. Three rows in total create the face space, then 11 ch and sl st to close it up again. Then a round of dc, 11 of which were in the chain, then a row of sc to join the two sides together. Then I switched to green to do a round of sc around the inside of the face space, then a ch to thread in and out through that round of sc to create a drawstring. See? Not too hard at all!
I might pop this into someone's birthday present along with some other things. I hope they think it's cute, I do!
Thursday, January 19, 2012
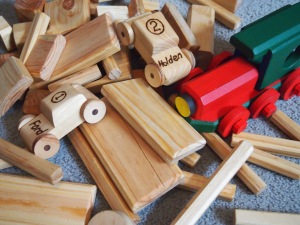
The Wooden Blocks Pa Murphy made
 |
| the wooden blocks Pa Murphy made |
 |
| two small wooden toy cars by Pa Murphy |
Definitely an addition to my collection of hand crafted family heirlooms! Thankyou Pa Murphy <3
Saturday, January 15, 2011
Three Small Things - blanket, beanie, curly worm
 <<< I bought 2m of this warm brown fleece last winter from Lincraft, thinking I could make myself a skirt or wrap dress which I didn't end up doing. So the other day I cut it in half, and then one half was cut in half again to make a 80x80cm square. I then edged it with blanket stitch in a contrasting blue cotton. I didn't do so well when I needed to sew in more thread. I'm sure there is a trick to it, I just don't know it. This is like the material the blankets are made of, and the nurses hospital are using these not crochet rugs which have been donated. But I don't think I'll edge the next one with hand-stitching, I might use my trusty sewing machine instead!
 >>> I made up this beanie using the cream yarn from Wangaratta Mill, which is part of the Australian Country Spinners. If I ever sell anything I make, I would prefer to be using locally made yarn, much like this. I used a 4mm hook and the pattern has the ridges at the increases for the 1st 5 rounds. This one has a turned up brim of 3 extra rounds. I call it a "junior fisherman's hat" because the look of it reminds me of the beanies fishermen wear on their boats on cold, early mornings.
 <<< This curly worm I made for a mobile I'm working on. Its a common pattern, I found one at Art of Crochet by Teresa. You just make a chain, then trb 4 times in ea ch. For a contrasting colour, I did a second round in red with 2 dc in ea trbl. You can make these into bookmarks, Christmas decorations, cats' toys or anything else you can think of. For this one, I used a 4.5mm hook and it just took me a few minutes, so it's a fun little project to do.
Saturday, January 1, 2011
Red Jacket for Blue Boy toy
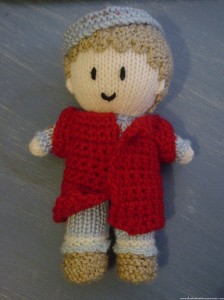 <<< This knitted toy was in the stocking the hospital gave us for Thomas and I just had to crochet a red jacket for it! I don't understand why, I just did. There is no pattern to follow for this, I just made it up as I went along to fit the toy.
Thursday, July 15, 2010
White Sunhat with Daisy Garland
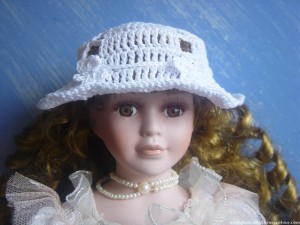 The purpose of making this sun hat was to practice before trying to make one for a child, possibly my niece who has gone back to live in Darwin and has no use whatsoever for one of my winter beanies!
This is a very special doll my mother gave to my grandma. When nanna went to hospital I was given this doll for safe keeping. I think my mum wants this doll back one day but when I offer she says 'next time'. So I am taking good care of her by making her a pretty hat, so she doesn't feel left out because all the other toys are getting clothes made for them, too!
I have real trouble reading patterns as I often say, I need to understand in my mind beforehand how what I am making will work. This means I have a lot of trial and error while I try and make up my own patterns when I want to do something a little more complicated. I looked at images of cotton crochet sun hat on google but did not follow a pattern or any one image idea. I started with a five petal flower then continued with a flat round, then stopped increasing down the sides, making gaps in the five corners. With the brim I started increasing again at the corners, filling in the gaps with increasing stitches. I mostly used double trebles (American trebles) for this hat.
 The hat was a little loose on the doll and I made it that way so it wouldn't ruin the doll's curls. But it wouldn't stay on! Looking at the completed hat I decided it needed some more five petal daisies to match the one in the centre. So I came up with the idea to make a little daisy garland to go round the hat to keep it tightly on the doll. The daisies in the garland are the same size as the daisy on the hat, but are made differently so the tips of the petals are not joined in a round. The daisies on the garland were (3 ch, sl st, 3 ch US treble into centre cluster, 3 ch, sl st into centre) repeat 5x, then each flower was joined with 15 ch. I had to do the final sl st of each flower on the opposite side to front so they would sit properly on the garland, all nicely facing the front.
I'm still not sure how I will make one to fit a child though. This used cheap 4ply mercer cotton from Lincraft and a 1.5m hook. It might be a bit fine for a child's hat, but I wouldn't want a summer hat to be much thicker either. Making a child's sunhat is just one more thing on my 'list of things to do'!
<3 <3
Saturday, June 5, 2010
Tiny Pink Treasures
When I went to the Salvo's store a couple of weeks a go with David, I picked up a couple of special pink treasures! This is my Pink Saturday post for this week, which is hosted by How Sweet the Sound!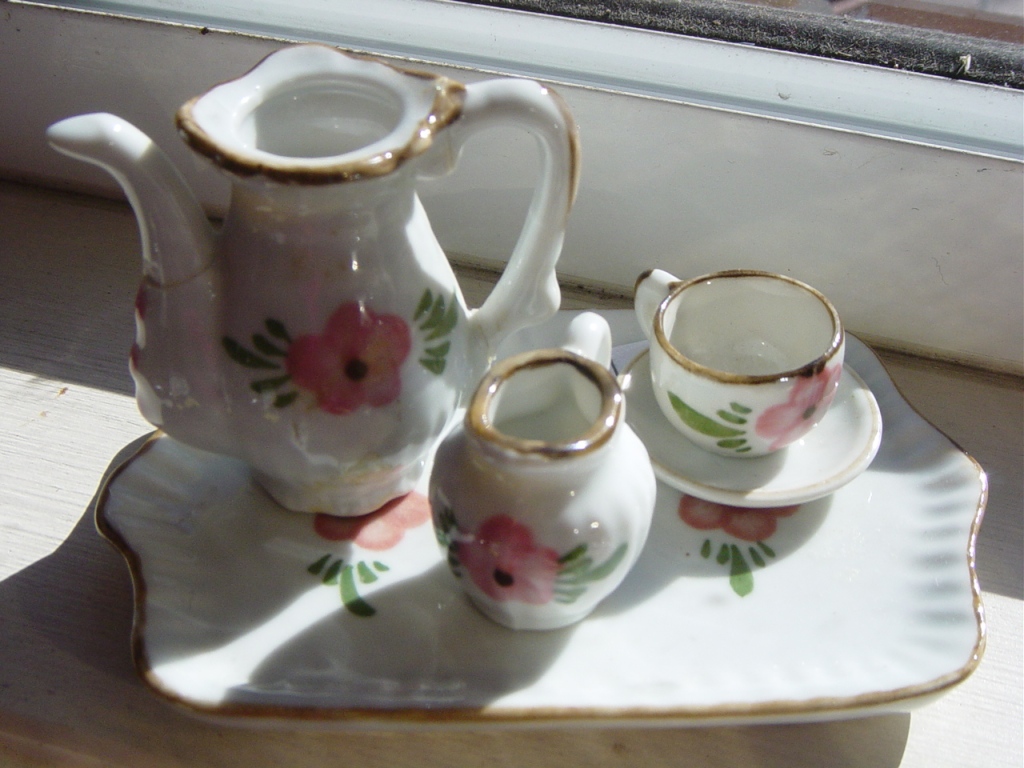 I had already looked on ebay for some miniature doll's tea sets and found they were a bit overpriced for my very modest doll collection. I remember when I was little, I was given a couple of tiny doll's tea sets. I'm really sad I haven't been able to keep any of them. I did treasure them for a little while, but as a child I lost them or they broke. Then I saw this set for just $1! This tiny tea set is part of my Barbie's Pink Tea Party setting.
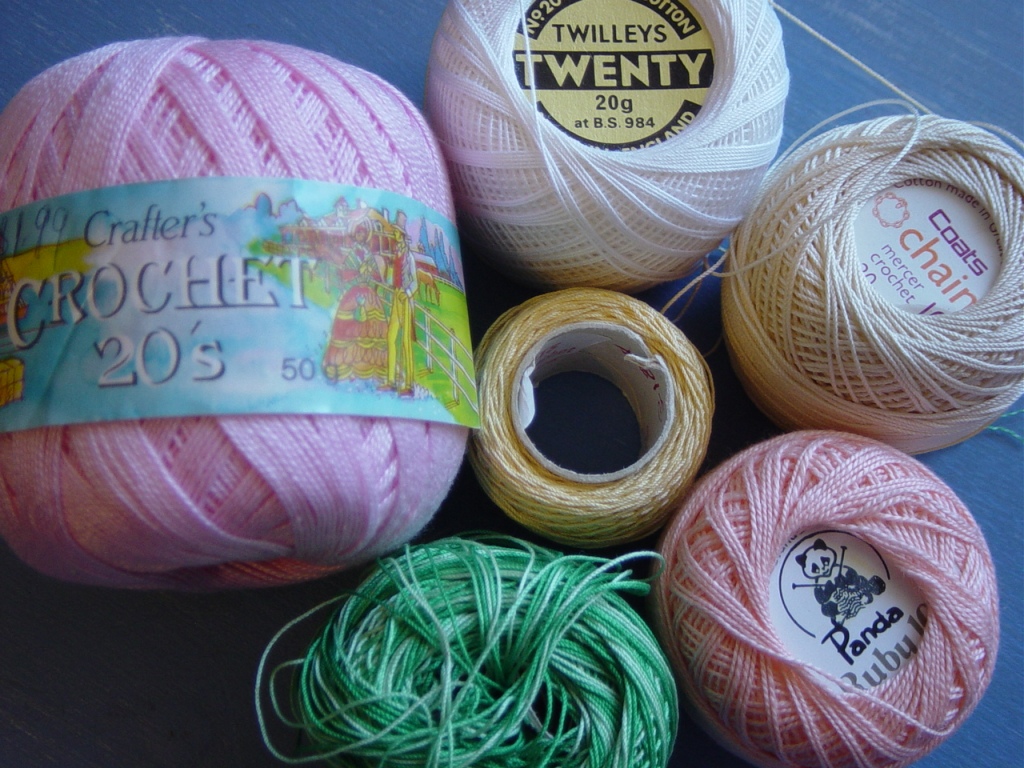 Also at Salvos, David spotted this small bag of cheap crochet cotton. Well spotted, David! Most of you will know how expensive new crochet cotton can be, but I picked this up for a total of $2. I'm really keen on that unused ball of pink, it's the perfect shade for something special! And it hasn't even been used, what a bargain find! I've already made my first small pink doily with it, which I use as a doll's coffee tablecloth.
 Using the pink cotton, I also made these special tiny pink scuffs for the flat footed Barbie I gave my niece. They were very easy, I just pierced some black plastic vinyl with a large sewing needle, then used those holes to crochet tiny straps to form the top part of the shoe. Easy Peasy!
Thanks for stopping by for my Pink Saturday post this week, be sure to check out the other great pinks at How Sweet the Sound!
<3 <3 <3
My selected highlights from this week's party
- the most gorgeous pink shoes I've ever seen, complimented by a well placed tattoo @ Do The Shoes Match My Purse?
- beautiful pinks, included a doll in knitted pink and pink crochet edging @ Miss Bee's Haven
- a special wedding blog party to look forward to @ Angelic Accents
- Pinkalicious flowers @ Simply Susan!
Tuesday, June 1, 2010
Scented Bean Bags
 |
| Scented Bean ags numbered sides |
 |
| reverse sides of the scented bean bags |
For this project I used the following embroidery stitches
running stitch
blanket stitch
cross stitch
chain stitch
lazy daisies
french knots
Saturday, May 29, 2010
Barbie's Pink Tea Party
 The pink dress I made especially for today's Pink Tea Party could very well be the most beautiful thing I've made so far! I think my Barbie is very pleased to have something so nice to wear to the party today, which is to celebrate the 2nd anniversary of Pink Saturday and is hosted at How Sweet the Sound.
The vintage doll's cane furniture is the first thing I've ever bought from Ebay about two weeks ago. I remember when I was a little girl some of my friends had these but I didn't, and when I saw them on Ebay I just had to grab it! There was also a four piece lounge set for sale with normal chairs instead of the peacock chairs, but because it was my very first ebay purchase, someone else bid at the very last minute so I lost! I didn't make the same mistake on the peacock chairs though, and got them for $16 including postage. Probably a little on the expensive side for my modest doll collection as I'm not too serious about it, but I do believe the seller when they said this cane set is about 40 years old! I think it's a very special thing.
 Using a 2.5mm hook and a small ball of baby pink yarn, I started the doll's dress on Monday afternoon and finished midday Tuesday, so it took less than one day. This is not the first dress I've made like this, although I think it's an improvement on the orignal because it crosses over at the back so you can't see her knickers - if she is wearing any! The Barbie dresses I make are inspired by a dress I've kept and treasured from my childhood which my mother tells me was made by my Nanna Pam. You can't tell when she is sitting down, but you can pinch the skirt to make pleats appear. I am so tickled pink I could manage to make something as pretty as this!
 In an attempt to preserve the doll's hair as long as possible, I try and keep it tied up in a little snood. Anyone who has collected dolls knows how synthetic hair can ruin over time. But the pretty pink dress needed it's own hat, so I decided to give making a bonnet a go! I looked on google for images of crochet doll bonnets, but there were not many that I could see. I remember a knitted bonnet I wore as a young child which folded neatly into a square, so I made one up kind of like that. I didn't follow a pattern at all, and used the same stitches as in the skirt of the pink dress.
 The tiny coffee table needed a pink doily, don't you think? This is my first completed proper doily and it took me between 2 to 4 hours I think, finishing it last Thursday morning. I used a pattern in a book I borrowed from my local library on Monday called "101 Easy Scrap Crochet Projects". The pattern for this doily is on page 40-41.
This doll's setting would not be complete without a tiny doll's teaset but when I looked on ebay for those I decided they were too expensive. But when David took me to the Salvo's store last Saturday I saw this set for just $1! That was more like it I thought, but didn't notice until I got to the counter that the teapot has been broken and glued back together. Oh well, I don't think Barbie minds! And the tiny teddies don't drink tea anyway. The cheeky things have hidden a big bottle of liquor to sip during today's party, those Party Animals!!! A good thing too, because there is only one teacup!
 I hope you enjoyed reading about my special pink tea party!
<3 <3 <3
For more pinkness check out today's special anniversary of Pink Saturday at How Sweet the Sound.
Highlights from this week's party
- a truly magical and artistic tribute to Beverly's Pink Universe @ Heart of a Wizardess
- gorgeous pinks like pink shoes and pink chandeliers @ Enchanted Revelries
- images of a tiny tiny vintage doll with crochet dress, hat and knickers @ Connie Eyberg Originals
Friday, May 28, 2010
A Pair of Tiny Dancing Teddies
 |
| a pair of tiny dancing teddies |
 |
| tiny dancing teddies beside reading glasses to size |
/chairdance!
Check out some crafty ideas at this week's party at It's fun to craft.
Highlights from this week's party -
- cushion cover made from a recycled cardigan @ Whimsi Kel
- a pretty and practical home-made skirt for a girl @ The Crafty Cupboard
- a very nice and simple homemade dress with pretty frills at What Allie's Making Now
Thanks to Fun to Craft for hosting today's party /smiles!
Tuesday, May 25, 2010
Red Hearts of Love
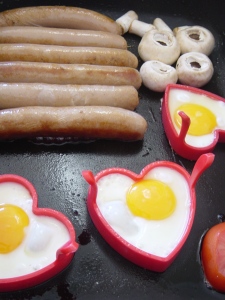 After a couple of hours of me checking the Pink Saturday blogs and he playing a computer game, we got peckish for some breakfast. We were in the mood for our favourite lovey dovey breakfast, sausages and tomato with love heart eggs and mushrooms!
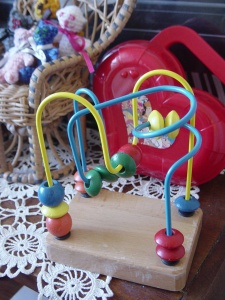 On Saturday, David took me to a Salvo's store (Salvation Army charity shop). We hadn't been there before and there were lots of bargain treasures to be found, some of which I decided I coudn't bring home. One thing I did grab was this very good toy for developing fine motor and hand-eye coordination in very young children. It's pretty solid, not flimsy, so I grabbed it for $3. In the background you can see a red love-heart bag. I can't remember where I got it from but I keep some Barbie things in it, it's so cute. Also in the background you can see my tiny teddies where they live now, sitting on one of the vintage doll's chairs to keep Barbie company. The doily you can see I believe was made by my great-grandmother, which I hope to try copying one day.
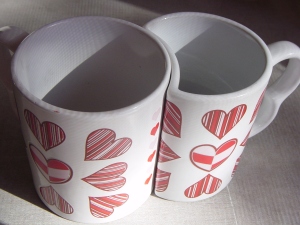 Another bargain treasure we found at the Salvo's store on Saturday were this pair of lovey dovey coffee mugs. We've decided to collect coffee mugs with love hearts on them, as well as other things with love hearts because we are sooo lovey dovey! /awwww... lol! These are probably not so great because the shape means that one is smaller than the other. I don't like the idea that to be in love one person must be smaller.
Our first love heart coffee mugs we bought were these very cheap ones we saw at the supermarket a couple of years ago.
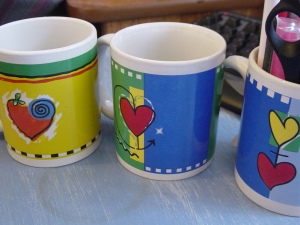 We got four, one broke and has been thrown away. That's a shame, I really must remember to keep broken crockery for my mosaic projects I hope to do one day. Two of the remaining three mugs have broken handles, so one is now used as my pens holder by my pc. That's why I'm afraid to use the 3rd mug for drinking as I have a terrible vision of someone spilling hot coffee over them when the silly handle breaks! But they are just too cute to throw away, they are too lovey dovey! When a coffee handle breaks, it can still be recycled into something useful.
 I also took a photo of this very cute red chocolate tin. It cost me $5 full of chocolates from Coles online last Valentine's Day. I havent' decided what it will be used for yet, but I'm sure it will turn out to be nice. It's sitting on top of the table my great-grandfather made, which I will do a post about one day.
I didn't realise how many red love hearts I have about my house!
<3 <3 <3
Be sure to check out other Ruby Reds at Ruby Tuesday!
Highlights from this week's party
- wonderful Flame Tree image and poetry at Rinkly Rhymes
- on friendships at Anne-Marie with a dash
- a beautiful close-up flower photograph at Little Bang Theory
- "I blog therefore I am" at Joysweb
Sunday, May 23, 2010
Three Small Things - fingerpuppet, granny square, doily
 <<< There is no pattern for this finger puppet, it is merely one of my early attempts at making a crochet toy. I decided to pop a little dress on her, along with a matching flower headband. It was after I embroidered her face that I realised she was back the front. Oh well, her backwards legs are hidden beneath the skirt so it doesn't really matter. She is just for practice after all, and was fun to make. You can see her before she was decorated in my Five Tiny Teddies post as one of my early attempts at making a crochet toy. I think she makes a great companion for my Octopus Boy!
 >>> When I asked David what he thought I should make next, his idea was for me to make a lovey-dovey blanket for the lounge, one with a heart motif. I've seen lots of square heart motifs so went back to the net for some ideas. One I saw was a cross my heart granny square. I didn't use that pattern, just looked at it for the idea. I think I might have a go at making a granny square all in one colour then out-lining just one of the four hearts in a contrasting colour using chain stitch.
 <<< I was feeling brave so was ready to give making a doily another go. I found a simple doily diagram at a page of beginner crochet doilies. I hit a snag at the 10th round so took it to the Women's Creative Centre to see if I could get some advice on it. Apparently my tension was too tight and I need to use a bigger hook, so after we unravelled the mistake we fastened this one off to make a small doily. It's just the right size to put under the phone that is sitting on my piano.
Thursday, May 20, 2010
Five Tiny Teddies
 |
| a family of 5 tiny teddies |
 |
| practice teddies while I worked out the pattern |
I think these tiny teddies are just so cute! They'll make great companions for my Barbie doll (you know, the one I have to practice making real clothes on!), to sit with her on my new vintage cane doll furniture.
Thursday, May 13, 2010
Two Hats for Babies
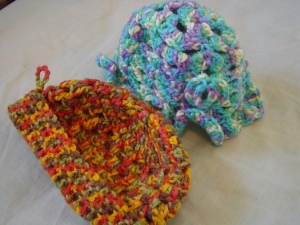 How did this happen? I do not know, but somehow I have managed to crochet, not one but two hats for babies, how absurd!
I've been trying to make beanies for children for the last two days, thinking maybe my brother's children might need some for the coming winter, but have just been getting the sizes all wrong because I am not following a pattern. I discovered a size chart for beanies yesterday which has helped a great deal.
 I have completed just 3 beanies in my life before learning how to read crochet patterns, making them to fit the person who was to wear them. One of them is the blue beanie I made for David last winter, I also made a loose fitting white one for myself to wear on holiday to Tasmania in 2004, the 3rd I made BD (before David) so we don't talk about that. The only beanie pattern I have actually read and followed was on Rachel's Crochet Spot, but I didn't actually finish the beanie! Instead it ended up as a flower in my day of crochet trials.
Now, in the last two days, I have made four more beanies with the wool I bought from Lincraft, including these two that are baby sized! (For these I used a 4mm hook and Lincraft DK yarn in Autumn and Turquoise mixes). They are just sooo cute, I can't undo them to redo again now, how could I? I particularly like the handy hookloop on the autumn one, and the hyperbolic brim on the aqua one, how sweet! But I don't know anyone who might make use of them, perhaps I will get a doll or a teddy that can wear them?
... lol ;-)
Wednesday, March 31, 2010
Dress for a Special Teddy
 This pair of teddy bears are very special to me, I've had them for nearly two years now.
I knew I wanted to get my grandma something soft and pink, hopefully something that could bring her at least a little bit of comfort. David found one and I loved it straight away, knowing it was what I needed to give her. I put a big, bright pink ribbon around it's neck. It was a hard time for my family, David took me back to the newsagent and bought me another one. When my nanna passed away, I was given the option to look after her teddy so chose to keep the pair together.
I recently made a dress for one, it was very easy. I might make another one in a different colour for the other teddy. I simply made a circle chain with a circumference as wide as the chest, rows of single crochet make up the bodice. Then I used a shell stitch for the skirt. Last to do was 2 shoulder straps leaving holes for the buttons, and sewing on the prettiest buttons I could find that would suit. I chose ones with a nice shell texture.
It might be fun to make a frilly pair of underpants to go under the dress, if I ever get around to it.


