 I decided to invest said 30 minutes into making a bag instead, one that was generously sized so this would no longer be an issue! I have metres upon metres, of cheap blue cotton material saved from my old life. These were purchased for a sea musical I directed for a primary school where I was the music teacher. For certain scenes of the show, we had a couple of kids hold the ends of these swathes of cloth, moving their arms up and down so they would make waves. Lol! I just have to laugh at the silliness of it, where did I get those ideas from? I didn't want to waste the material so saved it for a rainy day like today!
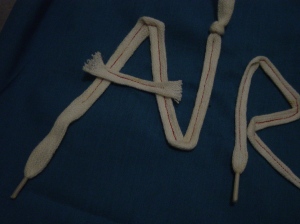
 To make this very simple bag a bit more challenging, I planned to sew the letters for A-I-R-B-E-D on it. I had several options, but in the end went for white shoe laces (of which I have a copious amount and I don't know why) with contrasting red thread. Actually, the thread was red from working on another project but I thought it looked nice so kept it. Once the lettering was done, sewing up the bag was very straight forward.
1. Cut a piece of material twice the size of the object you want to go in the bag, plus a couple of inches extra to make it easier to go in, and for seams.
2. Using pins, plan where the shoelace writing will go, plastic ends of laces will be the ends of letters, so you don't have to hem edges.
3. Machine sew the shoelaces with a contrasting thread, let the cut ends of laces fray for added effect.
4. Machine sew what will be the lip of the bag, make it wide enough for a nappy safety pin to go through.
5. Turn the lettering to the inside and sew down the two sides (the 3rd side is folded).
6. Turn the bag right way around.
7. Attach a nappy safety pin (I find those easiest to handle) to the end of some brightly coloured cord, and thread it through the lip of the bag.
voilà

No comments:
Post a Comment