Thursday, May 27, 2010

Simple Brown Handbag

I've quickly made up another chocolate-coloured handbag in case my sister doesn't like the other brown bag I made for her. This is my post for Transformation Thursday at The Shabby Chic Cottage. The materials transformed for this was about 50g of yarn and three buttons. Using a 3.5mm crochet hook it didn't take long at all, maybe one afternoon.

I was speaking to Jen last week and she mentioned she needed a little handbag just big enough to hold a couple of things so I've made another bag a little bigger than the last with a longer handle. This bag has a handle long enough that when on the shoulder the bag will hang down by the waist. I used a simple stitch, instead of the shell stitch I used in the first brown bag which made it a little wonky, so this was quicker to make.

By the way, I found out at the craft group I went to last week that the stitch I've been calling 'double crochet' is American for the UK stitch called 'treble crochet', which is the stitch I used mostly here. I'm thinking I will need to learn both crochet languages so I know the two names for each stitch. There are so many free patterns on the internet that are in American crochet, but my mother and the local craft group use British crochet, so it's best I know both!

Here's to hoping my sister likes at least one of these bags!

So MANY Fantastic Ideas at this weeks party, some day I'd really like to try these ones...

Wednesday, May 26, 2010

Women's Creative Centre, Greenslopes and Lifeline Store, Mt Gravatt

Last Wednesday I managed to get myself along to a craft workshop organised by the Women's Creative Centre in Greenslopes. I post every Wednesday to help motivate me to write about getting out of the house. Included are some photos of things I bought when David took me to the Lifeline shop at Mt Gravatt the previous Sunday, like this cute little garden charm we now have sitting on our garden outdoor table.

It was a challenge to even find out about this craft group in the first place, as I've been looking on the internet for a while and hadn't found anything local. I only happened to be told about this group when I asked at the Kingston Butter Factory craft shop if they held lessons. After searching the net for "Creative Women's Centre" I found one short page as part of some listing site which had precious little information, just an email address. So I wrote to the email address and got sent a document that I couldn't read because I didn't have the software. Luckily, David helped me download it so I could read a little more. Last Saturday David drove me out to Greenslopes to see the place, as I wasn't going to go by myself without 'casing the joint' first! I plucked up the courage to speak to two ladies in the shop about going along to a lesson.

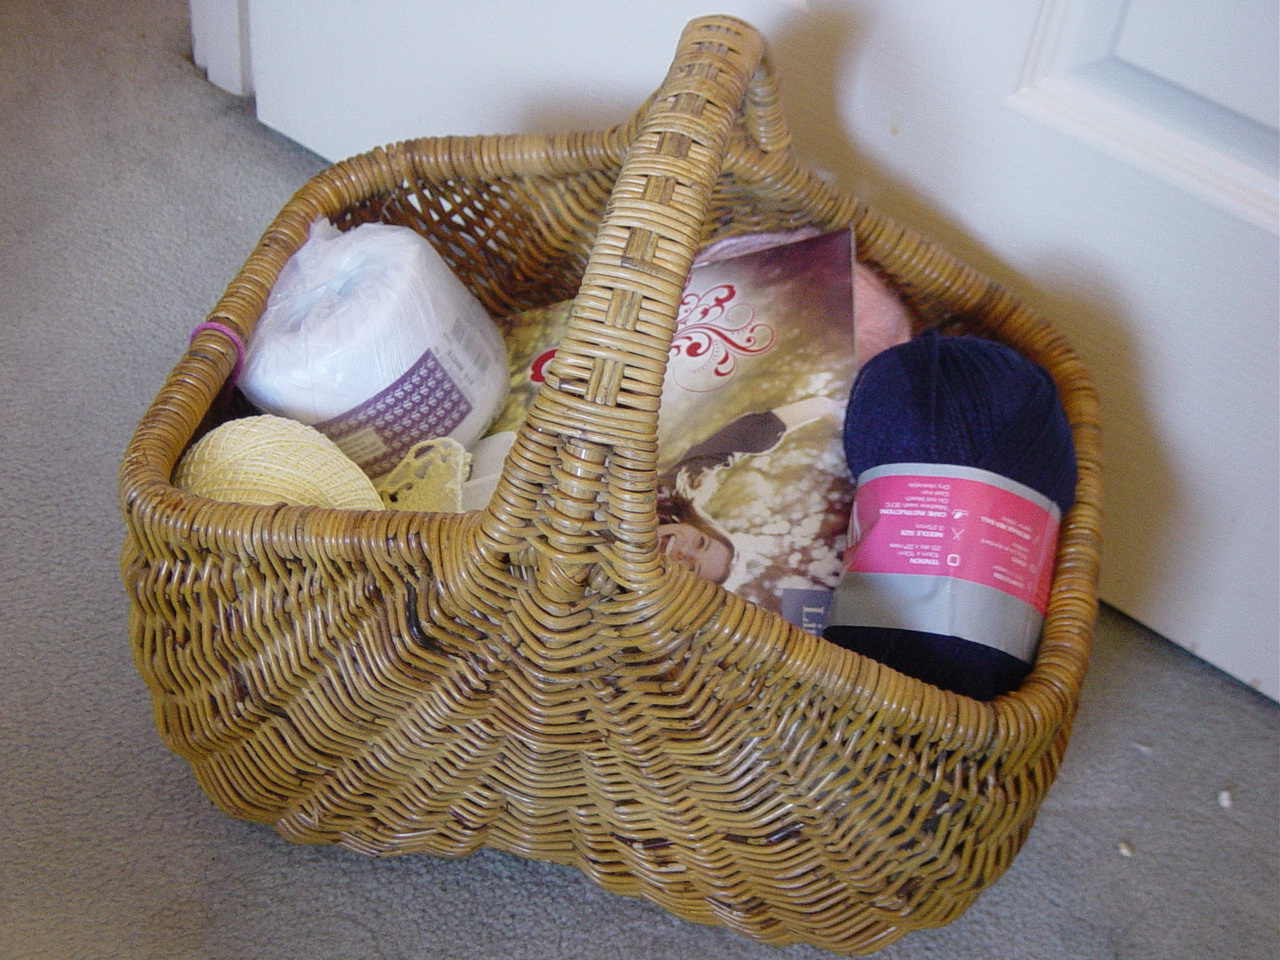
The lessons, or workshop which cost only $4.50, is not held at the craft shop but in another room in the shopping centre. It was nervous for me to walk into a strange room with strange people, its a pity they kept the window blinds closed. One lady went to close the blinds because she 'didn't want people looking at us'. I think that's a shame because it makes it harder for new people. I'm really glad I went to the craft group, and it went for two hours which was just the right length of time. I fit right in with my wonderfully perfect cane sewing basket which I got second-hand for an amazing $3 from the Lifeline shop last Sunday.

I learnt a new way of starting and ending my crochet work, which is great. I also talked with the instructor about tension and how to better judge which wool and hooks I should be using for certain projects. I had a go at an Irish Rose and I got a copy of the pattern, which is great. I also talked about the bolero I want to make, ending up changing my mind about which wool to use. There was a lot of inspiration for me to get going on several projects, I just don't know which to start next! I'll be going along again today, taking my patterns and cottons to ask about making doilies and to try and use up my pile of wool ... which doesn't seem to be shrinking yet!

Perhaps I should stop buying new wool??? lol!

Tuesday, May 25, 2010

Red Hearts of Love

All these photos were taken last Sunday morning. When I saw them in my pictures folder together I realised they were all red so that gave me an idea for a post to join in with Ruby Tuesday hosted by Mary at Work of the Poet!

After a couple of hours of me checking the Pink Saturday blogs and he playing a computer game, we got peckish for some breakfast. We were in the mood for our favourite lovey dovey breakfast, sausages and tomato with love heart eggs and mushrooms!

On Saturday, David took me to a Salvo's store (Salvation Army charity shop). We hadn't been there before and there were lots of bargain treasures to be found, some of which I decided I coudn't bring home. One thing I did grab was this very good toy for developing fine motor and hand-eye coordination in very young children. It's pretty solid, not flimsy, so I grabbed it for $3. In the background you can see a red love-heart bag. I can't remember where I got it from but I keep some Barbie things in it, it's so cute. Also in the background you can see my tiny teddies where they live now, sitting on one of the vintage doll's chairs to keep Barbie company. The doily you can see I believe was made by my great-grandmother, which I hope to try copying one day.

Another bargain treasure we found at the Salvo's store on Saturday were this pair of lovey dovey coffee mugs. We've decided to collect coffee mugs with love hearts on them, as well as other things with love hearts because we are sooo lovey dovey! /awwww... lol! These are probably not so great because the shape means that one is smaller than the other. I don't like the idea that to be in love one person must be smaller.

Our first love heart coffee mugs we bought were these very cheap ones we saw at the supermarket a couple of years ago. We got four, one broke and has been thrown away. That's a shame, I really must remember to keep broken crockery for my mosaic projects I hope to do one day. Two of the remaining three mugs have broken handles, so one is now used as my pens holder by my pc. That's why I'm afraid to use the 3rd mug for drinking as I have a terrible vision of someone spilling hot coffee over them when the silly handle breaks! But they are just too cute to throw away, they are too lovey dovey! When a coffee handle breaks, it can still be recycled into something useful.

I also took a photo of this very cute red chocolate tin. It cost me $5 full of chocolates from Coles online last Valentine's Day. I havent' decided what it will be used for yet, but I'm sure it will turn out to be nice. It's sitting on top of the table my great-grandfather made, which I will do a post about one day.

I didn't realise how many red love hearts I have about my house!
<3 <3 <3

Be sure to check out other Ruby Reds at Ruby Tuesday!

Highlights from this week's party

Monday, May 24, 2010

My Blue Skies


No matter how down I might be, a clear blue sky always cheers me up without fail.

It makes me count all the good things in life and brings a smile to my face!

It was such a stunningly blue day yesterday I just had to take some photographs.

 
I enjoy looking up at blue skies through the leaves of trees.  
The contrast of green against blue is eye-catching. 
I hope you like my blue sky photos 
<3 <3 <3

Sunday, May 23, 2010

Three Small Things - fingerpuppet, granny square, doily

Here are three small things I've made in the last few days, a Teddy Bear fingerpuppet, a cross-my-heart granny square and a lemon doily.

<<< There is no pattern for this finger puppet, it is merely one of my early attempts at making a crochet toy. I decided to pop a little dress on her, along with a matching flower headband. It was after I embroidered her face that I realised she was back the front. Oh well, her backwards legs are hidden beneath the skirt so it doesn't really matter. She is just for practice after all, and was fun to make. You can see her before she was decorated in my Five Tiny Teddies post as one of my early attempts at making a crochet toy. I think she makes a great companion for my Octopus Boy!

>>> When I asked David what he thought I should make next, his idea was for me to make a lovey-dovey blanket for the lounge, one with a heart motif. I've seen lots of square heart motifs so went back to the net for some ideas. One I saw was a cross my heart granny square. I didn't use that pattern, just looked at it for the idea. I think I might have a go at making a granny square all in one colour then out-lining just one of the four hearts in a contrasting colour using chain stitch.

<<< I was feeling brave so was ready to give making a doily another go. I found a simple doily diagram at a page of beginner crochet doilies. I hit a snag at the 10th round so took it to the Women's Creative Centre to see if I could get some advice on it. Apparently my tension was too tight and I need to use a bigger hook, so after we unravelled the mistake we fastened this one off to make a small doily. It's just the right size to put under the phone that is sitting on my piano.

Saturday, May 22, 2010

Operation Pinkify!

Oh no, my new phone only came in black, Horror! This calls for an urgent operation to Pinkify right away! First, we needed to find the parts and found them for cheap on ebay!
They arrived in the mail today, so David set to work to operate on the offending black casing. He soon discovered there was a little trick to it so searched youtube for a tutorial.


Buying a pink casing turned out to be cheaper than buying one of the pink phones in the first place! Thank goodness the black is replaced with some cute Pinkness!


Also arrived this week is a surprise for me in the mail that David ordered. What's this? Its a pink gaming headset! Isn't it gorgeous? Now I can be a Hawt Gamer Chick in Pink Style!

The pink microphone is detachable which is good for me because I keep breaking my mics when I have to plug them in the front of the pc and the wires get caught in my chair wheels. It was pretty expensive too, I hope I don't break this one!

For more pinkness check out Pink Saturday at How Sweet the Sound.

Recommended new blogs from this week's party

Friday, May 21, 2010

Pretty Patterned Beanie with Flower Brooch

This pretty wine-coloured beanie was not planned and has ended up being a small adult or teenager size. I wonder who will wear it?

I had planned for this to be for one of my young nephews, using the craft wool I bought from the city Lincraft store on Monday especially because this is a 'dark colour'. A good thing too, that I didn't need to use the whole 100g ball, the end of the yarn is faulty, but at least it was cheap at just $2. But this wool had such a pretty shine to it I just had to do some special stitch which ended up looking a bit pretty. This is a common shell stitch and is the same as I used on my teddy bear dress. I started the beanie with 7 increasing rounds which is the size for an adult, but the pattern makes its little tight for me to wear. For this I used a 3.5mm hook.

I don't think I'd ever wear a hat with a big flower on it, but this is just begging for one! I had a go at the rose pattern from Crochet Spot. A big thankyou to Rachel for sharing this free pattern on her site, I'm really happy with how this turned out! Because I wouldn't normally be keen on wearing a big flower on a hat myself, I've made the rose detachable by securing it to a safety pin. This way, you can wear the beanie with or without the flower, you could even pin the flower to other things like a bag.

This was really easy to make, and cheap using this wool. Maybe next time I will get some fancier yarn?
<3 <3 <3

For this post I tagged along with The Shabby Chic Cottage for Transformation Thursday! Check it out for some homecrafted ideas.

Recommended Blogs from this week's party.

Thursday, May 20, 2010

Five Tiny Teddies

I've been wanting to try making a crochet toy for quite a while thinking it wouldn't be too hard, and I must say I'm pleased with my first set of tiny teddies.
a  family of 5 tiny teddies
I didn't follow a pattern for these teddy bears, and it took me several failed attempts before I settled on a method to use. I had been trying to make the whole teddy in one piece, not wanting to cut, tie in and start new pieces. But in the end I settled on making the head, arms and body in one piece, then adding two legs and the ears afterwards. After I got the hang of it, I started adding the ears at the start while I was making the head. Although I did not follow anyone's pattern for these, I did look at some google images of crochet tiny teddies for inspiration.
practice teddies while I worked out the pattern
These were heaps fun to do and I'd like to make more. The brightly coloured embroidery thread I used for their faces were one of the purchases I made from the Lincraft store in the city on Monday. The ribbons are all recycled from packaging or cut off from clothing (those annoying ribbons you get inside clothes to help them hang nicely in the store but always manage to embarrassingly poke out when you wear them - I cut them off and recycle them).

I think these tiny teddies are just so cute! They'll make great companions for my Barbie doll (you know, the one I have to practice making real clothes on!), to sit with her on my new vintage cane doll furniture.

Wednesday, May 19, 2010

Flowering Lavendar and a trip to the Museum

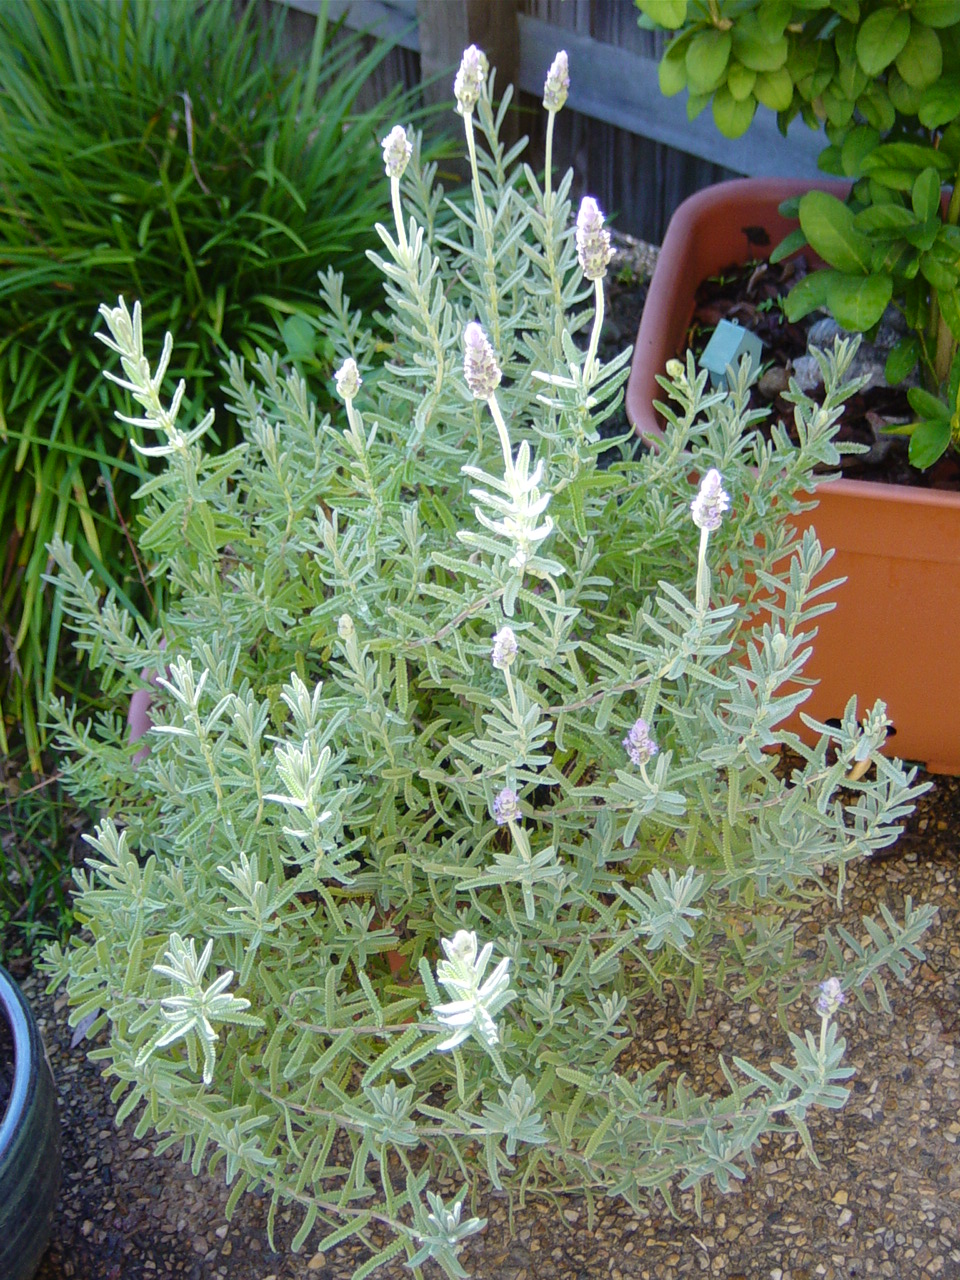
In preparation for my solo train trip to the city for an appointment on Monday, I did a trial run last Friday and ended up going to the Queensland Museum alone! This is my post for Outdoor Wednesday which I do every week to motivate me to post something about getting out of the house. Included are some images of my beautiful potted lavender which I'm so happy is flowering at the moment.

It was my first trip alone using the Go Card. As I left the station at South Brisbane, the station attendant looked at me so I asked her if I did the card thing right. Well, that was a mistake! I thought I did it wrong so touched on again, then she exclaimed 'don't do that!'  I told her I was new and didn't know how to use the thing so she helped me to the machine to clear the second touch on. Luckily, I found it funny, LOL!

Travelling on the train was fun, I used to do it all the time when I first got to Brisbane years ago, now I'm really wondering why I haven't been doing it these last couple of years? I thought to take myself to the art gallery but they were closed, and the museum wouldn't open for another half hour so I went to a cafe, got a cappucino and rang David on my new phone while I waited. I spent about an hour in the museum, its fairly small but still good, and because it didn't cost me anything, I bought a little specialist book on local birds. Because no pets are allowed on our complex, lots of different birds visit our garden and I've started looking up which ones they are and thought this book would be handy.
Thanks for listening <3 <3 <3

Tuesday, May 18, 2010

Simple Brown Beanie

On the way to my appointment in the city I whipped up this simple beanie on the train. It's 30 minutes there, another 30 back, plus waiting time, so all up it took less than 2 hours.

When I asked my S.I.L. what colours she'd like the beanies for her children to be she said 'dark colours' so I found this nice chocolate colour in my stash and decided to use that for one of them. Washing instructions for the wool is 'drip dry, non-shrink, colourfast, wash in warm water', it's 100% acrylic. For my beanies I start by making 4 to 7 rounds, each round increasing in size, with the 2nd round being 2 for every one, after that every round increases one less stitch than the previous round. Who I'm making it for will decide how many increasing rounds I do. Then I will stop increasing and make rounds the same size until I get to a length recommended by the beanie size chart.

So yes, for those interested in the update, I did catch the train to the city on my own for the first time in a couple of years. Poor David will have to find some other excuse to get time off work now! Yay for me :P
Related Posts Plugin for WordPress, Blogger...