Thursday, December 9, 2010

Racey Rocket!

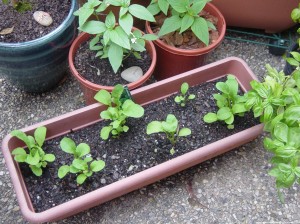
David and I are so very keen on our rocket this year! Last year we had just 6 plants from a nursery which seeded at the end of summer. We planted those seeds and are now starting to harvest our first crop! <<< Here is a photo of those very first 6 plants we bought from the shop. We didn't get much harvest from these 6 little plants, but we did enjoy immensely what we did manage to get.
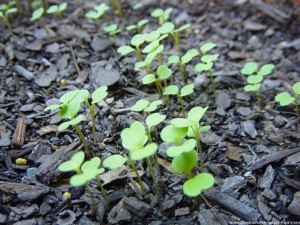
When they seeded I carefully harvested all the seeds and put them in a brown paper bag to wait for the next spring. We ended up planting them on Sunday 24th October. They astounded us by shooting up within three days of planting, the weather was very warm and humid at the time. Here are our rocket babies at 5 days old. >>>
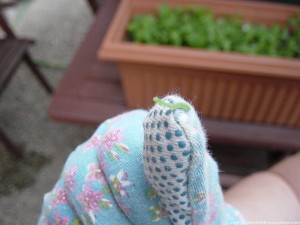
<<< But alas! Grubs were eating our rocket by 3 weeks! We decided the safest, healthiest way to remove them was by hand. The rocket should be ready to eat in just a few short weeks and we really didn't want to put poison on it! The grubs were a pretty green colour the same as the leaves so they were hard to spot. In the end we found them all but it took a few days, we guess we found about a dozen grubs.
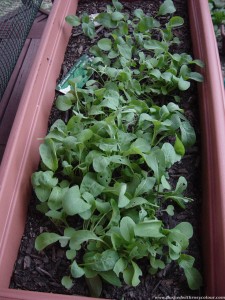
>>> Here is our rocket at 4 weeks, you can lightly run your hand across the leaves and the smell of fresh rocket wafts up to you straight away. Its very fragrant and fresh. We made a chicken wire cage at week 4 in case any bigger predators like birds or lizards decided they wanted to eat our rocket. It's sitting on our outdoor table at the moment, so we can keep an eye out for any more grubs!
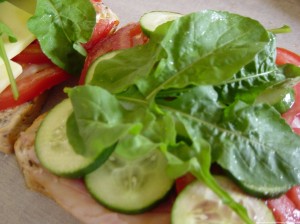
<<< At 5 weeks our rocket looks good enough to eat, so we did! It's best you don't leave it too long, or the leaves get too bitter. But we like the peppery taste to the crisp leaves. It's just so much nicer to pick a few leaves of greenery from the garden as you want them, better than buying a lettuce from the shop and having it wilt on you the very next day. I hate buying lettuce, it just seems like such a waste. Over the last 5 weeks, I think David fertilised a couple of times using an organic seaweed mixture.
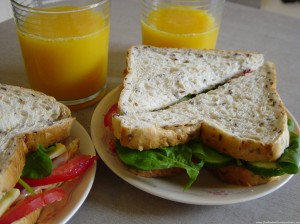
>>> Here is our very first lunch with our first rocket of 2010! My sandwich is the one with the cucumber, David hates cucumber! What's up with that? Who knows, but at least we both love rocket!
/nomnomnom

Tuesday, December 7, 2010

Pink and Purple Dolly Blankie

It's my niece's 4th birthday today, and on her wishlist was a 'Barbie Doll Blanket', so I hope this is what she had in mind!

The rug should be pink and purple, apparently. Luckily I had just enough of these colours in my scrap bag to make it. I used up the tiny bit of variated white wool left over from my flowers baby rug, and the bit left over purple dimples yarn which I also used for the purple baby jacket. For the pink flowers,
I had a small bit of yarn left over from my childhood when my mum had taught me how to crochet, so that wool is very special, as I've been carrying it around with me for a very long time! For the jazzy edge I used a bit of fluffy yarn my mum gave me last year some time. All of these yarns are probably acrylic. If this rug needs a wash, it would need to be gentle or it might fall apart.  It would be best to spot clean it, or a gentle hand wash in cool water and gentle detergent, drying flat in shade should be ok.


It took me a couple of hours to do up the 24 tiny granny squares, then a couple of hours to stitch them all together. I find stitching granny squares together the most tedious, there doesn't seem to be a quick enough way to do it. I used some cotton and a big needle and tried to get it done in an efficient time. Putting the cute fluffy edge on it only took a few minutes in comparison. I used a 3.5mm hook and the end result measures 18cm x 28cm, just big enough for a Barbie to be able to use as a blankie!

I hope my niece enjoys the things I've made for her this year, which includes everything I made for yesterday's post, as well as the child's cotton sun hat and the pretty pink and purple bag!
<3 <3 <3

Monday, December 6, 2010

How to make shoes for a flat-footed Barbie

My niece is turning 4 soon, and an order for new shoes for her flat footed Barbie has arrived so I set to work!
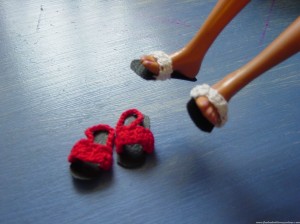
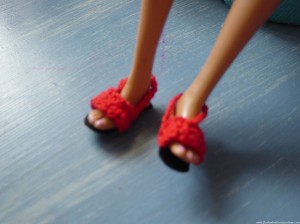
a pair of orange sandals for a flat footed Barbie doll
two pairs of shoes for a flat-footed Barbie

These are now the 3rd and 4th pair I've made for flat footed Barbie dolls. The shoes for these flat feet are very hard to find, and when you do find them, they are overpriced. So I make my own, and it's very easy. The first pair of flat-footed shoes I made were these slip on pink shoes which went to Darwin with my niece. The second pair I made were these orange sandals with ankle strap, which were for a flat footed doll I picked up at an op shop for $1. I'm most happy with those ones, they worked out quite well.

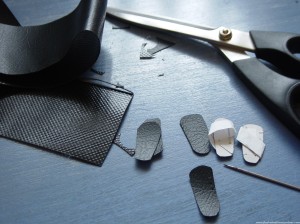
To make these doll shoes, I use some recycled black vinyl, I can't even remember where I picked it up from. You sometimes can find this on packaging or old things you might throw away, so keep an eye out for it, you don't need much. Any kind of flexible plastic you can pierce with a needle will do. I trace around the soles of the doll's feet to make a paper template, then trace that with white crayon onto the vinyl, and cut out the soles with sharp scissors. Then I pierce the plastic with the largest needle I have, pushing it all the way through, 3 times each side where the shoes strap will go.

I then use my 1.25mm crochet hook, and push that through the needle holes to make sure they are big enough. Then using fine crochet cotton, the first row is three single stitches (UK dc), then 4 rows of 2 ch 3 dc (UK trbl). The last row is some slip stitches and singles again to attach to the other side. Sometimes I'll add an ankle strap of chain stitches like I did with these red ones. I always put the shoes on before finishing the final stitch to make sure they'll fit. They don't take long to do, especially as I chose not to spend too much time fiddling on these ones.

In the package I'm sending to Darwin, I'm also popping in some doll knickers which I made ages ago using a pattern I found at crochetville. I'm not happy with them, they have ties but I'll pop them in the package none the less.

So I had a go at making my own Barbie doll knickers, they are 'boyleg hipsters' so very easy to make. They simply pull on and sit on the hips, which will be easier for my 4 year old niece to dress her doll.

My own pattern for Barbie doll 'boyleg hipsters'
1. ch 28, sl st to form ring, treble into ea ch (US dc), sl st, do not turn, 28 stitches
2. ch 2, treble into ea treble (US dc), sl st, do not turn, 28 stitches
3. ch 2, treble ea into next 5 treble, turn
4. sl st into next treble, ch 2, treble into next 2 treble, turn
5. ch 2, treble ea in next 2 treble, sl st into 3 trebles on opposite side of ring to form two leg holes
fasten off and turn inside out to hide the seam at the crotch.

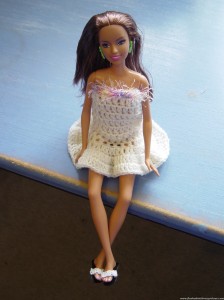
Then I just had to make a simple pull on party dress, didn't I?
My own pattern for a pull-on dress for Barbie
* using 3.5mm hook, gauge depends on the yarn and how many stitches it takes to go around the chest, check every few rows to check fit.
1. ch enough ch to go around chest, sl st to form ring, pull on over hips up to chest to check fit, ch 2, trb in ea trb (US dc), sl st in 1st trb, 23 trb
2. ch 2, trb in ea trb, sl st in 1st trb, 23 trb
3 - 8 repeat row 2
9. ch 2, 2 trb in ea trb, sl st in 1st trb, 46 trb
10. ch 2, 2 trb in ea trb, sl st in 1st trb, 92 trb
11. ch 2, 1 trb in ea trb, sl st in 1st trb, 92 trb
12. in bottom of row 1 using contrast yarn, ch 1, dc (US sc)  in bottom of ea trb, sl st in 1st ch, fasten off

Sunday, December 5, 2010

Summer Drinks "Frangipani" Coasters

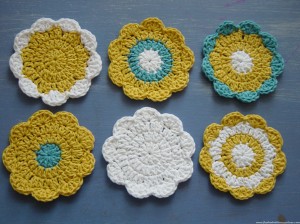
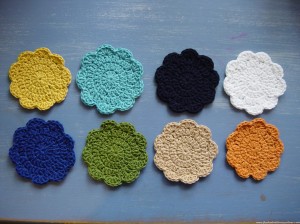
This is the last coaster set I'll do for now. I guess if anyone else wants one, I'll just get some more cotton and make more! But next time I buy cotton, I'll get some red, pink and purple so I can get different colour combinations. Below is a photo of the colours I used for this gift giving season.

It's fun to think of a name, a scene or season to match the colours and vice versa. I have done this last set because these three colours to me say 'frangipani' and I had enough of these colours left over. When I lived in Darwin there were a lot of frangipani trees about. They would loose all their leaves in the dry season, which is the north Australian equivalent of winter, but it really doesn't get very cold at all. Then as the wet season approaches, the trees would become full of flowers and the smell was gorgeous. Most of them were the yellow and white variety, some had a light blush of pink. And very rarely, there was a deep red variety which didn't seem to grow as thick but had the rich fragrance of a rose and was very special. The blue in this set represents the clear blue skies of the Darwin dry season.

I do not recommended this coaster set for red wine drinkers, as it's mostly white and yellow. If you spill red wine on these, soak in cool water immediately. Here are some more tips on how to remove red wine stains from cotton.

Next, to make some Christmas decorations and practice baking some home-made treats to share as gifts!

Saturday, December 4, 2010

Seasonal Drinks "Winter" & "Spring" Coasters

Here are two more sets for my Seasonal Drinks coasters collection, Winter and Spring.

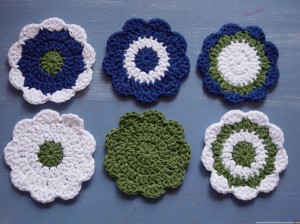
I borrowed inspiration from google images of  winter colours and spring colours. I could have used other colours than I did of course, but I looked at what I had and went with that. These winter colours are not of a typical Australian winter, but include lots of white for snow. We do get snow in Australia, but only in certain parts and not where I have ever lived in my life! The winter set also has some green for the evergreen trees and royal blue, which represents the long hours of twilight.

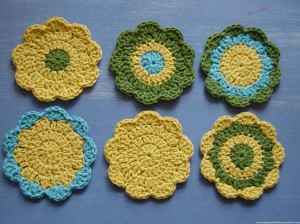
Spring is bright and cheery with mostly yellow, and some light blue and green. The blue represents the clear blue skies we got here early this spring, with green to stand for new growth. Yellow is for the new spring flowers and sunlight starting to warm things up. Choose darker coloured coasters when drinking red wine.

I now have made seven sets of coasters, I might have enough to give as gifts to various people. But then again, I might make just one more set ...

Wednesday, December 1, 2010

Seasonal Drinks "Summer" & "Autumn" Coasters

These are the first two sets of my Seasonal Drinks coasters!

For these ones, I picked seasonal colours for 'traditional' seasons, just due to the ease of what to call them and the colours to choose. Both of these coaster sets have the added bonus of bringing good luck and prosperity to the home due to the circular golden motifs, which represents money and coins.

The colours in my summer set of coasters represent the cool blue of swimming pools, backyard green lawns and lots of orange juice! I found inspiration on google images for Summer colours.

Autumn also had to have some orange, with a little bit of golden and green. Again, I found inspiration on google images, this time for Autumn colours. As often found in collections of Autumn colours, these represent the turning of the leaves from green to golden, to then dull and fall upon the ground, loosing the bright colour as winter approaches ...

Coming next - Seasonal Coasters "Winter" & "Spring"

Tuesday, November 30, 2010

Summer Drinks "Sandy Beach" & "River Boat" Coasters

Here are the second and third sets I've made for this Summer Drinks coaster collection, I call these colour combos "Sandy Beach" & "River Boat".

Sandy Beach is mostly light blue, for the shallow ocean. Sand is the second colour for the beach and white is for the waves. Or maybe it is white for the seagulls and shells?

A simple thing is choosing 3 colours to make a set of coasters, but these have an extra thought and meaning, to help transport the imagination on those hot summer days!

Navy and white are common sailor stripe colours and is the theme of the upholstery on our "River Boat", and of course it has timber decking!

Washing instructions are ‘Hand wash, do not bleach, dry flat in shade’. Choose the darker coloured coasters when drinking red wine.

Enjoy!

Monday, November 29, 2010

Summer Drinks "Deep Sea" Coasters

Here is the first set of six coasters I am making to give as Christmas gifts. I hope the recipients don't think they are too silly!

I'm thinking each set will have 3 colours, a major, a minor and a highlight, which tells the story of a scene or season. This first one is called "Deep Sea". The major colour is dark blue for the deepest part of the ocean, the minor colour of light blue is for the shallows, with a little white highlight for the tips of the waves. No two coasters are the same, neither are any two coasters a negative image of each other. The even number of coasters with random patterns reflecting both order and chaos in natural landscapes.

After trying out a couple of different patterns, this one is my favourite coaster pattern from Crochetspot. I used a 4.5mm hook for this, and thick 5 ply  COTON-A made by Sullivans, which is a 60% cotton blend with acrylic. Washing instructions are 'Hand wash, do not bleach, dry flat in shade'. I would say to avoid putting red wine or coffee mugs on very light colours like the white.

Making these were a lot of fun to do. Oh no! I think I'm going to make a few more ...

Sunday, November 28, 2010

Pretty Irish Rose for a Sunhat

I had a go at adding a flower to the child's sun-hat I made the other day, using a tradition Irish Rose pattern. I think the end result is very cute, if I do say so myself!

I wasn't sure how the colour changes would go, but it worked out fine. I changed colour after doing the back posts and chain foundations for the next row. I made a 6th petal, although the pattern I followed had 5, as I prefer it this way. A couple of buttons added to the centre provided just the right amount of embellishment. I'm glad a couple more of my homeless buttons have found a new home. This flower is not removable like my other flowers I make for hats, I just sewed it right on securing it tightly.

I wonder if my 4 year old niece would like this hat? I don't know anyone else this would fit, and it would be a shame if no one wore it, it's just too nice!

Saturday, November 27, 2010

Three Small Things - soap saver, dishcloth, square motif

<<< I don't really understand why I woke one morning thinking I needed to make a soap saver for the laundry soap, but I did! I don't usually use these things, but the soap I have in the laundry at the moment was a gift and really needed one as it was making a mess. I didn't follow a pattern as it's a pretty basic shape, but I did look at crochetspot and google for some inspiration, and used my thick cotton and a 4mm hook. I got the idea of continuing the first round all the way round the bottom of the first row from the free pattern at crochetspot, there are also pictures and patterns of other soap savers there. I've tested it out, so far so good. The plan is, when you get the little shards of soap left over at the end you keep them in the bag so you don't waste them. Very thrifty, I like it!

>>> I have been working on a spiral dishcloth using the same aqua cotton as my first cotton dishcloth, but I'm not happy with it so it's currently in my pile of unfinished projects. I bought some 'amalfi' yarn from Lincraft for $4, which is 100% cotton. I think the choice of colours look 'dishclothy', if there is such a thing, so chose the aqua greenish one. This time I made a bigger version of the basketweave dishcloth, as David asked for a bigger one. This used most of the 50g ball, there isn't enough left to make another one this size. Consolation is that this cloth can be washed and reused for quite a while, so I can get my money and effort's worth out of it. This didn't take long to do, I used a new bamboo 3.5mm I thought to try for fun. I found working with the bamboo hook that it stuck a little, and is not as smooth as using a metal one. The final product measures 22cm x 18cm.

<<< I tried this square motif, I'm thinking of using it to make some baby play cubes. This coaster pattern is at crochetspot.
Related Posts Plugin for WordPress, Blogger...