Tuesday, September 28, 2010

Silk Bamboo Wool Hat with Flower Brooch

This is the most expensive wool I've ever bought, but it was on special and I just couldn't go past this gorgeous blend of silk, bamboo and wool. I chose a colour similar to another hat I've made, because my sister-in-law said she liked it.

I used a 4mm hook for this hat, and the pattern is my own which is the same as my Pretty Patterned Beanie. As promised back then, this time I used a much nicer yarn with a 60% wool, 20% silk, 20% bamboo blend. This yarn was a such a joy to work with. It has a luxurious softness and consistent thickness, it's called 'silk plus' yarn from Lincraft. Again, I made a matching detachable rose brooch, using the free pattern at Crochetspot.

In everything I make I would like to include a little of what I call 'wabi sabi'. Apparently it's a Japanese term that means imperfect perfection, and is often included in handcrafted art works! I think it helps remind me that not everything can be perfect, no matter how hard we try. It's much healthier to accept and appreciate the beauty in handcrafted things that often include a slight flaw and lend the piece some personality. It also helps me avoid an obsession to try and produce perfection, which can be very frustrating as I find little flaws irritating! The 'wabi-sabi' in this piece is hidden at the base of the rose brooch! If you see it you will know this is a homemade piece made with affection.

It's my sister-in-law's birthday and I wanted to make her something but I wasn't sure what. I remembered she said she liked the patterned beanie but it's too small for an adult to wear, so I made another one with nicer wool in a similar colour. I was worried this one would be too small as well, but it's slightly larger than the proto-type as I used a bigger hook and thicker yarn.

I also put it on David's head for a while to make sure it was big enough, which was pretty cute! Sorry I forgot to take a photo of that, lol. I'll be posting this one off with the first one I made like this as a pair, which is a smaller size. Hopefully these two will get some wear, I'm just sorry they didn't arrive in time for winter!

Enjoy and Happy Birthday
<3 <3

Friday, September 17, 2010

Apricot Angora Shrug

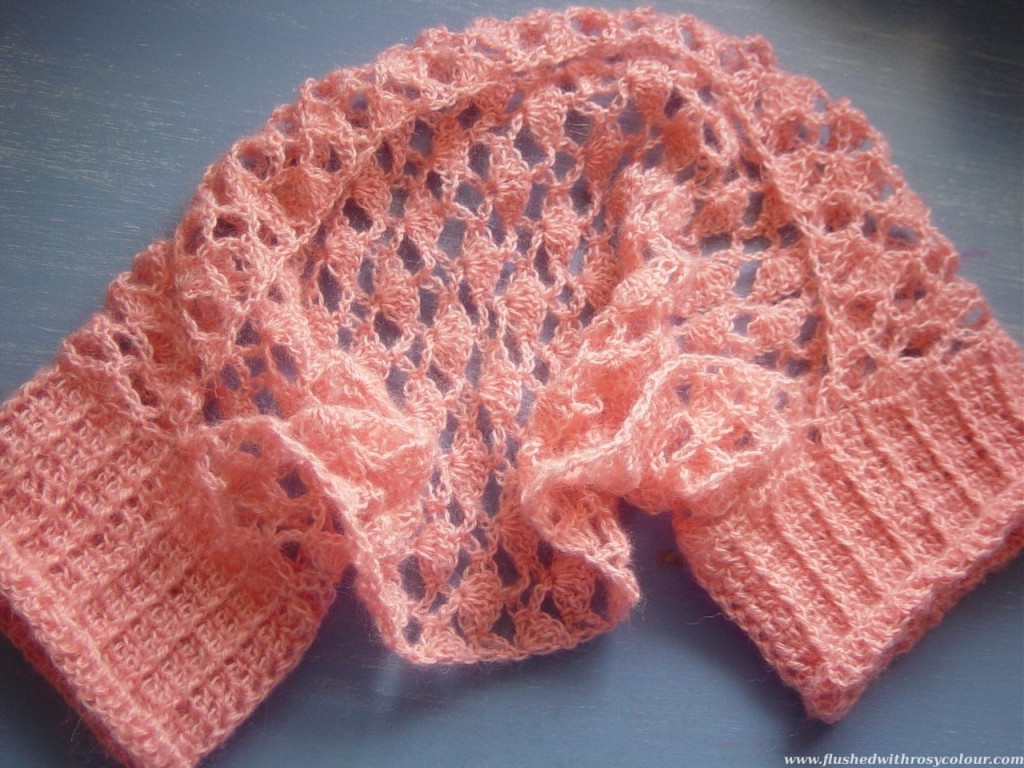
The beautiful apricot coloured angora that I got on special from Lincraft has been calling me, so I've turned it into this lovely lacey shrug!
a simple shrug made from imported Angora
I made this pattern up, which is based on another shrug I made. This time I made the cuffs in rounds of 10 rows, then used a new pretty lacey stitch for the body of the shrug. I'm really happy with how the lacey part turned out, and I'm glad I now have this stitch in my repertoire. I used the 'shell trellis' lace stitch on page 95 of a book I borrowed from the library called 'Crochet Basics' by Jan Eaton.
lace detail of my shrug
The pattern for a basic shrug is very simple. I use a fine and hairy wool, like angora or winter warmth from Lincraft, and a large hook (5mm). This makes a very 'loose' stitch. It uses just over 1 x 50g ball of yarn.

An easy guide to making a crochet shrug

1. First Cuff - ch 54, sl st to form circle, make 10 rows of trebles (US dc), check the circle is large enough to go up your arm to above your elbow - I made a ridge on every 3rd stitch

2. Lacey Body - increase 1 every 6 st, use any nice light and airy lacey stitch you like, do not join, turn, make this section about 60cm long

3. Second Cuff - decrease 1 every 6 st, sl st to form circle, make 10 rows of trebles (US dc) - repeat any pattern used in first cuff

folded shrug
Easy and ready for spring!
<3 <3

Tuesday, September 14, 2010

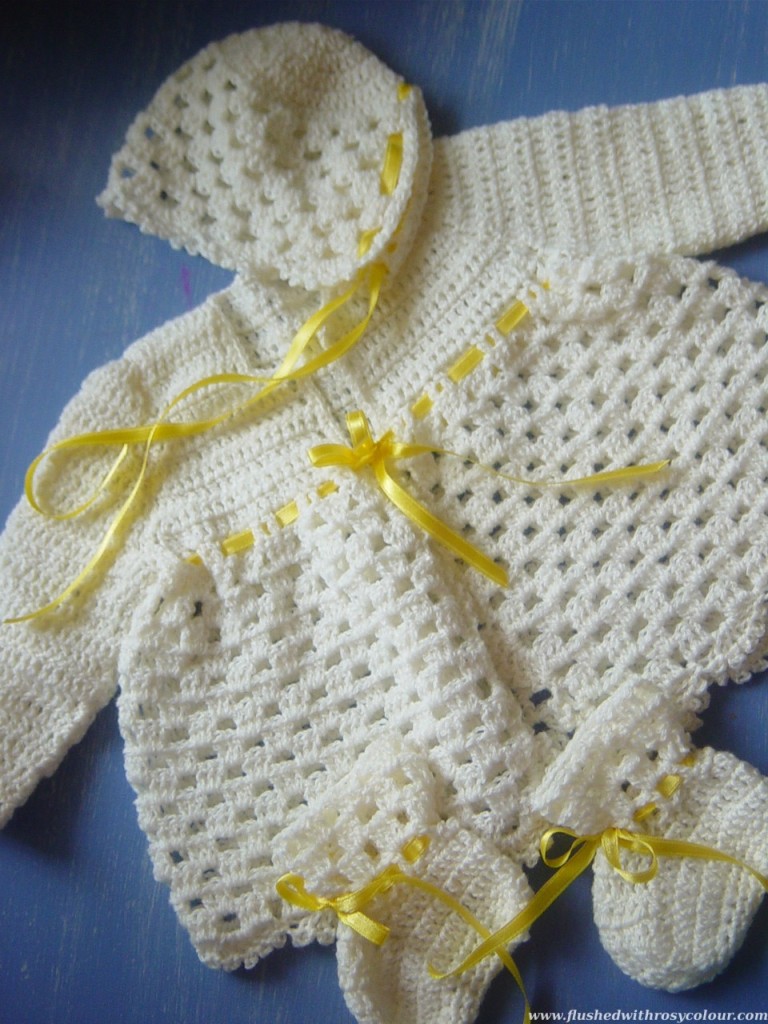
White Baby Layette

I don't think my baby will even wear these jackets I've been making, but I'm doing all these baby clothes now so I can learn more about crochet. The pattern is on page 77 in a book my mum lent me called "Crochet with Style", published by Murdoch Books in 1990. For this I used some really nice white wool my mum gave me for my birthday.

I've learnt a lot from from doing this jacket. It looks simple enough , but the challenge was interpreting the pattern for the shaping in the bodice and sleeves. As it was, I made a mistake in the front right yoke, so repeated it on the left side so at least they matched! I know what I did wrong. When the pattern said to repeat 3 more rows, I should have just done plain rows instead of decreasing like the previous row. I'll know better next time! I tried a red ribbon and some very cute strawberry buttons I bought years and years ago but have never used, but have settled on some lovely silky yellow ribbon, also given to me by my mum. I do have some white ribbon but it is a different white so didn't match. I could change the look of this set again and get some blue ribbon if I wanted.

I found the sleeves a real challenge and am quite proud that I figured it out! To join seams I usually use a crochet hook and dc, but that made this too bulky. So I undid the dc and sewed the seams with a yarn needle for a less bulky finish. And for these seams I did something I've not had to do yet with crochet - I actually pinned the pieces together first before sewing! I'm quite pleased and surprised these sleeves worked out. These are the first shaped sleeves I've done, and doing this has helped me learn more and makes me think I might be able to do an adult cardigan one day.

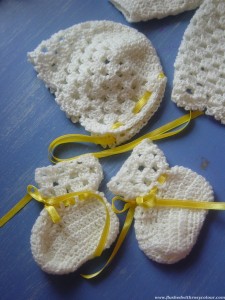
The bonnet was fairly straight forward, as were the booties. For the booties, the pattern gets you to fasten off twice, as the bootie is not all in one piece, but it wasn't too bad. I just left a length of yarn and used that to sew up the seams at the sole.

This was really nice to do, and was a pleasant surprise that I was able to complete it without any help which I thought I would need, especially with the jacket. And I don't know who will ever wear this. It's a newborn size, yet my baby is due in the summer, and my guess is, it's going to be a hot one!

At least I learnt more about crochet by doing this exercise, which can not be a bad thing at all!

<3

Saturday, September 4, 2010

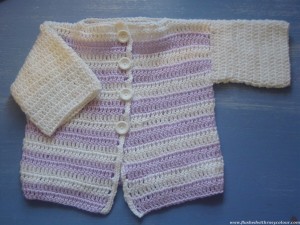
Purple and White Stripes Baby Jacket

How many of these things am I going to need? I do not know, but I just feel like making a bunch!

My baby is expected in summer, so I really don't know how many of these will be worn if at all! I guess if they don't get used they might make nice gifts for someone else. The jackets I've been making are different sizes, so maybe some will fit for the first winter. I've already started on my next baby jacket which is white!

This one was easy and boring to do. If I use this pattern again, I'll try and use a more interesting stitch. I think the stripes saved me from absolute monotony! This simple baby set pattern comes from the Lion Brand Yarn website, to access their free patterns all you have to do is register. This is the same site I got the baby socks pattern from.

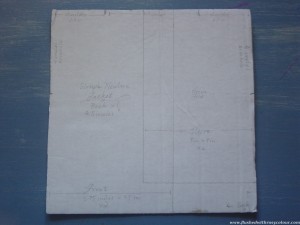
I drew up this simple pattern on a square piece of card. This way I could do it while watching tv, when I prefer not to have to read patterns. The square board is as big as the back of the jacket, and I've made markings for the sleeves and front sections. This pattern really was very straight forward and easy, all you have to do is make 5 rectangular shapes and sew them together. But instead of making up the sleeves separately, I just worked them right onto the made up vest in rounds.

I used my left over purple and white dimples yarn from Lincraft, I think I used the 4mm hook. I chose some very cute recycled flower buttons, and gave them a quick scrub with Earth Choice detergent and a recycled toothbrush so they came up just like new.

Although this is newborn size, it looks a bit bigger than that to me.

<3 <3

Wednesday, September 1, 2010

Simple Blue Pouch

This was very easy to whip up, it took me just over an hour using some nice blue wool from my left overs bag.

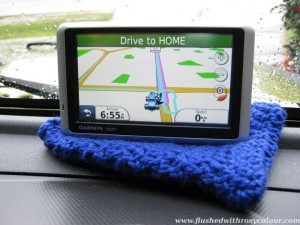
An internet friend asked me if I could make a pouch for his GPS which measures 125mm x 76mm x 16mm. Usually I don't sell what I make, preferring to make gifts for family, but I figured that this wouldn't be too hard so gave it a go.

My pattern for a simple pouch
1. ch 18, treble (US dc) in 3rd ch from hook, tr in ea chain to end, ch 2, turn (16 trebles)
2. treble in each treble, ch 2, turn
3-25. continue row 2 until piece measures 25cm long (about 25 rows)
26. fold at 12th row, making a base of one row, 3 dc (US sc) in ea space down the sides joining two sides together, last space has 1 dc then 2 dc in base row, dc in bottom of ea treble of row 12 to form bottom ridge, dc up the other side like the first side, ch 36 (long enough to be twice the width to form draw string).
27. cut the yarn and thread through first row of trebles, sl st in 1st ch to form draw string, fasten off
LoL! well that's my pattern as I understand it, I don't know if anyone else will!

I wrapped it up in some recycled tissue paper with a tiny homemade tag and posted it off to Western Australia! It fit inside a prepaid envelop which only cost $1.40 which I thought wasn't too bad at all.

Today these fotos came back from my friend in W.A. I'm very pleased to see the GPS actually fits inside. Really, why wouldn't it? Oh, I don't know, I thought I might have made it too small!!

I'm glad something I made so simply is a useful thing!

<3 <3 <3

P.S. Thanks to Louis for the fotos featuring the GPS! <3

Sunday, August 29, 2010

David's Fingerless Gloves

I bought another ball of this lima alpaca wool from Lincraft when it was on special to make another pair of fingerless gloves for David, this time I made up my own pattern to fit.

David has been wearing the first pair of fingerless gloves I made, but they are a little small for him, being too short and tight to pull on. It's his birthday today, so I just had to make him another pair in matching wool, this time longer and wider. And just in time for winter to be nearly over, too! At least he'll have them to wear all next winter! This longer pair of fingerless gloves weighs over 60g so took more then 1 x 50g ball of alpaca, and I used a 4mm hook.

My pattern for David's fingerless gloves
1. ch 36, sl st to join and form a circle, taking care not to twist the chain, ch 2, treble (US dc) in 1st ch on the right of ch 2 to form a 'cross-stitch', (sk 1 ch, tr in next ch, tr in sk ch) repeat to end, sl st in top of 1st cross-stitch (18 crosses)
2. sl st into next space, ch 2, treble in top of 1st cross-stitch (sk top of next cross, treble in next space, treble in top of sk cross) repeat to end, sl st in top of 1st cross (18 cross-stitches)
3-13. repeat row 2 until there are 13 rows of cross stitches
14. ch 2, treble in top of cross to the right of ch, ch 10 (thumb hole), sk 2 cross-stitch, sl st in between 2nd and 3rd cross, sl st 2 up the ch, treble in top of 2nd cross, sk top of 3rd cross, treble, treble in top of sk cross, repeat until end, sl st in top of 1st cross (17 cross-stitches)
15. ch 2, treble in top of cross to the right of ch, sl st in thumb hole, 4 dc (US sc) in thumb hole, treble in between next 2 crosses, treble in top of cross to the right to create cross, repeat cross-stitch pattern to end, sl st in top of 1st cross (16 cross-stitches)
16. sl st 1, ch 2, treble in top of cross to the right of ch, sk 1 dc, sl st in next 2 dc, sk 1 dc, treble in between next 2 crosses, treble in top of the 1st of those 2 crosses, sl st in top of 1st cross (16 crosses)
17. sk 1, sl st1, sk 1, sl st 1, sl st 1, ch 2, treble in top of 1st cross left of thumb hole, repeat cross-stitches to end, last one goes in sl st over thumb hole, sl st in top of 1st cross (16 crosses)
18. sl st, ch 2, treble in top of cross (sk 1, treble, treble in sk) repeat to end (16 cross-stitches)
19, 20, 21. repeat row 18

For David's birthday, I also bought him a father-to-be book with a cute lovey-dovey book mark to go with it. He's being such a trooper and so supportive of me right now, I wanted to get him something to help him from a father's point of view. This particular book comes recommended and it made him laugh in the book store when he saw it, so I got it for him. And it's good timing too, Father's Day is a week after his birthday!

Also for David's birthday, we got him an electric mixer! It might not sound like a good present, but it certainly isn't for me as I won't be baking! David loves to bake and is very good at it, so a proper machine will make it even more fun for him! If you would like to see some of the things David likes to cook, be sure to check out his cooking blog @ Teenas-home-cooking.blogspot.com

Happy Birthday, my darling David <3 <3 <3

Saturday, August 28, 2010

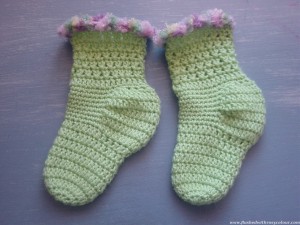
Purple Fluffy-top Baby Socks

These are the same as my green fluffy-top socks, except I altered the pattern slightly so the seam is at the sole instead of the top of the sock where it can be seen.

Using the purple big baby wool I got from Lincraft when it was on special, making these cute baby socks were a lot of fun. I changed the heel so I started the rounds in the centre of the heel at the sole instead of the centre of the front. There are only 7 rows that are turned around, the rest of the pattern is the same as before. I used a different fluffy top for these ones, this is some flutter wool with flecks of yellow, pink and purple.

There are two variations of ankles in the pattern, for this one I used the cluster. I thought I had memorised this cluster pattern  and was AFK in front of the TV when I did the first purple sock and I totally screwed it up! After I did the second sock (after re-reading the pattern) I realised my mistake and undid the first ankle and did it again. I'm glad I did, now the two purple socks actually match ...

Now I have some more cute things to add to my growing pile of baby stuff!!
<3 <3

Monday, August 23, 2010

Green Fluffy-top Baby Socks

I found this pattern for baby socks, and they turned out so cute I've memorised the pattern so I can make more!

The pattern for these baby socks is at free-crochet.com, all you have to do is register at the website to login and you can download free patterns. So far, I haven't received any spam and I haven't paid anything. For these kinds of things I just give an incomplete mailing address, just in case. The pattern for the socks is in the 'For baby' section. For these ones, I used 4ply baby wool with a 3mm hook.

One thing I think could be better about this pattern is the start of each round should be on the sole of the foot, not the top. For my second pair of socks, I'm going to turn the heel around so the rounds start underneath, not on top. That way you won't see the seam.

Other than that, this is a worthwhile pattern for me to memorise I am thinking! It took me about a couple of hours to make the pair. I topped them off with an extra row of dc (US sc) in a cheap fluffy craft wool, so I think they look extra cute!

Sunday, August 22, 2010

Green Hexagon Baby Jacket

I'm quite pleased and surprised this one turned out so cute!

I used some green craft wool my mum gave me for my birthday, I've got quite a lot of that colour left. The darker green was a small amount I have in my scraps bag, as was the white. I'm not sure if that dark green is real wool so I'll have to wash this one carefully, which might turn out to be too inconvenient later on. But this jacket was a bit of a 'practice' item for me to try, recycling some old buttons that I think look really cute, so making this jacket turned out to very thrifty and frugal indeed!

I used the hexagon jacket idea which I've tried before. I've since found another blog that explains the hexagon jacket pattern in more detail, I did the bottom edging and collar following that blog's pattern. The 11 rounds of green used 60g from my 100g ball of craft wool.

Even if this jacket doesn't fit my baby, it will be cute for a toy teddy to wear!
<3 <3

Green and Orange Baby Beanie and Booties

We're still 4 weeks away from finding out the gender of our baby, so I'm really leaning towards baby things in neutral colours.  I just received a lovely random package from my sister-in-law which had some very, very cute baby jumpsuits, all in neutral colours like lemon and green, or silver stars, which is just gorgeous. I'm rather leaning towards these coloured clothes for baby anyway. I really don't agree that the very young should be shoved in a labelled box so early in their lives. Too many baby clothes are overly pink and flowery or blue and macho in my opinion, there is no way I will be wanting to dress a baby boy in army greens, or black with a skull and cross bones print! I'm almost tempted to dress a boy in pink flowers just to get a reaction out of my father, it could be very funny to watch him freak out!

I still have some baby wool left in this nice variated orange and green, so decided to do another pair of booties. I then made a beanie to match using the same pattern as my purple and white baby beanie.

The booties are very similar to my purple and white baby booties, which are based on a pattern you can watch on youtube by Theshyrainbow. I added my own cuffs which are not in the video.

When I am using just one colour, I don't like to cut the wool, fasten off, and start somewhere else, so I have altered the pattern slightly so I can keep it all in one piece. By changing rounds 6, 7, 8 and 9  so that the start of every round is at the toe instead of the heel, there is no need to fasten off in the middle of the bootie.

One colour, One piece variation
1-5. as per youtube video by Theshyrainbow.
6. ch 3, tr 1 in same, (tr decrease every 2) 3x, tr 32, (tr decrease every 2) 3x, tr 2, sl st
7. sl st 8, ch 1, turn, htr 16, turn
8. ch 2, sk 1, treble don’t pull through leave loop on hook * , sk 1, trebel *, sk 1, treble *, etc to end, you should have 9 loops on hook, pull through
9. dc in space just left of centre, dc 2 in next sp, decrease dc over 3 in corner, dc 22, decrease dc over 3 in corner, dc 2 in next sp, dc in space just right of centre
My cuff variation
10. ch 3, tr in dc left of centre, this will create a little gap at the front, cont. with the rest of the cuff, which basically 6 rounds of trebles, and a 7th row of htr or dc.
11. ch 3, 1st treble in next space, then trebles around ...
Related Posts Plugin for WordPress, Blogger...